Tuesday, January 31, 2012

Greek Salsa Chicken


I've mentioned in previous posts how much I love Pinterest. That site rocks! Well now, Sara told me about a similar site called Punchfork which is AWESOME!!! It has a similar concept to Pinterest, but it is ALL FOOD!! I'm in heaven! Even more so than when I thought I was when I was introduced to Pinterest!

I found this recipe on Punchfork and it was so good! I loved the way the chicken was cooked - searing it first and then roasting it. The chicken alone had a wonderful flavor to it and came out really juicy and tender!  The Greek Salsa was also very delicious and paired really well with the chicken. The recipe is for 6, but it can very easily be reduced for fewer people.

I did make a mistake... I forgot to include half of the ingredients in the Greek Salsa! I don't know what I was thinking! I must have just completely looked over the rest of the ingredients. I was pretty excited about the tomatoes, olives and feta cheese, so I think my focus must have been on that. Oops! Well, my modified version of the Greek Salsa (only tomato, olives and feta) was really good! However, if I had added the parsley, oregano, olive oil and lemon juice then I bet that would have really changed the dynamic of the salsa and been pretty tasty! Oh well, I'll just have to make it again some time!

Simple and delicious - two of my favorite things about a recipe! Enjoy!

Greek Salsa Chicken
http://sweetpeaskitchen.com/2011/02/08/greek-salsa-chicken/

Total time: about 35 minutes  Yield: 6 servings

Salsa
4 oz crumbled feta cheese
1 cup halved grape or cherry tomatoes
1/4 cup pitted kalamata olives
1/4 cup minced fresh parsley
1/4 cup lemon juice
1/4 cup olive oil
1 tbsp freshly chopped oregano

Chicken
6 boneless, skinless chicken breast halves (7 ounces each)
pepper to taste
kosher salt to taste
2 tbsp olive oil
2 lemons, cut into wedges

1. Preheat oven to 450°F.
2. In a large bowl, combine feta, tomatoes, olives, parsley, lemon juice, 1/4 cup olive oil and oregano. Cover and chill in refrigerator.
3. Heat 2 tbsp olive oil in a large roasting pan over medium-high heat. Season chicken with kosher salt and pepper. Sear chicken, about 1-2 minutes each side; remove from heat.
4. Squeeze lemon wedges over chicken to coat. Place the squeezed lemon wedges around the chicken breasts. Roast until chicken reaches an internal temperature of 160°F, about 25-30 minutes. Transfer chicken and lemons to a large platter. Top with salsa.

Monday, January 30, 2012

Spicy Pasta with Sweet Potatoes


The other week, one of my old roommates posed a challenge to me. She said that she was tired of normal sweet potato recipes and wanted to know if I had any suggestions. I did some research and looked through some recipes, then while I was at one of my best friend's houses back home, her mom showed me their family's recipe collection and pointed out this sweet potato recipe. (Thanks Mama Ann!) The list of ingredients immediately sparked my curiosity to try it out!

This was amazing! It is a very interesting combination of flavors. My husband and I agreed that this was nothing like anything we've ever had before. Definitely not your ordinary sweet potato recipe!

This recipe was very delicious! When you take a bite, you first get the flavor of the peanut butter up front and then a second or two later the spicy flavor of the chili powder and chili sauce comes through. A subtle sweetness lingers the whole time. It was very incredible! As I already said, it was a combination of flavors that neither of us have ever experienced before, but we were very impressed! (You can find the chili sauce in the Asian section of the grocery store - I was even able to find it in Food Lion.)

It was really easy to put together and didn't take much time at all. A great, quick weeknight meal! I didn't have any rigatoni but I did already have small shells, so I just used those instead. I was a little worried that the chili powder and chili sauce would make the dish too super crazy spicy hot, but while there was a nice spicy flavor, it was just the right amount of a kick and wasn't overpowering. It was sooooo good!

I HIGHLY recommend this recipe!!

Spicy Pasta with Sweet Potatoes
http://www.bhg.com/recipe/pasta/spicy-pasta-with-sweet-potatoes/

Total time: 30 minutes  Yield: 4 servings

1 12 ounce sweet potato, peeled and cut into 3/4-inch cubes (2 cups)
1/2 teaspoon sugar, chili powder, and cinnamon
8 ounces dried rigatoni
1/3 cup peanut butter
1 3 ounce package cream cheese, cut up
2 teaspoons Asian chili sauce (such as Siriacha sauce)
1 tablespoon soy sauce
6 green onions, thinly sliced

1. Preheat oven to 450°F. Oil a rimmed baking pan; set aside. Place sweet potato cubes in bowl. Toss with 1 tablespoon olive oil, the sugar, chili powder, and cinnamon. Spread in prepared pan; bake 20 minutes or until tender.
2. Meanwhile, cook pasta according to package directions. Drain, reserving 1 cup hot pasta water.
3. In saucepan combine peanut butter, cream cheese, chili sauce, and soy sauce; whisk in 3/4 cup of the hot pasta water. Stir over medium heat until heated through. If too thick, stir in additional water. Stir in most of the green onions. Serve sauce over pasta with sweet potatoes and remaining onion.

Friday, January 27, 2012

Roasted Salmon with Green Herbs

My awesome friend Jen gave this to me - how cute is that?? It is so perfect for me! Haha! :-)


And here is tonight's dinner:


What a yummy, easy, healthy start to the weekend!

There was very little that went into making this recipe and it was very tasty! It was more of a subtle flavor, but really good! The flavor of the herbs was definitely there, but the flavor of the fish was definitely more showcased in this recipe. You need to be a fan of salmon to like this dish!

The recipe calls for skinless salmon, but I always leave the skin on, and for this recipe just spread the herb mixture on top of the fish. There are a lot of important nutrients in the skin, plus it's delicious! I didn't go through the process of covering it with aluminum foil and letting it rest for 10 minutes because my husband and I prefer meat and fish to be on the more raw side than well done, but if you prefer well done then you should just follow the instructions in the recipe. We just made some brown rice to go along with it, but a veggie, such as broccoli, would also be really good. A great start to the weekend!

I hope everyone has a super awesome weekend! :-)

Roasted Salmon with Green Herbs
Published by Clarkson Potter/Publishers in 2010.

Yield: 6 servings

1 (2 to 2 1/2 pound) skinless salmon fillet
Kosher salt and freshly ground black pepper
1/4 cup good olive oil
2 tablespoons freshly squeezed lemon juice
1/2 cup minced scallions, white and green parts
1/2 cup minced fresh dill
1/2 cup minced fresh parsley
1/4 cup dry white wine
Lemon wedges, for serving

1. Preheat the oven to 425°F.
2. Place the salmon fillet in a glass, ceramic, or stainless-steel roasting dish and season it generously with salt and pepper. Whisk together the olive oil and lemon juice and drizzle the mixture evenly over the salmon. Let it stand at room temperature for 15 minutes.
3. In a small bowl, stir together the scallions, dill, and parsley. Scatter the herb mixture over the salmon fillet, turning it so that both sides are generously coated with the green herbs. Pour the wine around the fish fillet.
4. Roast the salmon for 10 to 12 minutes, until almost cooked in the center at the thickest part. The center will be firm with just a line of uncooked salmon in the very center. (I peek by inserting the tip of a small knife.) Cover the dish tightly with aluminum foil and allow to rest for 10 minutes. Cut the salmon crosswise into serving pieces and serve hot with lemon wedges.

Wednesday, January 25, 2012

Meatballs and Truffles and Punch, Oh My!

This past weekend I was lucky enough to spend time with some of my favorite people! Sara and Caroline have been best friends of mine for over 10 years now. The three of us have been through so much together and they mean the world to me! We have lived in different cities and states since high school, so it was so wonderful to spend some time with them over the weekend! Sara's blog post today actually was about the three of us and this past weekend and put a huge smile on my face! You can view her post here.

Caroline is the first of the three of us to get pregnant, and is expecting her first child in a few months! Sara and I threw her a baby shower last weekend, and I thought I'd share a few recipes that we made for the shower. Sara came home from Texas for the weekend and I went over to her parent's house Friday night so that she and I could start fixing some of the food for the shower the next day. Sara's family has been like a second family to me since early high school and it was so great to hang out with them some! I (and I'm sure Sara as well) wanted this shower to be extra special for Caroline!

We started out making some Italian Turkey Meatballs. I didn't get a great picture of the meatballs, but here they are simmering in the crock pot:


I thought the meatballs turned out really good! We doubled the recipe and it was very easy to put together. We fixed them on Friday night and set them in the fridge and then put them in the crock pot on Saturday morning and let them cook all morning until 12:30pm (the shower was at 1pm). I thought they had a great flavor to them, and they sure did smell good cooking all Saturday morning!

Next, we fixed the Oreo Truffles:


We had a little trouble with the truffles. The recipe made it sound so simple! The beginning was very easy, we just had to crush the Oreo cookies (p.s. - I'd like my own food processor now) and combine them with the cream cheese, but we ran into problems with the dipping. The list of ingredients just calls for 8 oz dipping chocolate. I thought any type of chocolate would work, so I just brought some chocolate chips with me and we melted those in the microwave. It was pretty thick, so we tried adding milk. That made it very thick and fudge-like. Next we tried heating it all back up over a double boiler but we didn't have much luck. It was almost 1am at this point, so we decided to just stick the Oreo balls in the fridge and call it a night. We found out that apparently there is actually a special chocolate called dipping chocolate. Mama Ann had some in the pantry (that we overlooked late Friday night), so we very easily melted that and dipped the truffles by sticking a toothpick in the top of the truffle and dipping it in the melted chocolate (thanks Nana!). We were close to running out of chocolate, but discovered there was also some white dipping chocolate in the pantry. So, we made it look like we did this on purpose and dipped the other half of the truffles in the while chocolate and then sprinkled crushed Oreo crumbs on top of those truffles. Long story short, there were DELICIOUS!!! I could have eaten the whole tray! Mmmmm Oreo Truffles...

The last recipe I am posting from the baby shower is this punch recipe that looks like a bubble bath:


I thought it was super cute!! I totally loved this, but I think a lot of the guests were a little scared of it. I was in charge of the beverage table and many of the guests looked at it asking "Uhhh what is that?" But after I explained it, a lot of people preferred to have either water or tea. Oh well. I thought it was awesome! It was a very tasty punch too! The recipe calls for one packet blue Kook-Aid, so just make sure to get blue Kool-Aid instead of the blue packet of Tropical Punch (hehehe), because then your friendly bubble bath will be red. :-)

It was a super successful baby shower (as if I have a lot of experience in baby showers) and it made me so happy to spend time with people that I love so much! Give one or all of these recipes a try next time you have a shower or party!

Crock Pot Italian Turkey Meatballs
http://www.skinnytaste.com/2011/11/crock-pot-italian-turkey-meatballs.html

Makes about 24 meatballs

20 oz (1.3 lb) ground turkey breast 93% lean
1/4 cup whole wheat seasoned bread crumbs
1/4 cup Reggiano Parmigiano cheese, grated
1/4 cup parsley, finely chopped
1 egg
1 large clove garlic, crushed
1 tsp kosher salt + fresh pepper

For the sauce:
1 tsp olive oil
4 cloves garlic, smashed
28 oz can crushed tomatoes
1 bay leaf
salt and fresh pepper to taste
1/4 cup fresh chopped basil or parsley

1. In a large bowl, combine ground turkey, bread crumbs, egg, parsley, garlic and cheese. Using clean hands, mix all the ingredients and form small meatballs, about 1/8 cup each.
2. In a small saute pan, heat olive oil over medium heat. Add garlic and saute until golden, being careful not to burn.
3. Pour crushed tomatoes into the crock pot with bay leaf. Add garlic and oil.
4. Drop meatballs into the sauce, cover and set crock pot to low, 4 to 6 hours. When meatballs are ready, adjust salt and pepper to taste and add fresh chopped basil or parsley.'
5. Serve with ricotta, over paste or enjoy with French bread.

Oreo Truffles
http://www.myfabulousrecipes.com/2011/12/12/oreo-truffles/

1 (16 ounce) package Oreo Chocolate Sandwich Cookies, divided
1 (8 ounce) package Cream Cheese, softened
8 oz dipping chocolate

1. Crush 7-9 Oreo cookies in a food processor or place them in a resealable ziplock bag and finely crush them using a kitchen hammer. Set aside.
2. Crush the remaining Oreo cookies in the same manner. Combine the crushed Oreo cookies and the cream cheese and mix well using an electric mixer until well mixed and smooth.
3. Roll mixture into small balls, about 40-45 (or less if you decide to make bigger sizes balls.) Place them on parchment paper.
4. Dip the balls in melted dipping chocolate (to melt the dipping chocolate, microwave them in a bowl about 30 seconds at a time, stirring well, about three times)
5. Roll the dipped truffles in Oreo crumbs that were set aside earlier or sprinkle the top of Oreo truffles with Oreo crumbs. Set aside until hardened, about 1 hour.

Ducky Bath Baby Shower Punch
http://tidymom.net/2011/ducky-baby-shower-punch/

1 packet blue, unsweetened Kook-Aid
1 (2 liter) bottle Ginger Ale
1 (64 oz) bottle White Grape Juice
1 cup sugar
8 scoops pineapple sherbet
2-3 Rubber Duckies
maraschino cherries (optional for garnish)
orange slices (optional for garnish)

1. Chill ginger ale and grape juice over night.
2. Remove sherbet from freezer about 1/2 hour before serving punch to soften.
3. In a large bowl, combine Kool-Aid packet, sugar and chilled juice. Stir to blend.
4. Slowly add chilled ginger ale.
5. Float 8 scoops of softened sherbet on top.
6. Add Rubber Duckies (don't forget to wash before using)
7. Garnish cups with cherries and orange slices.

Tuesday, January 24, 2012

Apples 'n' Onion Topped Chops with Garlic Green Beans


These two recipes were just fantastic! This dinner will for sure be put on my list of delicious things to make again. Yum!

I wouldn't think to combine apples and onions, but the flavor combination was incredibly tasty! I was a little worried that adding the brown sugar and cider vinegar would make the dish way too sweet, but that wasn't the case at all. There was a bit of a sweet side to it, but it was delightfully balanced out with the onion and garlic. Again, I would have never thought that all of those ingredients would be so delicious together! The mixture of all of those flavors paired wonderful with the flavor of the pork chops.

The green beans were amazing!! From now on, this will always be how I make green beans. I used to always buy canned green beans, but over the last several months I have been trying to avoid canned and packaged food when possible. I started buying fresh green beans, but cooked them in the microwave. This is the first time I have boiled them and the difference was incredible! They were SO much better! The addition of garlic and drizzled olive oil really sent them over the top.

Simply delicious (and easy)! Give it a try!

Apples 'n' Onion Topped Chops with Garlic Green Beans
Taste of Home: Everyday Light Meals
Published by Reiman Media Group, LLC in 2010.

Apples 'n' Onion Topped Chops
Prep/Total time: 30 minutes  Yield: 4 servings

4 boneless lean pork loin chops (5 ounces each)
3 cups sweet onion slices
1 teaspoon canola oil
2 medium Granny Smith apples, peeled and sliced
1/2 cup water
2 tablespoons brown sugar
1 tablespoon cider vinegar
1 teaspoon garlic powder
1/2 teaspoon salt
1/4 to 1/2 teaspoon pepper
1/4 teaspoon dried rosemary, crushed

1. In a large nonstick skillet coated with nonstick cooking spray, cook chops for about 3 minutes on each side or until browned. Remove meat; set aside and keep warm.
2. In same skillet, cook and stir onion in oil for 7 minutes or until golden brown. Add apple slices; cook and stir 3 minutes longer. Combine the water, brown sugar, vinegar, garlic powder, salt, pepper and rosemary. Stir into skillet. Bring to a boil. Return meat to pan. Reduce heat; cover and simmer for 8-10 minutes or until apples are crisp-tender and a meat thermometer reads 160°.


Garlic Green Beans
Prep/Total time: 20 minutes  Yield: 4 servings

1 pound fresh green beans, trimmed
1 to 2 garlic cloves, minced
1/2 teaspoon salt
1/8 teaspoon white pepper
2 teaspoons olive oil

1. Place beans and enough water to cover in a saucepan; bring to a boil. Cook, uncovered, for 8-10 minutes or until crisp-tender; drain. Toss beans with garlic, salt and pepper. Drizzle with oil. Serve immediately.

Monday, January 23, 2012

Creamy Chicken Taquitos


Two of my favorite activities are running and cooking. Unfortunately, when I get sick (which is hardly ever since I work from  home), those two activities suffer. I was able to take some time off work today and get some rest, which I really think helped a lot. I actually started feeling a little better this evening and started to get a little anxious to get back in the kitchen. Because I'm still not feeling 100%, I picked a pretty simple recipe and my husband also helped me fix dinner. :-)

I found this recipe on Pinterest (best website ever!) and we both loved it! As I mentioned, it was very simple to put together and really good! I just used a 12.5 ounce can of 97% fat free Chicken Breast... not quite the same as cooking some chicken myself and chopping it up, but we were going for quick and easy tonight. It still tasted great! I left them in the oven for 15 minutes and they had the perfect amount of crunch. We just had a side of refried beans with a little salsa mixed in to go along with the Mexican theme.

At first, we weren't sure whether we were supposed to use a fork or eat them with our hands, but we quickly figured out that it was much easier to just pick them up with our hands and eat them. This led me to think about how this would be great to have at a Super Bowl party (or any party)! They were so easy and so yummy. There is also a lot of room for creativity with this recipe. I had thought about how good it would be to add some yellow saffron rice to the filling. Go ahead and experiment!

That's about it for me tonight. Time to get some more rest and hopefully kick this cold to the curb! Make sure to also check out the food blog where this recipe came from - she mentions how to freeze these and heat them up right from the freezer. 'Night!

Creamy Chicken Taquitos
http://annies-eats.com/2011/04/27/creamy-chicken-taquitos/

Total time: 30 minutes  Yield: 12 taquitos

3 oz cream cheese, softened
1/4 cup salsa
1 tbsp freshly squeezed lime juice
1 tsp chili powder
1/2 tsp cumin
1/2 tsp onion powder
2 cloves garlic, minced
3 tbsp chopped cilantro
1-2 green onions, chopped
2 cups shredded cooked chicken
1 cup shredded Mexican cheese
10-12 6-inch flour tortillas
Cooking spray
Kosher salt

1. Preheat the oven to 425°F. Line a baking sheet with a silicone mat or parchment paper.
2. In a large mixing bowl, combine the cream cheese, salsa, lime juice, spices, cilantro, green onions, chicken and shredded cheese. Mix thoroughly until well combined.
3. Briefly heat the tortillas in the microwave to make them soft enough to roll easily, about 20-30 seconds. Place a tortilla on a work surface. Spoon 2-3 tablespoons of the filling mixture down the middle of the tortilla. Roll the tortilla up tightly around the filling. Place seam-side down on a baking sheet. Repeat with the remaining tortillas and filling, spacing the assembled taquitos evenly on the baking sheet. Spray the tops lightly with cooking spray and sprinkle with a pinch of kosher salt. (You may be tempted to skip the sprinkle of salt, but it really adds a nice touch.)
4. Bake 15-20 minutes, until crisp and golden brown. Serve with sour cream and salsa, if desired.

Thursday, January 19, 2012

Roasted Shrimp with Feta


I may have doubted my skills in the kitchen after Tuesday night, but tonight, I'm back baby!!!

I was pretty blown away with how incredible this meal was. My husband even said that he thought this was one of best dishes I've made! Sweet! There were so many amazing flavors. You could pick out each flavor individually, but at the same time they all blended together beautifully.

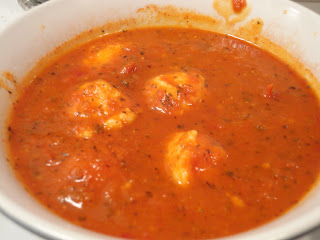
The author of this cookbook pretty much nailed it on the head - "I love the Greek combination of tomatoes, garlic, oregano, wine, and feta; they enhance - but don't overpower - the briny flavor of the shrimp." I couldn't agree more! Every ingredient in this recipe complimented every other ingredient in this recipe, and together perfectly complimented the flavor of the shrimp. So delicious! We had some French bread on the side and both of us ended up sopping up every last minuscule drop of sauce left on our plates because we just couldn't get enough! I was sad when dinner was over! I want more! Our plates were so clean by the end of dinner that we probably could have just put them back up in the cupboard! (Of course we didn't actually do that.) :-)

I was missing two ingredients tonight: Pernod and fennel. Pernod is a type of liquor, a successor of absinthe. The recipe only calls for a small amount, and I read online that a lot of people have trouble finding it, so I decided not to drive around looking for it. I went to the store after my workout tonight to get the fennel, because I had forgotten to get it when I was at the store the other day, but I couldn't find it anywhere. I asked the gentleman working in the produce section in the grocery store, but he had never heard of it before. I had left my phone in the car, so I couldn't look up what it could be substituted with. I'm sure these two ingredients would have added some different dynamics to the dish, but it still turned out delicious without them!

Because I didn't have the fennel, I started out the cooking process by sauteing the minced garlic in the olive oil and then added the wine and went from there. The olive oil, garlic and wine all smelled so good mixed together in that skillet! The recipe is really easy to follow. I ended up not leaving the tails on the shrimp because as I was peeling the shrimp, I had trouble not pulling the tails off also. The shrimp still sat up just fine in the tomato mixture. The cookbook says that "for the 1 cup of fresh bread crumbs, remove the crusts from 4 slices of white bread and process them in a food processor fitted with the steel blade until the bread is in crumbs." I actually had some Herbed Seasoned Stuffing in the cabinet, so I used that in place of the fresh bread crumbs. The seasoning paired really well with the rest of the ingredients and added some nice flavor!

I can't get over how delicious this recipe was. I'm ready to make it again! It is a pretty quick and easy meal to put together during the week, or it can be a perfect meal to fix to wow your friends at a dinner party! Enjoy!

Roasted Shrimp with Feta
Barefoot Contessa How Easy is That?
Published by Clarkson Potter/Publishers in 2010.

Yield: 4 servings

4 tablespoons good olive oil, divided
1 1/2 cups medium-diced fennel
1 tablespoon minced garlic (3 cloves)
1/4 cup dry white wine
1 (14.5 ounce) can diced tomatoes
2 teaspoons tomato paste
1 teaspoon dried oregano
1 tablespoon Pernod
1 teaspoon kosher salt
1/2 teaspoon freshly ground black pepper
1 1/4 pounds (16-20 per pound) peeled shrimp with tails on
5 ounces good feta cheese, coarsely crumbled
1 cup fresh bread crumbs
3 tablespoons minced fresh parsley
1 teaspoon grated lemon zest
2 lemons

1. Preheat the oven to 400 degrees.
2. Heat 2 tablespoons of the olive oil in a 10- or 12-inch heavy ovenproof skillet over medium-low heat. Add the fennel and saute for 8 to 10 minutes, until the fennel is tender. Add the garlic and cook for 1 minute. Add the wine and bring to a boil, scraping up any browned bits. Cook for 2 to 3 minutes, until the liquid is reduced by half. Add the tomatoes with the liquid, tomato paste, oregano, Pernod, salt, and pepper to the skillet. Simmer over medium-low heat, stirring occasionally, for 10 to 15 minutes.
3. Arrange the shrimp, tails up, in one layer over the tomato mixture in the skillet. Scatter the feta evenly over the shrimp. In a small bowl, combine the bread crumbs, parsley, and lemon zest with the remaining 2 tablespoons of olive oil and sprinkle over the shrimp.
4. Bake for 15 minutes, until the shrimp are cooked and the bread crumbs are golden brown. Squeeze the juice of 1 lemon over the shrimp. Serve hot with the remaining lemon cut into wedges.

Wednesday, January 18, 2012

Copper & Vine Kitchen and Wine Bar

This is the first restaurant review that I have done in this food blog. The thought to do a restaurant review never crossed my mind before, but we had such an amazing experience tonight that I felt it was deserved.

I can honestly say that tonight was one of the best dining experiences I have had in the 8 years I have lived in Greenville, North Carolina. My husband and I have recently started a new tradition - Hump Day Fun Day! On Wednesday nights, to break up the work week, we pick a place to go out to eat to relax, de-stress and enjoy ourselves. I feel like we have gotten into a routine of going to the same places over and over again (Greenville isn't THAT big), so I searched online for restaurants in Greenville and came across Copper & Vine Kitchen and Wine Bar. I had heard of this restaurant before through a local wine and beer shop, Dolce Vita, and decided to do some further research.

I discovered that Copper & Vine had a facebook page, so I went through the photos and comments, trying to feel out what the establishment was like. I was very intrigued by the pictures of the inside of the restaurant. It seemed very unique, different from your typical popular chain restaurants you find around Greenville (Olive Garden, Carolina Ale House, Chili's). The pictures posted of the food, positive comments on the facebook wall, and the fact that they say they offered "an extensive wine and beer list" all caught my attention. I decided, we have to check this place out!

You walk into a very cozy front room filled with a wall full of wine bottles, a few tables, what looked to be a VERY comfortable leather couch and an open window to the kitchen. Caitlin, who ended up being our amazing waitress, greeted us, and told us to head upstairs and pick out a table. We went upstairs, and were surprised to have our pick of about a dozen tables (there was only one other couple in the restaurant). I say surprised, because after the absolutely amazing meal we had tonight I couldn't believe that the restaurant was not packed!

We picked a table overlooking the downstairs:

We ordered our drinks, Blaine with a tasty IPA, and I with a 2009 Excelsior Cabernet Sauvignon from South Africa that was quite delicious - it was not only delicious up front, but there was an amazing flavor you got hit with a few seconds after your sip. Delicious! Next, we ordered dinner. Blaine got the crab cakes and I got the platter of cheeses, meats, fruit and bread:

Unfortunately, I didn't get a picture of the crab cakes, but this is a picture of my cheese/meat/fruit/bread plate. First of all, the crab cakes were indescribably delicious! It was obvious that the focus was more on the meat than the breading. We were both amazed at the amount of crab meat packed into these cakes. Pico de gallo was served on top of the crab cakes. I never thought to put the two together, but the outcome was amazing! These were by far the best crab cakes I have ever had! The juicy meat and combination of flavors was just out of this world!

I was SO excited about my cheese/meat/fruit/bread plate! It reminded me of my trip to Lake Como in Italy. Our group visited a vineyard and had an amazing experience full of wine, cheese, cured meats and bread. That was one of my fondest memories of that trip! This plate at Copper & Vine tonight reminded me exactly of that experience! There were 3 different cheeses, and forgive me if I can't remember exactly what each one was called. One cheese was soft white cheddar and mustard seeds that had an amazing strong flavor to it! The smoked Gouda was incredible (if you remember, there is one post I made a few months ago where I talked about how much I was in love with smoked Gouda). Then, the third cheese completely BLEW MY MIND! Unfortunately, I can't remember exactly what type of cheese it was, but it had blueberries in the cheese! Blueberries in the cheese! I'm sitting here on the couch just shaking my head because I can't believe how amazingly delicious this cheese was and I want more of it NOW!

There were two types of cured meat on the plate as well. I really wish I could remember the names of the cured meats, but they were Italian and the names have slipped my mind (if I heard the names, I'd recognize them). However, they were both incredible and full of flavor! The bread and fruit were also delicious, very nicely complimenting the meat and cheese, and the whole plate was sprinkled with some very tasty sunflower seeds.

As I mentioned earlier, our waitress was great! We also got a visit from the chef, Charles, which was really nice! I really enjoyed talking about the food with him. We learned that different events go on during the week (half priced wine, live music, beer groups) and the restaurant gets much more busy during those nights, but we happened to come in on a slower night. Again, I couldn't believe that the restaurant wasn't packed after the amazing food and experience we had tonight! The prices are very reasonable, in my opinion, especially when you consider how high of quality the food is. (Example: my husband's crab cakes were $10, but I'd say they were worth at the least $20!)

We ended the night with some homemade yellow cake with chocolate icing, a dollop of whipped cream, blueberries, and fresh mint:

The words "amazing" and "delicious" don't even come close to describing this dessert! Oh my goodness!

The whole experience was wonderful! I'm sure the fact that we were one of two couples in the restaurant made a difference in the special attention we received tonight, but the food and atmosphere was incredible! As I've described, the food was incredible, and it was a very cozy, relaxing, unique atmosphere (I loved the folksy music streaming throughout the restaurant)!

You can guarantee that we will be back very soon! Anyone in Greenville, NC needs to head to Copper & Vine Kitchen and Wine Bar the next chance you get!

Tuesday, January 17, 2012

Tasty Italian Chicken with Creamy Noodles


I guarantee this dinner can look better than it does in this picture and turn out very delicious. This isn't my best post.

I just spent the last 20 minutes typing in here about my frustrating afternoon and evening that led up to my slightly disappointing dinner, then decided that you probably don't want to read about that kind of stuff, so I deleted it! That kind of stuff isn't fun to read! I do wish I had a better story to tell about this recipe though.

As I stated at the beginning, I do believe that this recipe can look and taste better than my version turned out. I forgot to buy an onion, I had no minced garlic when I threw my butter in the heated saucepan, my timing got off with the different pots on the stove, my noodles weren't creamy, my chicken was dry. It just didn't taste good. Everything piling up through the afternoon and evening may or may have resulted in some watery eyes at the dinner table. Luckily, I have an incredibly amazing husband (who was sweet enough to pour a little extra wine in my glass after dinner). My husband, plus some funny tv, has raised my spirits, and I can now say that I WILL do this recipe again. It may not be next week, or next month, but I will make it again and next time I will ROCK at it!!

I'm in the process of reading through My Life in France, an autobiography by Julia Child, and it is absolutely amazing. I slip into a different world when I read this book. One thing she always said when something went wrong with her cooking was, "eh bien, tant pis!" Translation: oh well, too bad! So, to this recipe, I say, "eh bien, tant pis!" I will do it again, and it will be awesome! I hope that you give this recipe a try, because I really do believe that it can turn out delicious, and enjoy it!

Tasty Italian Chicken with Creamy Noodles
Taste of Home: Everyday Light Meals
Published by Reiman Media Group, LLC in 2010.

Tasty Italian Chicken
Prep/Total time: 30 min  Yield: 6 servings

1/2 cup chopped onion
1 1/8 tsp paprika, divided
3 tsp olive oil, divided
1 1/4 cups water
1/4 cup tomato paste
1 bay leaf
1/2 tsp reduced-sodium chicken bouillon granules
1/2 tsp Italian seasoning
1/4 cup all-purpose flour
1 1/2 tsp grated Parmesan cheese
1/2 tsp salt
1/4 tsp garlic powder
1/4 tsp dried oregano
1 1/2 pounds chicken tenderloins

1. In a small sauce pan, saute onion and 1/8 tsp paprika in 1 tsp oil until tender. Stir in the water, tomato paste, bay leaf, bouillon and Italian seasoning. Bring to a boil. Reduce heat; simmer, uncovered, for 10 minutes.
2. Meanwhile, in a large resealable plastic bag, combine the flour, Parmesan cheese, salt, garlic powder, oregano and remaining paprika. Add chicken; seal bag and shake to coat.
3. In a large nonstick skillet coated with nonstick cooking spray, cook half of the chicken in 1 tsp oil for 2-3 minutes on each side or until juices run clear. Remove and keep warm; repeat with remaining chicken and oil. Discard bay leave from sauce. Serve over chicken.

Creamy Noodles


Prep/total time: 25 minutes  Yield: 6 servings

8 oz uncooked thin spaghetti
3 garlic cloves, minced
3 tbsp butter, divided
6 oz fat-free cream cheese, cubed
3 tbsp reduced-fat sour cream
3 tbsp fat-free milk
3/4 tsp salt
1/2 tsp onion powder
1/4 tsp Cajun seasoning
1/4 tsp white pepper
4 1/2 tsp minced fresh parsley

1. Cook the spaghetti according to package directions. Meanwhile, in a saucepan, saute garlic in 1 tsp butter under tender. Add the cream cheese, sour cream, milk, salt, onion power, Cajun seasoning, pepper and remaining butter. Cook and stir over low heat just until smooth (do not boil). Remove from the heat.
2. Drain spaghetti; toss with cream sauce. Sprinkle with parsley. Serve immediately.

Monday, January 16, 2012

Jerk Pork Tenderloin with Mango Salad


Our portions aren't really that big... we just used our smaller appetizer plates tonight which ended up making it look like we have a ton of food!

I'm still in the process of learning how to appreciate hot/spicy foods, so I was a little nervous about making this recipe since a Jamaican Jerk spice was a main ingredient. It turned out great! It wasn't necessarily hot, just had a little bit of a kick to it. The fresh lime juice in the mango salad really complemented the Jamaican Jerk spice and I felt really brought everything together. The mango was delicious! The best bites were the ones when you got some pork, bell pepper and mango all together. Really outstanding sweet and spicy combination!

The potato was something I thought up just before I got started with dinner and decided to add it to the menu. I had seen potatoes cut like that before and thought it was neat, so all I did was preheat the oven to 425°F, cut slices in each potato that almost went all the way through but not quite, drizzled some olive oil and seasoned with the same Jamaican Jerk seasoning I used with the pork and salad. Just bake it in the oven for about 45 minutes!

I modified the recipe slightly. This recipe came from a Pampered Chef cookbook, and I don't have the Pampered Chef Jamaican Jerk Rub, so I just got some Jamaican Jerk spice from the grocery store. I had some pork chops in the freezer, so I used those rather than getting a pork tenderloin. I never used the oven for the pork, as the recipe suggests. I just seasoned the pork chops with the Jamaican Jerk spice and heated some olive oil over low to medium heat in a skillet and cooked the pork chops like that. It took about 8 minutes to cook, 4 minutes on each side. Pretty tasty!

A few notes from the cookbook: 1) For a pleasantly tender texture that complements the mango slices, the bell pepper is first peeled using the Serrated Peeler before slicing into thin strips. Removing the ribs from the pepper gives it a professional, finished looks, 2) To slice a mango, use Utility Knife to cut thin slices from both ends of the fruit. Stand fruit upright, wide end down, on cutting board. Slice off peel from top to bottom. Slice flesh alongside the large, flat pit. Lay mango flesh side down on cutting board and slice into 1/4-in. slices, and 3) Jarred mangoes, found in the refrigerated produce section of most grocery stores, can be substituted for the fresh mangoes, if desired.

A fresh, delicious, easy, light meal! Enjoy!

Jerk Pork Tenderloin with Mango Salad
Pampered Chef 29 Minutes to Dinner
Published by The Pampered Chef, Ltd. in 2007.

Total time: 28 minutes  Yield: 4 servings

Pork
2 tsp vegetable oil
1 lb pork tenderloin
1 tbsp Jamaican Jerk Rub


Mango Salad
2 green onions with tops, divided
1 small red bell pepper
2 large mangoes
1 lime
1 tsp Jamaican Jerk Rub


1. Preheat oven to 350°F. For pork, add oil to (10-in.) Saute Pan; heat over medium-high heat 1-3 minutes or until shimmering. As pan heats, trim fat and silver skin from pork tenderloin and cut pork in half crosswise using Boning Knife.
2. Coat pork with jerk rub. Cook 3-5 minutes or until browned on all sides, turning occasionally. Transfer pan to oven and roast 12-15 minutes or until Pocket Thermometer registers 155°F for medium doneness. Carefully remove pan from oven using Oven Mitts; transfer pork to plate. Tent with foil and let stand 5 minutes (temperature will rise to 160°F).
3. As pork roasts, start salad. Thinly slice green onions on a bias using Chef's Knife. Set aside 1 tbsp of the tops for garnish. Place remaining green onions into Classic Batter Bowl. Peel bell pepper using Serrated Peeler. Slice off top and bottom of pepper; discard or reserve for another use. Remove and discard seeds and ribs from sides of pepper; slice into thin julienne strips.
4. To finish salad, peel and slice mangoes. Juice lime using Citrus Press to measure 1 tbsp juice. Add pepper strips, mango slices, lime juice and remaining 1 tsp jerk rub to batter bowl; toss thoroughly.
5. To serve, slice pork crosswise into medallions and serve with salad. Garnish with reserved green onion tops.


Labels:

Sunday, January 15, 2012

Decadent Flourless Chocolate Cake


I love birthdays! Always have, always will. Of course I love my own birthday, but I also love celebrating other people's birthdays too. They're so much fun! That is YOUR day! When I was a little kid, I would make countdowns and hang them on the wall whenever a member of our family had a birthday approaching. Then I would sit down with my construction paper and make decorations to hang. And of COURSE, if it was your birthday then you got to pick what you wanted for dinner and there were always birthday brownies! :-) Birthdays are just so great! I love celebrating!

My mother-in-law's birthday was a few days ago, so we had a birthday celebration for her last night. I wanted to make a birthday cake for her, and I've had this Chocolate cookbook by Pampered Chef that I keep drooling over and have been dying to make something out of it. I decided on the Decadent Flourless Chocolate Cake.

I have never made a flourless cake before, so I wasn't exactly sure what to expect. I was expecting it to be more "cakey", but it was definitely more fudge-like and very rich! They weren't kidding when they put the word "decadent" in the title! Whew! After I served it last night, I felt bad and was worried that it was way too rich for everyone, but, as Julia Child taught, never apologize for your food! I get really nervous when other people eat my cooking, so I think I was being too critical when I had some of the cake last night. I gave it another try today and was much more happy with how it turned out today than I was last night.

It really is quite delicious, you just have to eat it in moderation because it is so dense and rich. The recipe is pretty self-explanatory. Definitely make sure to read through the whole recipe before you get started. As I was preparing everything, I got to the part that has you mix the sugar and egg yolks, and I got confused for a few seconds. Luckily, I read through to the next step and saw that I use the egg whites at a later time. So make sure to separate your egg yolks and whites and don't throw anything away! You do use both parts! Also, one of the ingredients is Double-Strength Vanilla, which I didn't have, so I just used regular vanilla and doubled the amount it asked for.

It says to "bake for 35-40 minutes or until center appears nearly set when gently shaken," but I checked on mine after only 30 minutes and it was completely baked through. It would have burned if I had left it in for the full 40 minutes. It seems that everyone's ovens are different, so just make sure to check on the cake sooner rather than later to avoid over-baking.

I wish I had taken a video of applying the glaze to the cake... I poured the glaze on top of the cake and as I spread it over the top, it just so perfectly spilled over the sides of the cake and coated it all around. It was so beautiful. The cookbooks says that you can really dress this cake up if you wish. It suggests coating the sides of the cake with finely chopped pistachios, or garnish it with chocolate curls. For the chocolate curls, the book says to "place 4 oz bittersweet chocolate in a clean, dry Small Micro-Cooker. Microwave, uncovered, on high 1 1/2 minutes or until mostly melted, stirring every 30 seconds. Using Large Spreader, spread chocolate in a thin layer over back of Large Sheet Pan. Refrigerate 10-15 minutes or until chocolate is slightly set. Drag blade of Nylon Knife along chocolate to make large curls."

I definitely recommend this recipe, just know that it is very rich! Very rich, but very delectable!

Decadent Flourless Chocolate Cake
Pampered Chef: Chocolate
Published by The Pampered Chef in 2011.

Prep time: 50 minutes  Total time: 2 hours, 50 minutes  Yield: 18 servings
Cake
12 oz bittersweet chocolate, chopped
3/4 cup butter (1 1/2 sticks), cut into pieces
1/4 cup unsweetened cocoa powder
3 tbsp hot water
1 tsp Double-Strength Vanilla
1 cup sugar
5 eggs, separated
1/4 tsp cream of tartar

Glaze
4 oz semi-sweet chocolate, chopped
5 tbsp butter
2 tsp light corn syrup

Toppings
1 cup roasted salted pistachios, finely chopped (optional)
Large Chocolate Curls (optional)

1. Preheat oven to 350°F. Lightly spray Springform Pan with nonstick cooking spray. For cake, place chocolate and butter in Large Micro-Cooker. Microwave, uncovered, on high 1 1/2 minutes or until mostly melted, stirring every 30 seconds. Set aside.
2. Place cocoa powder in (2-cup) Prep Bowl. Stir in hot water and vanilla to form a smooth paste; set aside. Place sugar and egg yolks in Stainless (4-qt.) Mixing Bowl; beat on medium-high speed of electric mixer until doubled in volume. Pour in chocolate mixture; beat on medium-high speed until well blended. Add cocoa mixture; mix on medium-low speed just until blended.
3. In Small Batter Bowl and using clean beaters, beat egg whites and cream of tartar on high speed until soft peaks form. Gently fold half of the egg white mixture into chocolate mixture just until blended. Repeat with remaining egg white mixture. Pour into pan; spread to edges using Small Spreader. Bake 35-40 minutes or until center appears nearly set when gently shaken. (Center will firm as it cools. Do not overbake.) Remove from oven to Stackable Cooling Rack. Cool completely, about 1 hour. Gently press down on edges of cake to form a flat surface. Loosen edges of cake from pan. Remove collar from pan.
4. For glaze, place chocolate and butter in Small Micro-Cooker. Microwave, uncovered, on high 1 1/2 minutes or until melted and smooth, stirring every 30 seconds. Stir in corn syrup. To glaze, place Parchment Paper under cooling rack. Pour glaze evenly over cake; spread over top and sides of cake using Small Spreader. Coat sides with finely chopped pistachios, if desired. Refrigerate up to 1 hour or until glaze is set. Garnish with Large Chocolate Curls, if desired.

Labels:

Onion Dip from Scratch


I think I've died and gone to onion dip heaven...

Thanks to my good friend Sara for giving me this recipe! I have mentioned in previous posts that I looooove different types of dip. This dip was just fantastic! The flavor of the caramelized onions really came through and I thought set it apart from store-bought onion dips. Don't let the fact that you caramelize your own onions scare you off from this recipe! It was very easy and well worth the effort. The only thing I would suggest is to start the onions out at a lower heat, and then bring the heat up to medium throughout the caramelizing process. The medium heat just seemed too hot to start out with at the beginning.

The consistency was perfect and the flavor was outstanding! I probably could have sat there and just ate it with a spoon. Everyone seemed to enjoy it! Some of the reviews of the recipe mentioned that letting the dip refrigerate overnight really deepens the flavor and makes it even better. I'll have to try that next time! I made it a few hours before serving it and was very pleased!

This would be a great thing to have at your upcoming Super Bowl party (or any party, for that matter)! Serve it with veggies, chips, or whatever you want! You won't be disappointed!

Onion Dip from Scratch
Food Network

Prep time: 5 minutes  Cook time: 20 minutes  Yield: 1 batch

2 tablespoons olive oil
1 1/2 cups diced onions
1/4 teaspoon kosher salt
1 1/2 cups sour cream
3/4 cup mayonnaise
1/4 teaspoon garlic powder
1/4 teaspoon ground white pepper
1/2 teaspoon kosher salt

In a saute pan over medium heat add oil; heat and add onions and salt. Cook the onions until they are caramelized, about 20 minutes. Remove from heat and set aside to cool. Mix the rest of the ingredients, and ten add the cooled onions. Refrigerate and stir again before serving.

Labels:

Friday, January 13, 2012

Herbed Lime Chicken


What a delicious, light meal!

This post will be short tonight because, hey, it's Friday night! But, this chicken was very delicious! The recipe calls for it to marinate in the refrigerator for about 8 hours, so I just put it together this morning and let it marinate while I was working all day. There are few ingredients to this meal, but each one is delicious and really shines through in the chicken! This chicken was full of flavor! You can pretty much pick out each flavor with each bite of chicken, but at the same time they all blend together really well. Delicious! The cookbook states that if you are unable to grill the chicken, then simply broil the chicken 4-6 inches from the heat for the same amount of time directed in the recipe. (Or I'm sure you could use your George Foreman or bake it in the oven and it would turn out great!)

Now, go enjoy your Friday night! I know I am! :-)

Herbed Lime Chicken
Taste of Home: Everyday Light Meals
Published by Reiman Media Group, LLC. in 2010.

Prep time: 5 minutes + marinating  Grill time: 10 minutes  Yield: 4 servings

1 bottle (16 ounces) fat-free Italian salad dressing
1/2 cup lime juice
1 lime, halved and sliced
3 garlic cloves, minced
1 teaspoon dried thyme
4 boneless, skinless chicken breasts (1 pound)

1. In a bowl, combine the first five ingredients. Remove 1/2 cup for basting; cover and refrigerate. Pour remaining marinade into a large resealable plastic bag; add chicken. Seal bag and turn to coat; refrigerate for 8-10 hours.
2. Drain and discard marinade. Grill chicken, uncovered, over medium heat for 5 minutes. Turn chicken; baste with reserved marinade. Grill 5-7 minutes longer or until juices run clear, basting occasionally.

Labels:

Tuesday, January 10, 2012

Bangers & Mustard Mash


You just can't NOT have a beer when eating something called "Bangers & Mash". They just go together! (Besides, I beasted it in my hour long Body Combat class tonight, so I'd say I more than earned it!) :-)

Ohhhh boy this was yummy... This was the first time I have ever put Dijon mustard in my mashed potatoes - this is genius! It was like everything around me became just a little bit brighter. I didn't use the whole-grain mustard or dry mustard. I kind of half forgot to get those two items and half didn't bother adding them to my grocery list because I didn't have any other uses for them right now and didn't feel like buying them. The potatoes turned out just fine! Quite amazing, actually! Since I left out the other two types of mustard, I added a little extra Dijon mustard. The potatoes were so incredible! Everyone everywhere should always add Dijon mustard to their mashed potatoes from now on.

Before I leave the potatoes, I used skim milk instead of whole milk, and I didn't do the whole process of placing the potatoes in a heat-proof bowl and keeping them hot after I finished making them. I just planned everything out so that the potatoes and sausage would be done at the same time.

The sausage was also really good! I bought Smoked Turkey Sausage (the turkey helped make this meal a little healthier), so it had a lot of flavor on its own. Dinner was late tonight, so I didn't feel like messing with the grill, so we just heated the sausage up on the stove. The sausage and potatoes were both very delicious!

Well folks, I think this is going to be a short post tonight. I'm exhausted! All you need to know is that this meal is amazing and you should give it a try when you have a big appetite!

Bangers & Mustard Mash
Barefoot Contessa How Easy is That?
Published by Clarkson Potter/Publishers in 2010.

Yield: 4-6 servings

2 pounds Yukon Gold potatoes, peeled and quartered
Kosher salt
4 tablespoons unsalted butter, diced
1/2 cup whole milk
4 ounces crème fraîche
2 teaspoons Dijon mustard
2 teaspoons whole-grain mustard
1 teaspoon dry mustard
1 teaspoon freshly ground black pepper
2 pounds fresh veal or chicken sausages

1. Place the potatoes in a large saucepan with 1 tablespoon of salt and enough water to cover the potatoes. Bring to a boil and simmer for 20 to 25 minutes, until the potatoes are very tender. Drain the potatoes in a colander and return them to the saucepan. Add the butter, milk, and crème fraîche and beat the potatoes in the pan with a handheld mixer until very smooth and creamy. Add a little extra milk if they're too stiff. Mix in the Dijon mustard, whole-grain mustard, dry mustard, 1 tablespoon salt, and the pepper. Place the potatoes in a heat-proof bowl set over simmering water and keep hot for up to 30 minutes, until ready to serve. (You may need to add more hot milk from time to time.)
2. Meanwhile, prepare a grill with hot coals or heat a gas grill to medium-high and cook the sausages for about 5 minutes on each side, until browned and cooked through. Transfer to a plate, wrap with aluminum foil, and allow to rest for 5 minutes.
3. To serve, mound a generous portion of potatoes on a dinner plate and top with grilled sausages that have been cut in half diagonally.

Labels:

Monday, January 9, 2012

Tomato-Basil Soup with Ricotta Dumplings


If you've been following my blog, then you know that some of the foods I love the most are cheese (any type), potatoes (in any form), dip (dip for chips, not in the form of tobacco... as if I actually need to specify that?), and garlic... the tomato is another favorite food of mine. I love tomatoes! My grandfather and I used to each get a tomato, sprinkle it with salt and pepper, and just sit there and eat it like an apple. Love it!

The tomato flavor in this soup was just fantastic! It was like a tomato punch to your taste buds. And the basil blended in with the tomatoes was absolutely delicious. I've been passing over this recipe for months now - I'm so happy I finally decided to make it for our weekly vegetarian dinner tonight! The dumplings were also quite tasty. I was worried they would be too cheesy (my husband isn't a big fan of super cheesy), but that wasn't the case at all. The dumplings had a really great flavor to them without being overpowering.

A few notes from the cookbook: 1) Soup should be gently simmering when dumplings are added. Do not boil soup or the tender dumplings may break apart. Serve soup soon after cooking dumplings to maintain their texture, and 2) For the most tender dumplings, carefully measure flour by lightly spooning into cup and leveling off with a knife. Do not over-mix the batter once the flour has been added.

A very tasty meal! Each serving only has 250 calories, but it is very filling and warms you right up on a cold night! Enjoy!

Tomato-Basil Soup with Ricotta Dumplings
Pampered Chef Quick Vegetarian Main Dishes
Published by The Pampered Chef, Ltd. in 2010.

Total time: 30 minutes  Yield: 2 servings

Soup
1 tsp Basil Oil or olive oil
1 garlic clove, pressed
1 can (15 oz) crushed tomatoes, undrained
1 1/2 cups vegetable broth
1/4 cup snipped fresh basil leaves

Dumplings
1/4 cup part-skim ricotta cheese
2 tbsp grated fresh Parmesan cheese
1 egg white, lightly beaten
1/2 tsp salt
1/4 tsp coarsely ground black pepper
1/3 cup all-purpose flour
Thinly sliced fresh basil leaves

1. For soup, combine oil and garlic in (3-qt.) Saucepan; cook and stir over medium heat 1-2 minutes or just until garlic begins to turn light golden brown. Immediately add tomatoes, broth and basil. Bring to a boil. Reduce heat; simmer 5-7 minutes, stirring occasionally.
2. Meanwhile, for dumplings, combine ricotta cheese, Parmesan cheese, egg white, salt and black pepper in Small Batter Bowl; mix well. Add flour; stir just until combined. Using Small Scoop, scoop dumpling mixture directly into simmering soup. Cook until dumplings float to the surface, about 2 minutes. Remove from heat. Ladle soup into bowls; sprinkle with thinly sliced fresh basil.

Labels:

Sunday, January 8, 2012

Crab Cakes


I have lived in Eastern North Carolina for about 8 years now, but I feel like last night I had a taste of true Eastern Carolina culture. Last night for dinner we went to Sunny Side Oyster Bar in Williamston, NC. Sunny Side Oyster Bar is a very unique establishment. After a journey through some back country roads, you come across what some might call a hole-in-the-wall, but those that have eaten there know that it is a real gem of a restaurant. The whole atmosphere was unique, but the oysters were amazing! You sit at a horseshoe bar, order any of the four items on the menu (all steamed out back behind the restaurant) and converse with the shuckers behind the bar as they shuck your freshly steamed oysters (our guy has been doing this for 40 years) and you enjoy your plump, juicy oysters. Some of the best oysters I've ever had!

Anyways, long story short, I was still on a seafood kick today after our amazing dinner last night, so I decided to go with these crab cakes. I must say, I made an excellent decision! :-) My husband and I were both pretty blown away with these crab cakes.


Man, look at that crab meat! These crab cakes were just bursting with crab! This recipe came from a cookbook that my brother gave me for Christmas, and I have been completely fascinated as I've read through it (call me a dork, but I like to read through cookbooks like normal people like to read regular books). This cookbook, The Lee Bros. Southern Cookbook, is something everyone should own. 

The authors mention that about 30-40 years ago, the crab cake was more about the cake than the crab. However, people are moving away from that nowadays. Now, it's all about the crab, but a cook also shouldn't be afraid of some slight seasoning and breading. This recipe was the absolute perfect combination of crab meat, breading and seasonings. All was right in the world as we ate these crab cakes. As I already mentioned, these cakes were just bursting with crab meat, but the blend of seasonings was just the right touch to add to the cakes without taking away from the flavor of the crab. Absolute perfection.

The authors also mention that when buying crabmeat, look for fresh crabmeat in plastic containers, rather than crabmeat found in cans. The cans add unpleasant flavors to the meat, according to the authors. The recipe is very easy to follow, and you are surely missing out if you don't make these. I know I've said that before, but this is the real deal tonight! 

I assumed the crab cakes would be a little rich, so I decided to fix a simple salad to go as a side to the crab cakes. I've been trying to move more and more away from canned, frozen and boxed products and buy fresh products as often as possible. For example, today I got fresh parsley and chopped it myself instead of using the parsley seasoning sitting in my cupboard. Also today, I got a fresh head of green lettuce instead of buying a bag of salad mix. (Isn't my salad pretty in the pictures?) You can really tell a big difference when using fresh products. I highly recommend it!

These crab cakes are an absolute MUST. You must make them! You will be blown away with the flavor and pure deliciousness packed into each cake. Enjoy!

Crab Cakes
Published by W. W. Norton & Company in 2006.

Total time: 50 minutes  Yield: 4 servings (eight cakes)

3/4 pound picked jumbo lump or lump backfin crabmeat
3 tablespoons high-quality store-bought mayonnaise; such as Duke's or Hellemann's
1 teaspoon Dijon mustard
1 tablespoon fresh bread crumbs
2 heaping tablespoons chopped fresh flat-leaf parsley
1/2 teaspoon minced garlic
2 tablespoons minced green onion
1/2 teaspoon kosher salt, plus more to taste
1/4 teaspoon freshly ground black pepper, plus more to taste
1 large egg, beaten
1 tablespoon peanut oil or canola oil, plus more if needed
1 lemon, cut into wedges, for garnish

1. Place the crabmeat in a large bowl. Add the mayonnaise, mustard, bread crumbs, parsley, garlic, green onion, salt, and pepper and gently fold the ingredients together with a rubber spatula or wooden spoon until they're thoroughly incorporated. Season with more salt and pepper if desired. Add the egg and fold it into the mixture.
2. Using a 2 1/4-inch cookie cutter, mold the crab mixture into 8 cakes. Wrap them in plastic wrap, 2 at a time. Apply gentle pressure to flatten the cakes slightly, and let them rest in the refrigerator for 30 minutes.
3. Preheat the oven to 350 degrees.
4. Remove the crab cakes from the refrigerator and unwrap. Place the oil in a 12-inch cast-iron skillet or sauté pan and heat over medium-high heat. When it shimmers, transfer 4 of the cakes to the skillet, taking care not to crowd them in the pan. Sauté until gently browned on both sides, about 2 minutes per side. Transfer to a plate lined with a paper towel and repeat with the remaining 4 cakes, adding more oil to the pan if it is too dry. Place all the crab cakes in a medium baking pan and bake until warmed through, about 5 minutes.
5. Garnish with lemon wedges and serve with Summer-Herbed Grits (page 148) or a simple green salad. Pass around a ramekin of Lee Bros. Tartar Sauce (page 526).

Labels:

Pull-Apart Cinnamon Sugar Pumpkin Bread


Mmmmm warm, cinnamon, gooey goodness... I feel like Homer Simpson when he starts to drool over doughnuts.

I had an attack of the sweet tooth today. We don't keep any sweets or junk food in our house, so the fact that I was craving something sweet posed a problem. I got on Pinterest and started looking through some recipes and came across this amazing recipe. My aunt used to make something similar, Monkey Bread, but I was intrigued by the addition of pumpkin to this bread. Once I realized that I already had all of the ingredients in my cupboards (even the pumpkin!), I went right to work!

The recipe calls for bread flour, but I only had all-purpose flour and whole wheat flour. I did some research, and determined that it would be okay to substitute the bread flour with all-purpose flour in this situation. The quantity and quality of gluten is part of what makes different types of flour, and certain flours are right or wrong for certain situations. However, all-purpose flour will perform pretty well in most situations. Worked just fine in this scenario!

Another ingredient, for the glaze, is rum. It says that if you don't want to use rum, then you can use vanilla extract instead. I just so happened to have some vanilla rum in the house, so I used that. Pretty tasty!

Make sure to check out the link listed below to the blog where I found this recipe. As you can see from the pictures, I layered the slices of bread incorrectly. I stacked the slices of bread on top of each other, but I later realized that I was supposed to stack them side by side. Look at the pictures on the site listed below and compare them to my pictures above and you'll see what I mean.

This bread is just what I was in the mood for. It is so delicious! It doesn't have as strong of a pumpkin flavor as I was anticipating, but it still has a nice subtle hint of pumpkin which tastes amazing with the cinnamon and sugar. Make sure to get a bite soon after it comes out of the oven when it is still warm and gooey. Mmmmm.... now it's time to fall into my sugar coma. :-)

Pull-Apart Cinnamon Sugar Pumpkin Bread
Sunny Side Up Food Blog


Bread
2 Tbsp unsalted butter
1/2 cup milk
2 1/4 teaspoons (1 envelope) active dry yeast
3/4 cup pumpkin puree
1/4 cup white sugar
1 tsp salt
2 1/2 cups bread flour

1 cup granulated sugar
2 tsp ground cinnamon
1/2 tsp fresh ground nutmeg
2 Tbsp unsalted butter

Buttered Rum Glaze 
2 Tbsp unsalted butter
1/8 cup brown sugar
1 1/2 Tbsp milk
3/4 cup powdered sugar
1 Tbsp rum *

*The recipe I used called for just a 1/4 tsp of rum but I really wanted to be able to taste the rum, so I upped it to a full tablespoon. It was just right for my taste, adding a nice warmth to the glaze. If you're not into rum you can sub a teaspoon of vanilla extract. 

In a saucepan over medium-high heat, brown 2 tablespoons of butter, letting it bubble up and turn a dark golden brown but being careful not to allow it burn (turn black). Once browned, remove the pan from the heat and carefully add the milk, return to stove and heat through.**** Pour the milk and butter into the bowl of standing mixer (fitted with a dough hook) and allow to cool so it is no longer hot but also not cool (about 100-110 degrees F). Once it has reached a warm but not hot temperature add the yeast and 1/4 cup of sugar and allow to proof (this can take up to 8 minutes, the top will look foamy and the liquid cloudy). Then add the the pumpkin, salt, and 1 cup of flour. Stir until combined then add the rest of the flour 1/2 cup at a time and knead for 6 minutes, until the dough is smooth and elastic and just slightly sticky. If the dough is too moist, add extra flour 1 tablespoon at a time.

Move dough to a lightly oiled bowl and cover with a clean towel. Allow to rise in a warm place for 60-90 minutes or until doubled in size.

While dough is rising, brown another 2 tablespoons of butter. Add the sugar, cinnamon, and nutmeg and mix well.** Making sure sugar evenly absorbs the butter. Set aside. Next, grease and flour a 9x5 loaf pan and set aside.

When the dough has doubled in size, punch it down and flip out onto a clean floured surface and knead with hands for 1-2 minutes. Roll dough into a 20x12 inch rectangle.*** Evenly sprinkle the dough with the cinnamon sugar mixture and press into dough with palms of the hand. Cut the rectangle into 6 strips. Lay strips on top of each other and cut each strip into 6 even squares (cut in half then each half into thirds). Stack strips vertically into the loaf pan. Cover the pan with a clean towel and let rise for 30-45 minutes.

In the meantime preheat an oven to 350 degrees. After rising in the pan bake for 30-40 minutes (mine took 37 exactly) or until top is a very deep golden brown.

To prepare the glaze, heat the butter, milk, and brown sugar in a small saucepan. Bring to boil then immediately remove the pan from the heat and stir in the rum and powdered sugar.

**Of course I didn't properly read this section of the directions... I was supposed to melt the butter and brush the dough with the butter then adding the sugar on top of the butter (instead of mixing it all together and sprinkling) but it worked my way so that's how I am listing it. It's really your call!
*** If dough is difficult to roll out, cover with a towel and allow to relax for a few minutes then try again.
**** My milk was room temperature. Adding it cold to the butter can result in clumping. Willow Bird Baking called for removing the butter from the pan, then heating the milk, then adding the butter back to the milk. I was lazy which is why I skipped that step. You can also heat the milk separately in the microwave if you'd like. 

Labels: