Tuesday, March 27, 2012

Chicken & Shrimp Delight


I mentioned in last night's post that we had been out of town for three days, which got me behind in my usual weekly recipe planning. So, I didn't have a recipe to follow tonight. I decided to just go in the kitchen and work with what I had and make my own creation! That was fun!

The ingredients I used were:
Garlic-Infused Canola Oil
small frozen chicken breasts
frozen shrimp
frozen spinach
cherry tomatoes
brown rice
salt & pepper

The first thing I did was start the rice, because that takes about 25 minutes to cook. Next, I defrosted the chicken using the defrost setting on the microwave, and defrosted the shrimp simply by placing them under cold running water for a few minutes. Once they were both done, I cut the chicken up into little medallions and peeled the shrimp, sprinkling salt and pepper over both. Try to get all of the chicken medallions as close to the same size as possible so that they all cook evenly.

Next, I heated up a tablespoon of the Garlic-Infused Canola Oil in a skillet over medium heat. I added the chicken and cooked, turning occasionally, until cooked through and the pieces were no longer pink in the center. While the chicken was cooking, I cut some cherry tomatoes in half and followed the directions on the frozen spinach package to fix that.

Once the chicken was finished, I removed that from the skillet and added the shrimp to the same skillet, cooking them until pink and cooked through. After the shrimp finished cooking, I added the chicken medallions, cherry tomatoes and spinach to the skillet with the shrimp and mixed every together. About this time, the rice was ready, so I spooned the rice onto the plates and topped it with the chicken, shrimp, tomato and spinach mixture.

This was pretty dang tasty, if I do say so myself! Considering the fact that I wasn't following any kind of recipe and just put this together on my own, I was really happy with how it turned out! My husband said that it looked like something he would order in a restaurant :-) The natural flavors of each ingredient really came through and I thought paired well together. The garlic-infused canola oil also added a nice flavor to everything. You could definitely take this in different directions - experiment with different spices or sauces or whatever you want. Enjoy!

Monday, March 26, 2012

Pasta al Pomodoro

Before I get into tonight's recipe, I wanted to share a picture of what I had for dinner this past Saturday night:


The picture is a little dark, but it is quail stuffed with duck meat with some sauteed mushrooms on the side, drizzled with this sauce that I can't remember what it was, but it was AMAZING!! I had a work conference in California over the weekend, and we went to this really amazing restaurant on Saturday night. This dinner was incredible! I just had to share :-)

After being out of town and eating out for three days, it is always nice to come home and have a home cooked meal. Here is a picture of tonight's recipe:


Pasta al Pomodoro is Italian for pasta with tomato sauce. This home-made spaghetti sauce was delicious! I thought this sauce had a fantastic flavor to it. I loved the pinch of red pepper flakes that you add to the sauce. It wasn't overbearing, but it provided an overall nice, subtle flavor to the sauce. I thought that really helped set this sauce apart from jarred sauces.

I decided to add ground turkey to the sauce, which I'm really happy I did! I cooked the ground turkey in a separate skillet, and then added it to the sauce as it was thickening. All of the flavors tasted wonderful together - the turkey, the onion and garlic, the red pepper flakes, the basil, all of it! I altered just a few things. I pretty much followed the recipe, but at one point it has you reserve a 1/2 cup pasta cooking water and mix that in with the sauce to loosen it up some. I'm not sure if adding the meat to the sauce changed the consistency of the sauce at all, but I didn't think it needed to be loosened up at all, so I didn't add the water to the sauce. I also didn't add the butter to everything at the end. I was so happy with how tonight's dinner turned out!

I highly recommend you give this spaghetti sauce a try the next time you find yourself reaching for jarred spaghetti sauce!

Pasta al Pomodoro

Total time: about 40-45 minutes  Yield: 4 servings

1/4 cup extra-virgin olive oil
1 medium onion, minced
4 garlic cloves, minced
1 pinch crushed red pepper flakes
1 28oz can peeled tomatoes, pureed in a food processor
Kosher salt
3 large fresh basil sprigs
12 oz bucatini or spaghetti
2 tbsp cubed unsalted butter
1/4 cup finely grated Parmesan or Pecorino

1. Heat extra-virgin olive oil in a 12" skillet over medium-low heat. Add minced onion and cook, stirring until soft, about 12 minutes. Add garlic and cook, stirring for 2-4 minutes. Add crushed red pepper flakes; cook for 1 minute more. Increase heat to medium, add pureed tomatoes and season lightly with kosher salt; cook, stirring occasionally, until sauce thickens slightly and the flavors meld, about 20 minutes. Remove pan from heat, stir in basil sprigs, and set aside.
2. Meanwhile, bring water to a boil in a 5-qt. pot. Season with salt; add spaghetti or bucatini and cook, stirring occasionally, until about 2 minutes before tender. Drain pasta, reserving 1/2 cup pasta cooking water.
3. Discard basil and heat skillet over high heat. Stir in reserved pasta water to loosen sauce; bring to a boil. Add pasta and cook, stirring, until sauce coats pasta and pasta is al dente, about 2 minutes. Remove pan from heat; add butter and cheese; toss until cheese melts. Transfer to warm bowls; serve with more cheese, if desired.

Wednesday, March 21, 2012

Lightning-Fast Veggie Chili


Three words: easy, healthy, delicious! An excellent alternative to a meat chili!

Lightning-Fast Veggie Chili
Pampered Chef 29 Minutes to Dinner
Published by The Pampered Chef, Ltd. in 2007.

Total time: 28 minutes  Yield: 4 servings

1 can (28 oz) diced tomatoes, undrained
3 garlic cloves, pressed
1 tbsp chili powder
1/2 tsp salt
1 medium yellow squash
1 medium onion
1 medium poblano pepper
1 tsp olive oil, divided
3 tbsp tomato paste
1 can (16 oz) chili beans in sauce, undrained
1/4 cup chopped fresh cilantro
Shredded cheddar cheese and sour cream (optional)

1. Combine tomatoes, pressed garlic, chili powder and salt in Large Micro-Cooker; microwave on high 5-7 minutes or until simmering. Remove from microwave and set aside.
2. Meanwhile, seed and dice yellow squash using Petite Paring Knife. Dice onion and pepper using Santoku Knife. Add 1/2 tsp of the oil to (4-qt.) Casserole; heat over medium-high heat 1-3 minutes or until shimmering. Add squash; cook 1-2 minutes or until tender. Set squash aside.
3. Add remaining 1/2 tsp oil to same Casserole; cook onion and pepper 3-4 minutes or until tender. Add tomato paste and cook an additional 30 seconds or until tomato paste begins to caramelize, stirring constantly.
4. Add tomato mixture to Casserole. Reduce heat to medium-low; add beans and squash. Simmer 4-5 minutes or until chili is thickened; stirring occasionally.
5. As chili simmers, chop cilantro. Stir cilantro into chili; serve with cheese and sour cream, if desired.

Apple Thyme Chicken


I love to grill. I love everything about it - the smell of the charcoal burning, the fact that it generally represents warm weather, the flavor that food can only get from cooking on a grill, that it is something my husband and I enjoy to do together... I love it! I realized recently that I only have a few cookbooks that have only a few recipes for the grill in them. Solution: get a new cookbook! I could spend hours in the cookbook section of a book store. It was hard for me to settle on only one, but I think I made an excellent choice. I got Taste of Home: Backyard Grilling - 330 recipes for the grill! I have another Taste of Home cookbook and have been real happy with it. I haven't seen a recipe yet in this new cookbook that doesn't look incredible!

This recipe was very tasty! I really like the flavor combination of chicken and apples. Yum! The marinade adds a lot of flavor to the chicken, and the sauce is also really good. Grilling the apples added a nice touch to everything! It was very simple to put together. I do love an easy, delicious meal!

Apple Thyme Chicken
Taste of Home: Backyard Grilling
Published by Reiman Media Group, Inc. in 2006.

Yield: 4 servings

6 tbsp apple juice
6 tbsp lemon juice
4 1/2 tsp cider vinegar
4 1/2 tsp vegetable oil
1 1/2 tsp dried thyme
4 boneless skinless chicken breast halves (4 ounces each)
2 medium Golden Delicious or other all-purpose apples, peeled and quartered
1 tbsp honey
Sauce
2 tsp cornstarch
1/4 tsp dried thyme
3/4 cup apple juice

1. In a bowl, combine the first five ingredients; mix well. Pour half of the marinade into a large resealable plastic bag; add chicken. Seal bag and turn to coat; refrigerate for at least 2 hours. Cover and refrigerate remaining marinade.
2. Coat grill rack with nonstick cooking spray before starting the grill. Drain and discard marinade from chicken. Dip apples in reserved marinade; set aside. Combine the honey with the remaining marinade. Grill chicken, covered, over medium heat for 4-6 minutes on each side or until juices run clear, basting frequently with the honey marinade. Grill apples, uncovered, for 3-5 minutes, basting and turning frequently or until lightly browned.
3. In a saucepan, combine cornstarch, thyme and apple juice until blended. Bring to a boil; cook and stir for 2 minutes or until thickened. Slice grilled apples; stir in sauce. Serve with chicken.

Monday, March 19, 2012

Chicken Cannelloni with Roasted Red Bell Pepper Sauce


I didn't realize until we had already started eating that I hadn't taken a picture yet! Oops!

We had some special company over this weekend, so I wanted to make a special meal! What is great about this recipe is that it can be used for special occasions, or you can make it ahead of time and freeze it for a quick heat-up during the week when you need a quick meal! What I did this weekend was fix the filling the night before, so that all I had to do when it was time for dinner was boil the pasta, stuff it with the filling and pop it in the oven! This recipe is great for situations like that when you want to plan ahead!

I have made this a few times before, but it never gets old! This recipe is so delicious! (If I do say so myself!) :-) I absolutely LOVE the roasted red bell pepper sauce that gets poured on top of the stuffed pasta. The filling is good, but I think that the sauce really makes the recipe and sets it apart.

Enjoy!

Chicken Cannelloni with Roasted Red Bell Pepper Sauce

Yield: 6-8 servings

1 (8 ounce) package cannelloni or manicotti shells
4 cups finely chopped cooked chicken
2 (8 ounce) containers chive-and-onion cream cheese
1 (10 ounce) package frozen chopped spinach, thawed and well drained
1 cup (8 ounces) shredded mozzarella cheese
1/2 cup Italian seasoned breadcrumbs
3/4 teaspoon garlic salt
1 teaspoon seasoned pepper
Roasted Red Bell Pepper Sauce
Garnish: chopped fresh basil or parsley

Roasted Red Bell Pepper Sauce
2 (7 ounce)  jars roasted red bell peppers, drained
1 (16 ounce) jar creamy Alfredo sauce
1 (3 ounce) package shredded Parmesan cheese

1. Cook pasta according to package directions; drain.
2. Stir together chicken and next 6 ingredients.
3. Cut pasta shells lengthwise through the other side. Spoon about 1/2 cup chicken mixture into each shell, gently pressing cut sides together. Place, cut sides down, in 2  lightly greased 11- x 7-inch baking dishes. Pour Roasted Red Bell Pepper Sauce evenly over shells.
4. Bake, covered, at 350° for 25-30 minutes or until thoroughly heated. Garnish, if desired.

Roasted Red Bell Pepper Sauce
1. Process all ingredients in a blender until smooth, stopping to scrape down sides.

Bacon-Crab Mushroom Caps


I have posted a stuffed mushroom recipe before, which you can view here. They are both delicious, but I think I like these more! These mushrooms have a fantastic flavor to them! The crab flavor really comes through and pairs wonderfully with the bacon and cheese and especially the mushrooms. Delicious! However, I made the mistake of serving them as finger foods. Don't serve them as finger foods! They come out very juicy, so you definitely want to serve them on a little appetizer plate with a fork.

A few suggestions from the website where I found the recipe: 1) Omit mushroom caps. Prepare crabmeat mixture as directed. Use as a spread for you favorite Nabisco Crackers or as a flavorful filling for sandwiches or hollowed-out cherry tomatoes. Serve hot or cold!, and 2) Substitute 1 pkg (8oz) imitation crabmeat for the canned crabmeat.

A terrific, simply, yummy appetizer to serve next time you have some guests over!

Bacon-Crab Mushroom Caps

Prep time: 20 minutes  Total time: 30 minutes  Yield: 36 mushroom caps

1 can (6 oz) crabmeat, drained, flaked
1/2 cup Kraft Shredded Sharp Cheddar Cheese
1/2 cup Kraft Real Mayo Mayonnaise
1/3 cup Oscar Mayer Bacon Pieces or Bits
1 1/2 tbsp parsley flakes
36 medium mushroom caps

1. Preheat oven to 350°F. Mix all ingredients except mushroom caps.
2. Spoon evenly into mushroom caps. Place on baking sheet.
3. Bake 8-10 minutes or until cheese is melted.

Thursday, March 15, 2012

Shrimp Orzo Skillet


This recipe falls into two categories: 1) one of the top most delicious recipes I have made, and 2) one of the easiest recipes I have made! Holy moly this was incredible! And there was very little I even had to do!

I did things a little differently from what the recipes tells you to do, so I'll share what I did. I thought I had some orzo pasta, but when it was time for dinner realized that I just had some brown rice. Because rice takes longer to cook than orzo pasta, I decided not to cook the shrimp first and then cook the rice in the same skillet. I didn't want the shrimp to sit out so long and get cold. So what I did was cook the rice in a separate saucepan, and then cooked the shrimp (which took about 5 minutes) in a sauté pan at the very end right as the rice was finishing cooking. That way everything was ready at the same time.

Normally when I fix rice for the two of us, I measure 1/2 cup rice and 1 cup water, then proceed from there. Tonight, I still measured out the 1/2 cup of rice, but followed the directions with the chicken broth and clam juice measurements (cut in half, because it was just the two of us and the recipe serves 4). So instead of cooking the rice in water, I cooked it in 1 cup chicken broth and 1/2 cup clam juice (plus the pressed garlic). Oh my goodness!!!! The rice was so incredible! The chicken broth and clam juice added so much flavor, it was amazing.  After the rice was finished cooking, I stirred in the peas, butter and lemon juice (while at the same time sautéing the shrimp in the olive oil).

When I said that it was one of the easiest recipes I have done, I was not joking! It took just a minute to get the rice started, and then while that cooked (which took about 30 minutes) I was able to leave it and get a lot of stuff done around the house. The shrimp only took about 5 minutes at the end as the rice was finishing up, and all you had to do for that was toss it in the salt, pepper and sugar and throw them in the sauté pan! So simple!

I still can't get over how delicious this dinner was. When I saw it, I thought to myself that it looked good, but I had no idea it would be bursting with so much flavor! Tossing the shrimp in a tiny bit of sugar allowed caramelization to take place in the little time that the shrimp took to cook, which added a whole other dynamic to the dish. That, combined with the rice (which I already mentioned cooking it with the chicken broth, clam juice and garlic made it amazing), peas and lemon juice just really blew me away! I want some more! Haha :-)

You are truly missing out if you don't give this recipe a try!

Shrimp Orzo Skillet
Pampered Chef 29 Minutes to Dinner
Published by The Pampered Chef, Ltd. in 2007.

Total time: 29 minutes  Yield: 4 servings

Shrimp
8 oz large uncooked shrimp (21-25 per pound)
1 tbsp vegetable oil
1/4 tsp salt
1/4 tsp coarsely ground black pepper
1/8 tsp sugar

Orzo
8 oz orzo pasta
1 garlic clove, pressed
2 cups chicken broth
1 cup clam juice
1 lemon
1tbsp thinly sliced fresh mint
1 cup frozen peas
1 tbsp butter

1. For shrimp, peel and devein shrimp. Add oil to (10-in.) Skillet; heat over medium-high heat 1-3 minutes or until shimmering. As Skillet heats, combine salt, black pepper and sugar in Small Batter Bowl; add shrimp and toss to coat.
2. Arrange shrimp in a single layer over bottom of Skillet and cook about 1 minute or until one side is browned and edges are pink. Remove Skillet from heat and turn shrimp over with Small Slotted Turner; let stand an additional 30 seconds or until centers are opaque and shrimp is cooked through. Remove shrimp from Skillet; set aside.
3. For orzo, in same Skillet, combine orzo, pressed garlic, broth and clam juice. Bring to a boil; cover and reduce heat to medium-low. Cook 10-12 minutes or until orzo is cooked through.
4. As orzo cooks, zest lemon with Microplane Adjustable Grater to measure 1 tbsp zest; juice lemon to measure 1 tbsp juice. Thinly slice mint using Santoku Knife.
5. Remove Skillet from heat and stir in peas, butter and lemon juice. Arrange shrimp over orzo; cover and let stand 3-5 minutes or until heated through. Sprinkle with lemon zest and mint before serving.

Monday, March 12, 2012

Polenta-Stuffed Poblano Peppers


Not only was this the first time I have ever had polenta, but it was also the first time I have ever even heard of polenta! Wikipedia defines polenta as "coarsely or finely ground yellow or white cornmeal used as a foodstuff." It had a similar texture to grits, and with the corn mixed in, it reminded us of cream of corn. It was really good!

The recipe was very easy to follow. I don't really have any side tips to give you. Just follow the directions and you'll be fine! The only thing I will say is to be careful when adding the polenta to the boiling water, because if you add too much at a time then it will clump up. I actually had trouble finding polenta in the grocery store. I got the recipe from Sara, so I asked her where I could find polenta, when she actually explained that it can also be called corn meal. So, because I couldn't find polenta, I got Blue Ribbon Fine Ground Stone Ground Corn Meal and that worked out perfect.

I also had a few other substitutions... the grocery store was out of poblano peppers, so I got green bell peppers instead. I also was unable to find some goat cheese, but looked online and found out that cream cheese can be used as a substitution for goat cheese. So, had to get a few different ingredients from what is listed, but that didn't cause any problems! Everything still worked out just fine!

The dish had a great flavor to it! The polenta, corn and cheese mixture was really tasty, and the sauce was delicious! The cinnamon added a great flavor overall to the meal. I wouldn't normally think to pair cinnamon with tomatoes and onions, but it provided a very unique flavor - very yummy!

I would say this week's vegetarian dinner was a success! Enjoy!

Polenta-Stuffed Poblano Peppers

Hands-On Time: 25 minutes  Total time: 35 minutes  Yield: 4 servings

4 plum tomatoes, halved
1 red onion, cut into wedges
1 tablespoon olive oil
4 poblano peppers, halved lengthwise and seeded
1/4 teaspoon ground cinnamon
kosher salt and pepper
1/2 cup instant polenta
1 10-ounce package frozen corn
1/4 cup soft goat cheese (2 ounces)
4 scallions, sliced

1. Heat broiler. On a rimmed broilerproof baking sheet, toss the tomatoes, onion, and oil; turn the tomatoes cut-side down. Add the peppers, cut-side down.
2. Broil until tender and charred, stirring the onions and turning the tomatoes and peppers halfway through, 5 to 8 minutes.
3. Heat oven to 400°F. In a food processor, puree the tomatoes, onion, cinnamon, 1/2 teaspoon salt, and 1/4 teaspoon pepper until smooth. Spread half the sauce in a 9-by-13-inch baking dish. Arrange the peppers in the dish, cut-side up.
4. In a medium saucepan, bring 2 1/4 cups water to a boil. Add 1/2 teaspoon salt. Gradually whisk in the polenta. Cook, whisking constantly, until thickened, 3 to 4 minutes. Stir in the corn, cheese, and all but 2 tablespoons of the scallions.
5. Divide the polenta among peppers. Top with the remaining sauce and bake until heated through, 5 to 10 minutes. Sprinkle with the remaining scallions before serving.

Sunday, March 11, 2012

Hawaiian Turkey Burgers


I love Daylight Saving Time!! It makes me SO happy having the sun out later in the day! It does stink having it darker in the morning when you're going into work, but just keep in mind that as the days pass, the sun will begin to rise earlier in the morning (and set later in the day too)! :-) Love this time of the year!

In honor of Daylight Saving Time, I wanted to find a recipe to do on the grill tonight. These light, yummy Hawaiian Turkey Burgers were perfect! They were very delicious! The red pepper, green onion and soy sauce added some great flavor to the burgers. I realized at the last minute that I didn't have any teriyaki sauce, so I used Worcestershire sauce instead. That worked out great! Next time I will probably baste the burgers and pineapple with the Worcestershire sauce more than I did tonight. I could have stood to have that flavor come through a little more than it did. The pineapple added a wonderful touch! It paired really well with the different flavors in the turkey burger.

I made the Oven-Baked Country Fries (see post below) to go with the burgers. Now that the weather is warming up, I'll probably post more recipes for the grill, so be on the lookout!

Hawaiian Turkey Burgers
Taste of Home: Everyday Light Meals
Published by Reiman Media Group, LLC in 2010.

Prep/Total time: 25 minutes  Yield: 4 servings

1 can (8 ounces) sliced pineapple
1/2 cup dry bread crumbs
1/2 cup sliced green onions
1/2 cup chopped sweet red pepper
1 tablespoon reduced-sodium soy sauce
1/4 teaspoon salt
1 pound 93% lean ground turkey
1/4 cup reduced-sodium teriyaki sauce
4 sesame hamburger buns

1. Coat grill rack with nonstick cooking spray before starting the grill. Drain pineapple, reserving 1/4 cup juice (discard remaining juice or save for another use); set pineapple aside. In a bowl, combine the bread crumbs, onions, red pepper, soy sauce, salt and reserved pineapple juice. Crumble turkey over mixture and mix well. Shape into four patties.
2. Grill, covered, over medium heat for 3 minutes on each side. Brush with teriyaki sauce. Grill 4-6 minutes longer on each side or until meat is no longer pink and a meat thermometer reads 165°. Grill pineapple slices for 2 minutes on each side, basting occasionally with teriyaki sauce. Warm buns on grill; top each with a burger and pineapple slice.

Oven-Baked Country Fries


These fries are what I made to go along with our Hawaiian Turkey Burgers (see post above). Pretty tasty!!

They were a nice alternative to, say, frozen french fries. You can't beat fresh over frozen! The seasoning was really good. I especially liked the Parmesan cheese flavor mixed into everything. The timing worked out really well too. It didn't take me long to prepare the fries, and in the amount of time it took for them to bake in the oven, we got the grill fired up, and prepared and cooked the burgers. Everything got done at the same time! There were a great side-kick to the burgers!

Oven-Baked Country Fries
Taste of Home: Everyday Light Meals
Published by Reiman Media Group, LLC in 2010.

Prep: 10 minutes  Bake: 40 minutes  Yield: 4 servings

2 egg whites
1/4 cup all-purpose flour
1/3 cup dry bread crumbs
2 tablespoons grated Parmesan cheese
1 1/2 teaspoons onion salt
1 1/2 teaspoons Italian seasoning
1 teaspoon paprika
1/4 teaspoon pepper
3 medium unpeeled baking potatoes (1 pound)

1. In a shallow bowl, beat egg whites until foamy. In another shallow bowl, combine the flour, bread crumbs, Parmesan cheese and seasonings. Cut each potato lengthwise into eight wedges. Dip potatoes into egg whites, then coat with crumb mixture.
2. Place in a single layer on a baking sheet coated with nonstick cooking spray. Spray wedges evenly with nonstick cooking spray. Bake, uncovered, at 375° for 40-45 minutes or until golden brown.

Thursday, March 8, 2012

Grilled Salmon with Smoky Yellow Pepper Salsa

What a tasty treat this was! A perfect, delicious mixture of sweet and spicy!

I did things a little differently from what the cookbook suggests. The cookbook has you use a Grill Pan to cook the salmon, but with it being such a beautiful evening, I couldn't pass up an opportunity to fire up the grill!

 Nothing like the smell of a charcoal grill! Love it!

yellow pepper salsa 


I love cooking on a charcoal grill! I love the way it smells, the way the food tastes... Also, cooking on a grill usually means nice weather and relaxing on the back porch - both of which I'm big fans of! Cooking this recipe on an actual grill I feel had a lot to do with how delicious it turned out! (I'm sure it would have been delicious fixing it the way the cookbook suggests also.) 

What I did was create a tray out of tinfoil for the salmon to sit in. After I mixed together the yellow pepper salsa, I poured the salsa over the fish, and then closed up the tinfoil, leaving a small opening for venting purposes. Then I put the tinfoil tray on the grill and let it all cook together! Cooking a salmon fillet in this fashion would normally only take around 10 minutes, but we had a pretty thick piece of fish, so it took a little longer. Just check it and see how it looks! 

The fish was so delicious! It was very tender and juicy. The salsa was incredible! As I said earlier, it was a perfect combination of sweet and spicy and had a wonderful flavor! The flavors and juices really cooked into the fish - cooking the fish and the salsa together in the tinfoil on the grill I feel really added a lot to this dinner.

A few notes from the cookbook: 1) For Toasted Chili Oil, wearing plastic gloves, break 16 dried arbol chiles into pieces, discarding seeds. Heat 1/4 cup vegetable oil in (1.5-qt.) Saucepan on medium heat until hot. Add chiles; reduce heat to low. Cook until chiles begin to look crisp. Remove from heat; cool completely. This versatile oil can be used in place of olive or vegetable oil whenever a kick of extra heat is desired. Store at room temperature, covered up to 1 month, 2) If desired, 2 teaspoons crushed red pepper flakes can be substituted for the arbol chiles, and 3) For roasted bell pepper, place bell pepper directly over gas flame on high heat or under a broiler. Cook about 8-10 minutes or until charred on all sides, turning occasionally using Chef's Tongs. Remove from heat and place in large resealable plastic bag or small paper bag. Seal bag and let stand 10 minutes; peel off the skin and remove the seeds and stem.

I'll be honest with you guys - I didn't roast my yellow bell pepper and I just used the crushed red pepper in place of making the Toasted Chili Oil with the arbol chiles. And you know what, what we had was delicious! So, you can go all out with this recipe, or take the short cuts and you'll be fine! Either way, definitely give this dish a try - you'll be happy you did!

Grilled Salmon with Smoky Yellow Pepper Salsa
Published by The Pampered Chef, Ltd. in 2006.

Prep time: 20 minutes  Total time: About 45 minutes  Yield: 2 servings

1 small yellow bell pepper, roasted (see above instructions)
1/2 plum tomato, seeded and diced
2 green onions with tops, sliced
2 tablespoons orange juice
1-2 teaspoons Toasted Chili Oil (or 2 teaspoons crushed red pepper flakes)
3/4 teaspoon salt, divided
2 skinless salmon fillets (4-6 ounces each)
Small navel orange, scored and cut into 1/4-inch slices (optional)

1. Peel, seed and chop bell pepper. Combine pepper, tomato, onions, orange juice, chili oil and 1/2 teaspoon of the salt; stir until well blended. Set aside until ready to serve.
2. Season salmon with remaining 1/4 teaspoon salt. Heat Grill Pan over medium-high heat 5 minutes. Lightly grease pan with vegetable oil. Add salmon, top side down. Cook 10-12 minutes or until salmon flakes easily with a fork, turning once. Remove salmon from pan to serving platter. If desired, place orange slices onto Grill Pan; remove when grill marks appear. If desired, arrange orange slices onto serving plates; top with salmon and salsa.

Tuesday, March 6, 2012

Terrific Turkey Meatloaf


This is going to be a short post tonight folks, because I am TIRED! :-) This meatloaf was really good! All of the flavors blended together very well and gave it a great flavor. I liked the fact that it used ground turkey rather than beef. I also enjoyed using some ingredients that I have not used in making meatloaf before, such as black olives and dried marjoram. There wasn't much to do to get dinner on the table tonight. I mixed all of the ingredients together on my lunch break (which shows you how little time it took), and then just popped it in the oven when I got home from the gym this evening! Easy peasy! Overall great flavor and I will definitely use the version again the next time I make meatloaf! Enjoy!

Terrific Turkey Meatloaf
Taste of Home: Everyday Light Meals
Published by Reiman Media Group, LLC. in 2010.

Prep time: 15 minutes  Bake: 55 minutes  Yield: 4 servings

1 egg white
3 tablespoons ketchup
1 tablespoon Worcestershire sauce
1/2 teaspoon Dijon mustard
1/2 cup oat bran
1/2 cup chopped green pepper
1/4 cup chopped onion
2 tablespoons chopped ripe olives
1 garlic clove, minced
1/4 teaspoon celery salt
1/4 teaspoon dried marjoram
1/4 teaspoon rubbed sage
1/4 teaspoon pepper
1 pound ground turkey

1. In a large bowl, combine the egg white, ketchup, Worcestershire sauce and mustard. Stir in the oat bran, green pepper, onion, olives, garlic, celery salt, marjoram, sage and pepper. Crumble turkey over mixture and mix well.
2. Pat into a loaf in an 11-in. x 7-in. x 2-in. baking dish coated with nonstick cooking spray. Bake, uncovered, at 350° for 55-65 minutes or until a meat thermometer reads 165°.

Monday, March 5, 2012

French Onion Soup

Noncooks think it's silly to invest two hours'
work in two minutes' enjoyment; but if
cooking is evanescent, so is the ballet.
~ Julia Child ~

I have mentioned my dear friend Sara a few times in my blog. She and I share the same love for food and cooking, so whenever she tells me about a recipe that she really liked, I always make sure to pay close attention. She made this French Onion Soup last week and raved about how delicious it was. After looking over the recipe, I decided that there was no question about it - I had to make it! Upon a closer read through, I realized that this recipe is adapted from Mastering the Art of French Cooking by Julia Child! I love Julia Child!

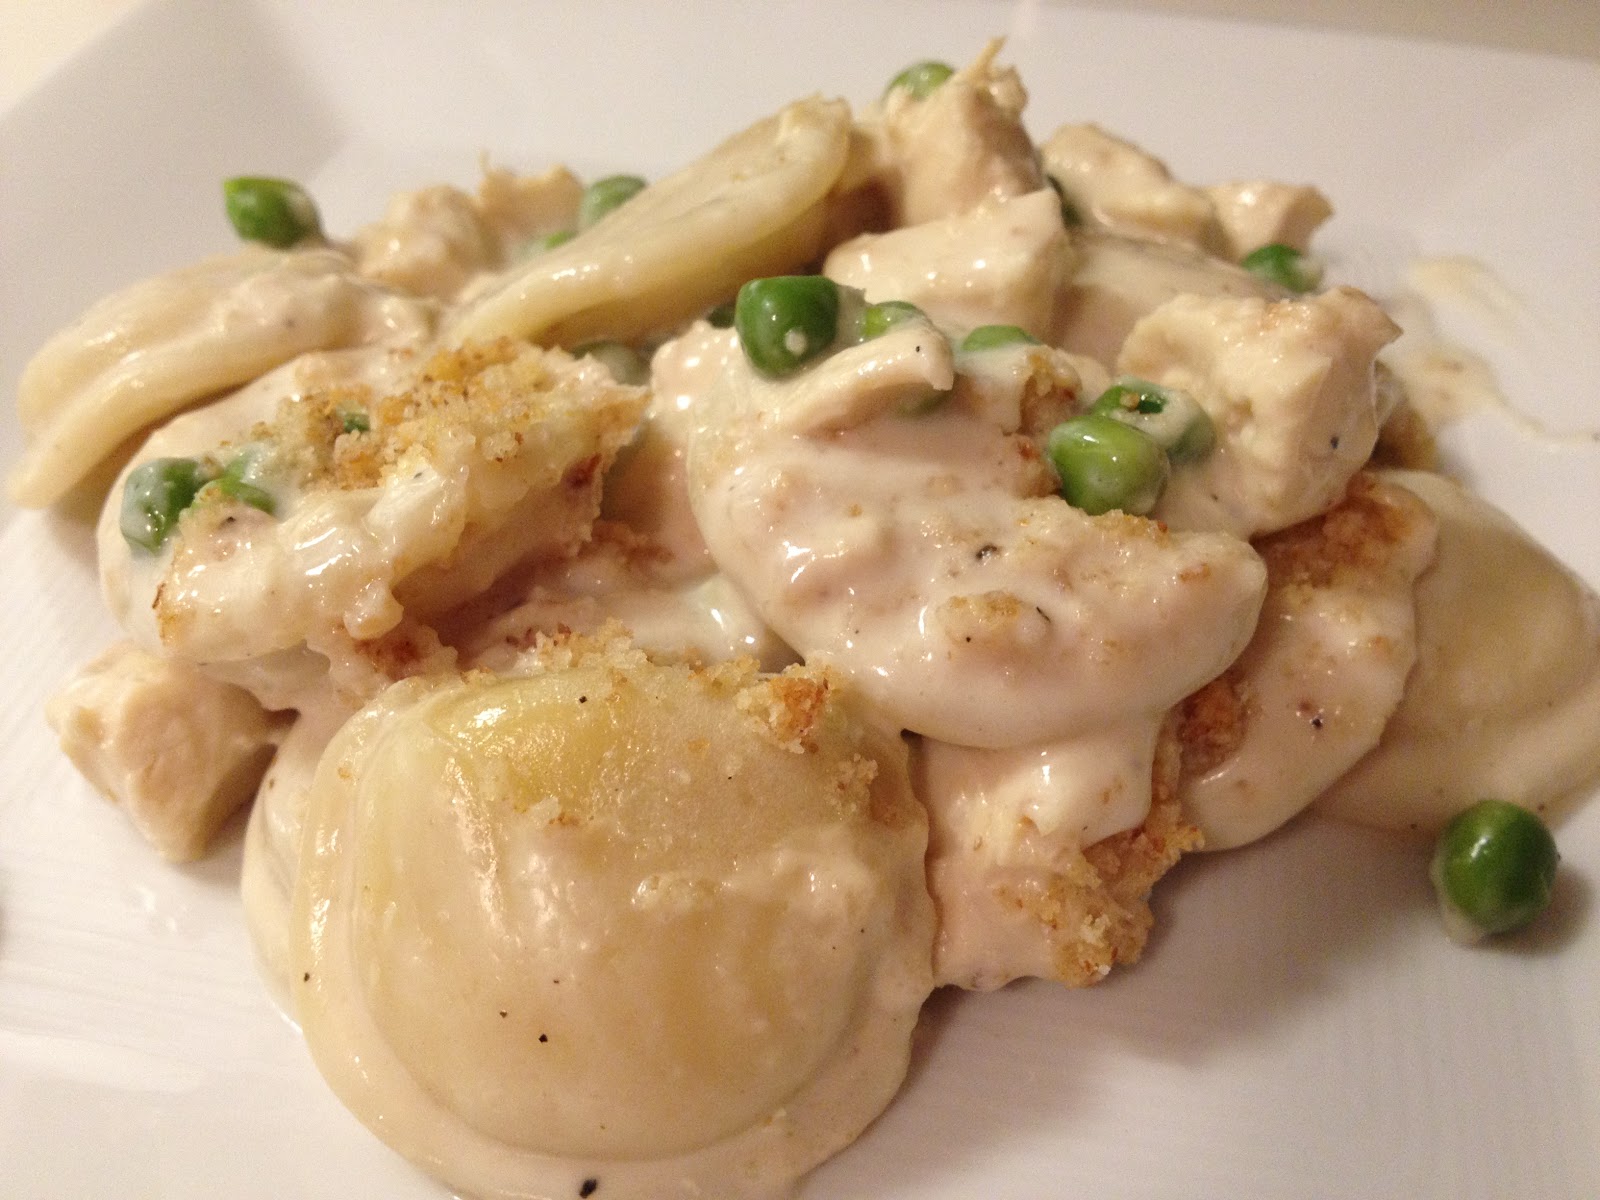
This recipe does take some time to fix, but it is SO worth it! (Hence the opening quote I posted.) Here are some pictures I took along the way:

 Caramelizing the onions!

 Just before I topped everything with the cheese and stuck it in the oven.

 The final product!


I had a lot of fun making this dinner tonight. I cranked up one of my iHeartRadio channels, which appropriately began to play Frank Sinatra singing April in Paris. I have never been much of a soup person, but I was really blown away with how delicious this soup was! Incredible! The onions were perfectly caramelized, and combined with the beef stock, wine and cheese, there was just so much flavor! I loved having the pieces of French bread in the soup. Baking the soup in the oven at the end made it fantastically  bubbly and gooey, and the bread soaked up the juices wonderfully. Magnifique! 

Although this recipe does take some time to fix (it took me 2 hours from beginning to end), it is not only incredibly worth it, but it also really doesn't take much effort on your part! Caramelizing the onions doesn't take more than slicing them up and then stirring them in the pot as needed, and then you just have to pour the rest of the ingredients in there and let it simmer and do it's thing! Ok, so you have to grate some cheese and slice some bread (geez!), but that is just about it! Before you know it, you have yourself a delicious masterpiece you can be proud of.

I highly recommend you read the blog that this recipe came from. She wrote a great post to go along with the recipe! To quote her, "...raises the soup beyond the everyday, without making it too difficult to whip up almost any day. Which I promise will happen when you realize the staggering gap between effort and outcome that Child's onion soup manages to bridge." 

Be sure to go ahead and make this soup before the weather begins to warm up and you won't feel like having soup anymore! (Although, after realizing how amazing this soup is, I'd be happy eating it on a 100° summer day!) :-) 

Onion Soup [Soupe à l'Oignon]

1 1/2 pounds (about 5 cups) thinly sliced yellow onions
3 tablespoons unsalted butter
1 tablespoon olive oil
1 teaspoon table salt, plus additional to taste
1/4 teaspoon granulated sugar (helps the onions to brown)
3 tablespoons all-purpose flour
2 quarts (8 cups) beef or other brown stock
1/2 cup dry white wine or dry white vermouth
Freshly ground black pepper
3 tablespoons cognac or brandy (optional)

To finish [Gratinée] (Optional)
1 tablespoon grated raw onion
1 to 2 cups (to taste) grated Swiss or a mixture of Swiss and Parmesan cheese
1 tablespoon butter, melted
12-16 1-inch thick rounds French bread, tasted until hard

1. Melt the butter and oil together in the bottom of a 4- to 5-quart saucepan or Dutch oven over moderately low heat. Add the onions, toss to coat them in oil and cover the pot. Reduce the heat to real low and let them slowly steep for 15 minutes. They don't need your attention; you can even go check your email.
2. After 15 minutes, uncover the pot, raise the heat slightly and stir in the salt and sugar. Cook onions, stirring frequently, for 30 to 40 minutes until they have turned an even, deep golden brown. Don't skimp on this step, as it will build the complex and intense flavor base that will carry the rest of the soup. Plus, from here on out, it will be a cinch.
3. After the onions are fully caramelized, sprinkle them with flour and cook, stirring, for 3 minutes. Add the wine in full, then stock, a little at a time, stirring between additions. Season to taste with salt and pepper. Bring to a simmer and simmer partially covered for 30 to 40 more minutes, skimming if needed. Correct seasonings if needed but go easy on the salt as the cheese will add a bit more saltiness and I often accidentally overdo it. Stir in the cognac, if using. 
4. Set aside until needed. I find that homemade onion soup is so deeply fragrant and flavor-rich that it can stand alone, but that doesn't mean we don't enjoy the graitinéed top once in a while. Here's how to pull if off:
5. Preheat oven to 325°F. Arrange six ovenproof soup bowls or rocks on a large, foil-lined baking sheet. Bring the soup back to a boil and divide among six bowls. To each bowl, add 1/2 teaspoon grated raw onion and a tablespoon of grated cheese. Stir to combine. Dab your croutons with a tiny bit of butter and float a few on top of your soup bowls, attempting to cover it. Mound grated cheese on top of it; how much use will be up to you.
6. Bake soups on tray for 20 minutes, then preheat broiler. Finish for a minute or two under the broiler to brown the top lightly. Grab pot holders, and serve immediately.

Sunday, March 4, 2012

To Die For Blueberry Muffins

I really don't like having leftovers for dinner. I'm not sure what it is about leftovers, but I just don't like them. Never have. When I cook, I try to reduce the recipes to make just two servings so that we don't have any leftovers, but somehow I managed to have a lot of leftovers after last week. I put it off long enough, and finally decided that we needed to eat them tonight so that we don't waste any food...

However, I still was antsy to get in the kitchen and do some cooking, so I got on Pinterest and started looking through the food boards for something fun to make since I wasn't cooking dinner tonight. I'm not sure how I came across the idea of making blueberry muffins, but as soon as I got blueberry muffins in my head, I couldn't get them out. I LOVE blueberry muffins. I have never made them from scratch before, so I decided it was time!

My husband and I are big fans of Seinfeld, and any time I have a muffin, I think about the episode where they're talking about how the best part of the muffin is the top and Elaine has an idea for a business that only sells the tops of muffins... she and her boss have conflicting views on the name of the shop:


Anyways, these muffins (the whole thing, not just the top) were amazing! Holy cow! The mixture was perfect and the blueberries were so delicious! I decided to do half of the muffins plain and half with the crumb topping. Both versions were incredible! (Of course I had to taste one of each muffin so that I could fairly compare the two! :-))


I'm starting to drool just looking at these pictures... Our apartment smelled sooooo good as they were baking!  It was torture to wait the 20 minutes as they baked in the oven! They were absolutely amazing when they first came out of the oven, all warm and gooey... They are also quite delicious after they have cooled off as well! I could probably sit down and eat the whole dozen. Must... restrain... myself...

You probably already have most of the ingredients in your kitchen. I did learn, though, that baking soda and baking powder are two different things! And while they have a similar purpose, you cannot substitute baking powder with baking soda. I didn't realize that until today, but you can find baking powder in the grocery store conveniently located right next to the baking soda. This is an interesting link that describes the difference between the two: http://chemistry.about.com/cs/foodchemistry/f/blbaking.htm

By now, if you haven't already made plans to make these muffins, then you need to right now!

To Die For Blueberry Muffins
http://adamandhaleykjar.blogspot.com/2011/06/to-die-for-blueberry-muffins.html

Prep time: 10 minutes  Bake time: 20-25 minutes  Yield: 12 muffins

1 1/2 cups all-purpose flour
3/4 cup white sugar
1/2 teaspoon baking powder
1/3 cup vegetable oil
1 egg
1/3 cup milk
1 1/2 cups fresh (or frozen) blueberries
Crumb Topping
1/4 cup sugar
3 tablespoons flour
2 tablespoons butter, softened
3/4 teaspoon cinnamon

Preheat oven to 400°F. Grease muffin cups or line with muffin liners. Combine flour, sugar, salt, and baking powder. Place vegetable oil into a 1cup measuring cup; add egg and enough milk to fill the cup. mix this with flour mixture. Fold in blueberries. Fill muffin cups to top; sprinkle with crumb topping mixture. Bake 20-25 minutes or until done.

Thursday, March 1, 2012

Cheesy Chicken Tortellini Bake

It was so beautiful outside today!! I do enjoy the winter season, but if it is going to be cold then I want to see snow. Lots of it. If it's not going to snow, then I'm ok with moving on to the next season. I absolutely love warm weather! My husband always teases me. He says, "It takes you 7 months of warm/hot weather before you're ready for it to cool off, but only takes you 2 weeks of cold weather before you're ready for it to warm up." :-)

We unfortunately didn't see any snow this year. It was a pretty mild winter, but still cool enough that I needed to wear ear warmers when I ran. So when the weather today was clear, sunny skies with a high reaching near 80°, I was super excited! After several months of cooler temps, having a day like today made me want to be outside in the sunshine and make margaritas. So that is what I did! I went for about an hour long run after work, soaked up that wonderful vitamin D, and got to enjoy the last bit of daylight on the back porch with a refreshing margarita! (Ignore the fact that it is in a martini glass - I need some margarita glasses!)


Anyways, on to tonight's recipe...


It was pretty good. It didn't make me jump up and down or anything, but it tasted good. It was a very quick and simple meal to put together, so it would be great for busy weeknights when you don't have a lot of time. I felt like you definitely tasted the Alfredo sauce over everything else. Although, the crumb topping did add a slight crunch and a little bit of a contrasting flavor that was good.

The recipe makes 6 servings, so I tried to reduce everything to make just enough for the two of us. I'm not sure at what point I went wrong, but the end product was more liquidy than I think it was supposed to be. The picture in the book looked more creamy. I just used a spoon that had slits in it when I served dinner so that some of the liquid could drain out.

So, again, nothing spectacular, but it did taste good and would be great for those nights when you don't have much time to focus on dinner! Enjoy!

Cheesy Chicken Tortellini Bake
Pampered Chef Stoneware Inspirations
Published by The Pampered Chef, Ltd. in 2005.

Prep and cook time: 10 minutes  Bake time: 15-20 minutes  Yield: 6 servings

Pasta Mixture
1/2 cup chopped onion
1 teaspoon olive oil
1 garlic clove, pressed
1 jar (16 ounces) white Alfredo pasta sauce
2 packages (9 ounces each) refrigerated cheese-filled regular or spinach tortellini)
1 1/2 cups cubed cooked chicken
1 cup milk
1 cup water
1 cup frozen peas
1/4 teaspoon ground black pepper
2 tablespoons snipped fresh basil leaves or 1 teaspoon dried basil leaves

Crumb Topping
1/4 cup (1 ounce) grated fresh Parmesan cheese
2 tablespoons butter or margarine, melted
1 cup fresh bread crumbs

1. Preheat oven to 400°F. For pasta mixture, chop onion using Food Chopper. In Professional (4-qt.) Casserole, heat oil over medium-high heat; add onion and garlic pressed with Garlic Press. Cook and stir 2-3 minutes or until onion is tender. Stir in pasta sauce, tortellini, chicken, milk, water, peas and black pepper. Heat until mixture just comes to a boil; remove from heat. Stir basil into pasta mixture.
2. Meanwhile, for crumb topping, grate Parmesan cheese using Deluxe Cheese Grater. Place butter in Small Micro-Cooker; microwave on high 30-45 seconds or until melted. Stir in bread crumbs and cheese; mix well.
3. Spoon pasta mixture into Square Baker; sprinkle with crumb topping. Bake 15-20 minutes or until edges are bubbly and topping is golden brown.