Thursday, December 29, 2011

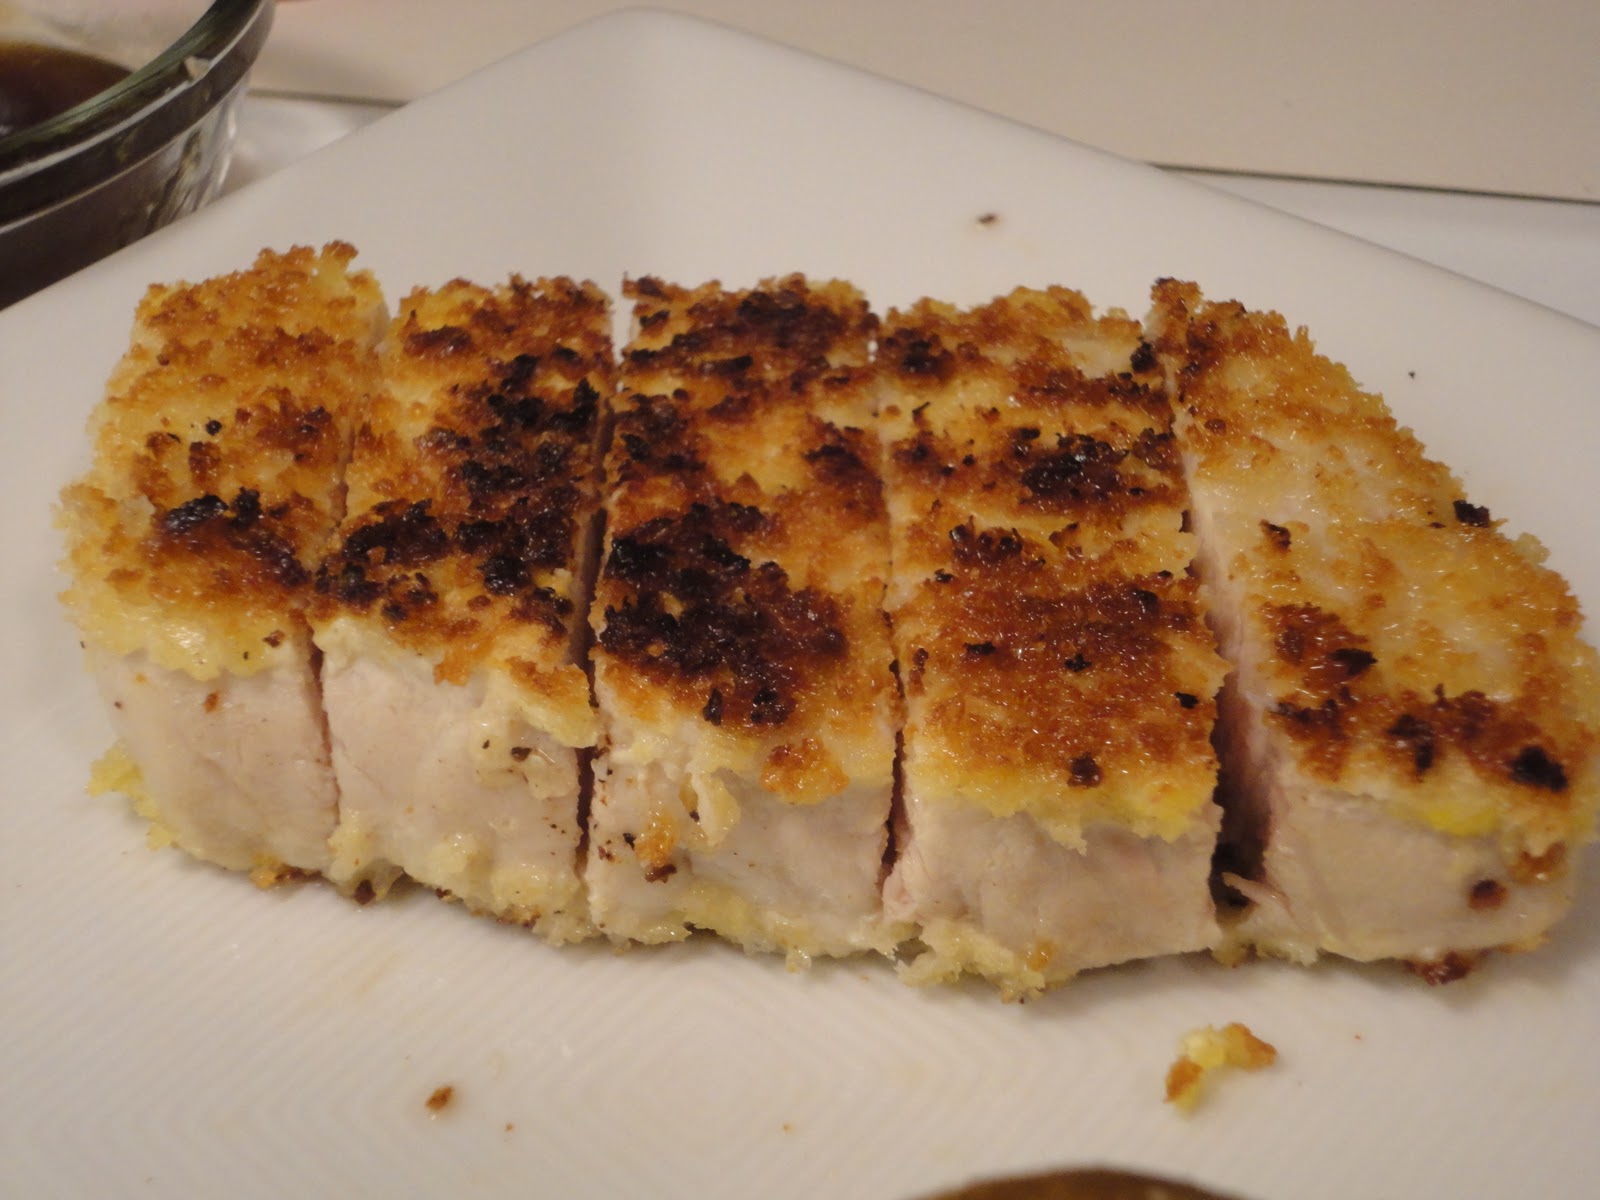
Honey-Lime Pork Chops with Garlic Mashed Red Potatoes


Mmmmm look at those deliciously whipped mashed potatoes back there...

For those of you that know me or have read certain blog posts, you know that I love cheese. A lot. Like, way more so than the average fan. My love for potatoes comes in close behind my love for cheese. Any potato in any form, I love it. I especially love mashed potatoes, but not just any ol' serving of mashed potatoes (because you CAN screw up mashed potatoes). These mashed potatoes, to my delight, were very good.

As I was reading through the recipe for the first time, I saw something that I had never seen before. This recipe calls for you to boil the potatoes WITH cloves of garlic also in the water! Nice! Why have I never thought of doing this before? I got really excited when I read this because I am a big fan of garlic. A fresh head of garlic is something that I always make sure I have in the house. However, I am convinced that there HAS to be an easier way to peel garlic than standing there for several minutes tediously peeling the individual cloves of garlic. If you know of a method, please let me know!

Anyways, the potatoes were great! The final mashed product had a nice subtle hint of garlic. I personally think  that you could add even more garlic. And of course, the best way to make mashed potatoes is with a KitchenAid mixer. :-)

The pork chops also had a great flavor to them! They are supposed to marinate for 8 hours or overnight, so I got that together this morning before work and let them marinate all day. I'm not too crazy about soy sauce, so that flavor was a little more prevalent than I cared for, but the lime juice also really came through which I thought was delicious. We didn't have any of the sauce for the pork chops at the end, as you can see from the picture. I messed up the sauce the first time I made it. The recipe says to bring to a boil the six ingredients and in a SEPARATE bowl combine the cornstarch and water until smooth and then add that together to the broth mixture. The first time I did it, I added the cornstarch and water to the boiling broth mixture separately and it didn't turn out too well. The cornstarch just clumped together and wouldn't mix in. It took me a few minutes to realize that I had read the recipe wrong. So make sure you read through carefully! I made the sauce again, but as I was plating dinner, I realized that the pan with the sauce accidentally got washed out. No big deal! The pork chops were still delicious! They were very juicy and full of flavor after sitting in the marinade all day.

A yummy, simple meal! Give it a try!

Honey-Lime Pork Chops w/ Garlic Mashed Red Potatoes
Taste of Home: Everyday Light Meals
Published by Reiman Media Group, LLC in 2010.

Pork Chops


Prep time: 20 minutes + marinating  Grill: 15 minutes  Yield: 6 servings

1/2 cup lime juice
1/2 cup reduced-sodium soy sauce
2 tablespoons honey
2 garlic cloves, minced
6 boneless pork loin chops (4 ounces each)
Sauce:
3/4 cup reduced-sodium chicken broth
1 garlic clove, minced
 1 1/2 teaspoons honey
1/2 teaspoon lime juice
1/8 teaspoon browning sauce
Dash pepper
2 teaspoons cornstarch
2 teaspoons water

1. In a large resealable plastic bag, combine the first four ingredients. Add pork chops Seal bag and turn to coat; refrigerate for 8 hours or overnight.
2. Drain and discard marinade. Grill chops, covered, over medium heat or broil 4 in. from the heat for 6-7 minutes on each side or until juices run clear.
3. For sauce, combine the broth, garlic, honey, lime juice, browning sauce and pepper in a small saucepan. Bring to a boil. Combine cornstarch and water until smooth; stir into broth mixture. Return to a boil; cook and stir for 1-2 minutes or until thickened. Serve with pork chops.

Mashed Potatoes
 Prep/Total time: 30 minutes  Yield: 6 servings

8 medium red potatoes, quartered
3 garlic cloves, peeled
2 tablespoons butter
1/2 cup fat-free milk, warmed
1/2 teaspoon salt
1/4 cup grated Parmesan cheese

1. Place potatoes and garlic in a large saucepan; cover with water. Bring to a boil. Reduce heat; cover and simmer for 20-25 minutes or until the potatoes are very tender. Drain well.
2. Add the butter, milk and salt; mash. Stir in Parmesan cheese.

Labels:

Wednesday, December 28, 2011

Panko-Crusted Salmon


Whether you love salmon or hate salmon, I bet you will love this recipe! This was absolutely delicious!

One thing I loved about this recipe was that you could taste the different flavors individually, as well as a collective whole. In each bite you could taste the Dijon mustard, lemon and parsley and they all paired together so well with the salmon! It was especially tasty with a drizzle of fresh lemon juice on top. The slight crunch that the panko bread crumbs provided was a really nice touch!

As I mentioned in one of my posts last week, you can find panko bread crumbs in the Asian section of the grocery store. Tonight was the second time I have used them, and I'm a big fan now! They will surely be a staple in my pantry from now on.

The recipe calls for you to sear the salmon in an ovenproof pan on the stove, and then transfer that pan to the oven to finish cooking. Luckily, I am a somewhat new owner of a Pampered Chef stainless steel skillet, which is oven- and broiler-safe, so I just used that. However, if you do not have a pan that is able to go in the oven, then I'm sure you could just sear the salmon on the stove and then transfer the fish to a dish that can go in the oven to finish cooking. I'm not sure how much that will change the final result. I'm assuming that the skin will not be quite as browned, but I'm sure that the salmon as a whole will still taste great!

Besides the fact that this was very delicious and bursting with flavor, it was so easy and quick to put together! Hardly took any effort or time. This would be a great dish for you to try yourself to enter the contest/giveaway that I'm holding! :-) You have 5 more days to enter!

Panko-Crusted Salmon
Barefoot Contessa How Easy is That?
Published by Clarkson Potter/Publishers in 2010.

Total time: about 25 minutes  Yield: 4 servings

2/3 cup panko (Japanese dried bread crumbs)
2 tablespoons minced fresh parsley
1 teaspoon grated lemon zest
Kosher salt and freshly ground black pepper
2 tablespoons good olive oil
4 (6-8 ounce) salmon fillets, skin on
2 tablespoons Dijon mustard
2 tablespoons vegetable oil
Lemon wedges, for serving

1. Preheat the oven to 425°F.
2. In a small bowl, mix together the panko, parsley, lemon zest, 1/2 teaspoon salt, and 1/2 teaspoon pepper. Drizzle with the olive oil and stir until the crumbs are evenly coated. Set aside.
3. Place the salmon fillets, skin side down, on a board. Generously brush the top of the fillets with mustard and then sprinkle generously with salt and pepper. Press the panko mixture thickly on top of the mustard on each salmon fillet. The mustard will help the panko adhere.
4. Heat the vegetable oil over medium-high heat in a 12-inch cast-iron skillet or large heavy, ovenproof pan. When the oil is very hot, add the salmon fillets, skin side down, and sear for 3-4 minutes, without turning, to brown the skin.
5. Transfer the pan to the hot oven for 5-7 minutes until the salmon is almost cooked and the panko is browned. Remove from the oven, cover with aluminum foil, and allow to rest for 5-10 minutes. Serve the salmon hot or at room temperature with lemon wedges.

Labels:

Tuesday, December 27, 2011

Weeknight Bolognese


Ohhhh boy, you guys... I got some AWESOME new cookbooks for Christmas! My parents gave me two, Barefoot Contessa How Easy is That? and Taste of Home: Everyday Light Meals. I highly recommend both of these cookbooks! I'm very excited to dig into these two. The third cookbook I got was from my brother, The Lee Bros. Southern Cookbook: Stories and Recipes for Southerners and Would-be Southerners. Yeah buddy! This cookbook rocks! I love the fact that every recipe has a story behind it - it is a definite page-turner. I'm incredibly anxious to start making my way through it! I have already read through the introduction and several recipes and it has been hard for me to put the book down. Now I just need to get cookin'!

The majority of the recipes that I have posted in this food blog so far have been Pampered Chef recipes. I'm still going to do some Pampered Chef recipes, but I won't be quite so focused on Pampered Chef from now on. It's time to branch out more! I have three new cookbooks PACKED with some amazing recipes! My goal will be to still include at least one Pampered Chef recipe each week, since that is what my food blog was originally based on. But, you will start to see some different stuff now.

This recipe, Weeknight Bolognese, came from the first cookbook that I mentioned. It was very tasty! A great meal for a cold night. Which, tonight isn't super cold, but it has been rainy and yucky all day, so I thought this meal was fitting. As the cookbook states, Bolognese is a thick meat sauce that is a staple of northern Italy. This sauce had an incredible amount of flavor to it! The recipe calls for red wine as an ingredient, so we got a Redwood Creek Cabernet Sauvignon. I love Redwood Creek! You can find it in any grocery store and doesn't cost much. I personally think that you get a lot for what you pay with this wine. It paired exceptionally well with this meal. The food and the wine really brought out a lot of flavor in one another.

The recipe was really easy, and as I already said, full of flavor! The spices really came through, and the wine added as an ingredient added a lot to the meat sauce. Needless to say, I'm looking forward to the leftovers!

Weeknight Bolognese
Barefoot Contessa How Easy is That?
Published by Clarkson Potter/Publishers in 2010.

Total time: About 35-40 minutes  Yield: 4-5 servings

2 tablespoons good olive oil, plus extra to cook the pasta
1 pound lean ground sirloin
4 teaspoons minced garlic (4 cloves)
1 tablespoon dried oregano
1/4 teaspoon crushed red pepper flakes
1 1/4 cups dry red wine, divided
1 (28-ounce) can crushed tomatoes, preferably San Marzano
2 tablespoons tomato paste
Kosher salt and freshly ground black peper
3/4 pound dried pasta, such as orecchiette or small shells
1/4 teaspoon ground nutmeg
1/4 cup chopped fresh basil leaves, lightly packed
1/4 cup heavy cream
1/2 cup freshly grated Parmesan cheese, plus extra for serving

1. Heat 2 tablespoons of olive oil in a large (12-inch) skillet over medium-high heat. Add the ground sirloin and cook, crumbling the meat with a wooden spoon, for 5-7 minutes, until the meat has lost its pink color and has started to brown. Stir in the garlic, oregano, and red pepper flakes and cook for 1 more minute. Pour 1 cup of the wine into the skillet and stir to scrape up any browned bits. Add the tomatoes, tomato paste, 1 tablespoon salt, and 1 1/2 teaspoons pepper, stirring until combined. Bring to a boil, lower the heat, and simmer for 10 minutes.
2. Meanwhile, bring a large pot of water to a boil, add a tablespoon of salt, a splash of oil, and the pasta, and cook according to the directions on the box.
3. While the pasta cooks, finish the sauce. Add the nutmeg, basil, cream, and the remaining 1/4 cup wine to the sauce and simmer for 8 to 10 minutes, stirring occasionally until thickened. When the pasta is cooked, drain and pour into a large serving bowl. Add the sauce and 1/2 cup Parmesan and toss well. Serve hot with Parmesan on the side.

Labels:

Monday, December 26, 2011

Contest/Giveaway!


I began my food blog and adventure in the kitchen six months ago, so I decided it was time for a contest/giveaway! I have posted almost 70 new recipes since I started this blog 6 months ago (you can look through the archives listed on the right-hand side of my blog by each month). For the contest, you are to pick out one of the recipes I have posted and make it yourself! Take a picture of your finished product, and either post it on my facebook page or email me the picture at piratefan86@gmail.com. I will put all of the contestant's names in a hat, and whichever one I draw will receive a free Pampered Chef cookbook that I will mail to you! You have until next Monday, January 2 at 8pm. Have fun!

Friday, December 23, 2011

Santa Hat Brownies


How cute is this?? This was another great find from the wonderful world of Pinterest. Such a fun little treat for the holidays!

You can view the original recipe here. I did mine a little different. Her recipe has you make a pan of brownies and then use a cookie cutter to cut out circles of brownie. I think my method is easier (and probably less wasteful in the end). I got a box of my favorite brownie mix (Betty Crocker Original Supreme Brownie Mix - the one that comes with the pouch of Hershey's syrup) and split the batter among 36 of the mini baking cups. You just have to have one of the mini muffin pans. Most stores carry them, or you can see Pampered Chef's mini muffin pan here.

Another thing I did different from the original recipe was use Cool Whip instead of making the Mascarpone Buttercream. I'm sure that would be good too! You can see that whole recipe by clicking on the link I posted in the last paragraph.

Merry Christmas!

Santa Hat Brownies

1 package of your favorite brownie mix
fresh strawberries
1 container of Cool Whip

1. Preheat oven and prepare brownie mix according to package. Scoop into mini baking cups (fill cups about 3/4 full) in mini muffin pan and bake approximately 18 minutes (I started checking on mine every few minutes after 10 minutes)
2. After brownies cool, cut tops off strawberries and place upside down on top of brownies.
3. Fill a ziplock bag with Cool Whip and cut one corner off of bag. Gently pipe Cool Whip around the base of the strawberry and add a dot on top to complete the Santa hat effect.

Labels:

Chicken Enchiladas


Before I get into my story, I just have to say that I think the name of this recipe should be changed to "OHMYGODTHESEAREAMAZING Chicken Enchiladas".

Have you all heard of Pinterest before? If not, you need to stop what you're doing (finish reading my blog first) and check out this website! It is the best website ever! I have just recently been introduced to it and am completely addicted to it now. It is basically an image-based website where people share ideas and things that interest them. You have different "boards" and you "pin" your images with a description, etc. There are a lot of neat craft ideas and DIY projects on there, but there is also SOOOOOO many amazing recipe ideas!!! Holy cow! I could spend hours just browsing through all of the amazing food posts. One really cool thing about this website is that it has led me to other people's food blogs, which is where I got this recipe. Some random person that I don't even know pinned a picture of these chicken enchiladas with a fantastic review and a link to the food blog where they got it from. I'm so happy I found this!

These chicken enchiladas are phenomenal. I am by NO means anything that even closely resembles an expert chef and I don't like to brag, but you can't find in a restaurant what I made last night! These things were amazing!

It is a very involved recipe. Very involved. But TOTALLY worth it! Make sure you give yourself plenty of time. I think I got started about 5:20pm and it was about 6:45pm by the time the enchiladas were ready to go in the oven to bake. But it was fun! Luckily we had the yummy 5-Layer Mexican Dip to snack on. :-)

The recipe is very descriptive, so as long as you follow it carefully then there isn't too much explaining to do. One thing I did different was cook the chicken separate first and then let it sit in the sauce for about 10 minutes so that all the flavors and juices could mix together. I have a bad paranoia about chicken not being cooked all the way, and I just didn't trust that the chicken would fully cook simply by sitting in the simmering sauce for 12-20 minutes. I'm sure it would have been fine, but I decided to do that part a little different.

Also, the mixture is supposed to produce enough to fill 12 (6-inch) tortillas with 1/3 cup of the mixture, but I only got 8 tortillas out of that. That ended up being just fine because I only needed 8 anyways, but I'm not sure if I just didn't have enough chicken or what. Also, I didn't realize how much chili powder the recipe called for before I started cooking, so I ended up not having enough. :-( So sad. Obviously, the dish still turned out great, but it was missing about 2 tbsp of chili powder. Lesson learned - check your spices before you go grocery shopping and start cooking!!

Again, just give yourself enough time and follow the recipe carefully and you will produce the best chicken enchiladas you have ever had! Also make sure to check out Pinterest! You have to have an invite to join, so if you're interested then just let me know and I can email you an invitation. :-)

Chicken Enchiladas
Pink Parsley Food Blog

1 medium onion, chopped fine
2 jalapenos, seeded and chopped fine
1 teaspoon canola oil
3 medium cloves garlic, minced
3 tablespoons chili powder
2 teaspoons ground cumin
3 teaspoons sugar
1 15-oz can tomato sauce
1 cup water
1 large beefsteak tomato, seeded and chopped
1 pound boneless, skinless chicken breasts (2 large breasts)
1 cup extra sharp white cheddar, shredded
1 cup monterey jack cheese, shredded
1/2 cup minced fresh cilantro
12 (6-inch) soft corn tortillas
cooking spray
salt and ground black pepper

1. Preheat oven to 425°F.
2. Combine the onion, jalapeno, 1/2 teaspoon salt, and oil in a large saucepan. Cover and cook over medium-low heat, stirring often, until the onions and peppers have softened, 8-10 minutes. Stir in the garlic, chili powder, cumin, and sugar, and cook until fragrant, less than 30 seconds. Stir in the tomato sauce, water, and chopped tomato. Bring to a simmer, and cook until slightly thickened, 5 minutes.
3. Nestle the chicken into the sauce. Reduce heat to low, cover, and cook until chicken is cooked through (the thickest part reaches 160°F), about 12-20 minutes. Transfer the chicken to a plate, and set aside to cool.
4. Strain the sauce through a strainer into a medium bowl, pressing the onion mixture to extract as much liquid as possible. Transfer the onions to a large bowl and set aside. Season sauce with additional salt and pepper to taste.
5. Shred the chicken into bite-sized pieces. Add to the onion mixture, and add 1/4 cup of the enchilada sauce, 1 cup cheese, and the cilantro. Toss to combine.
6. Stack the tortillas on a plate and cover with plastic wrap; microwave on high until warm and pliable, 40-60 seconds. Spread the tortillas on a clean work surface, and spoon 1/3 cup of the chicken mixture evenly down the center of each. Tightly roll each tortilla and lay seam-side down in a greased 9x13 inch baking dish.
7. Lightly spray the tops of the enchiladas with cooking spray. Place in the oven, uncovered, for about 7 minutes, or until the tortillas start to brown slightly (skip this step if you don't like the crunch).
8. Reduce heat to 400°F. Remove enchiladas and pour sauce evenly on top. Top with the remaining cheese. Cover dish with foil, and bake an additional 20 minutes, or until heated through.
9. Remove foil and bake another 5 minutes, until cheese browns. Remove from oven and let stand 10 minutes before serving.
10. Serve with sour cream, guacamole, salsa, additional cilantro, etc.

Labels:

5-Layer Mexican Dip


I would say that one of my top five weaknesses is dip. It doesn't matter what kind - french onion dip, salsa, spinach & artichoke dip, marinara sauce, ranch dressing, any form of cheese dip, layered dip, hummus dip, crab dip... you name it, I love it. Just give me a bag of chips and a dip and I'm a happy girl.

We had some dear friends over last night who really like Mexican food, so I decided it was the perfect opportunity to try out this 5 Layer Mexican Dip that I had previously come across. Not only was it incredibly easy to put together, but it was very yummy as well! It needs to refrigerate for several hours, so I was able to quickly throw it together on my lunch break (which shows you how easy it is to fix) so that it would be ready in time for dinner.

At first, I had trouble finding refried black beans. I didn't see them next to the salsas and taco kits in the grocery store, so I checked the Hispanic section of the grocery store and found some there. They were really good with the chili powder and ground cumin mixed in! That really added a lot of flavor. I honestly think I could have added even a little more chili powder to it.

The recipe is very self-explanatory! Just mix, chop, layer and you're good to go! My husband doesn't like sour cream (I know, crazy right?) so I only spread that on half of the dish. I was very happy with how good this dip tasted! It makes a decent amount, so it is great for any type of gathering, party, tailgate or whatever. Enjoy!

5-Layer Mexican Dip
Kraft Recipes

Prep time: 10 min  Total time: 3 hr 10 min  Yield: 32 servings, 2 tbsp each

1 can (15 1/2 oz) refried black beans
1 tbsp chili powder
1/2 tsp ground cumin
1 cup sour cream
1 cup Kraft Shredded Cheddar Cheese
3 green onions, sliced
1/3 cup sliced black olives
1 tomato, chopped

1. Mix beans, chili powder and cumin; spread onto bottom of 9-inch pie plate.
2. Top with layers of remaining ingredients.
3. Refrigerate several hours; serve with tortilla chips.

Labels:

Monday, December 19, 2011

Panko-Crusted Pork with Plum Sauce


In the mood for some Asian cuisine? Look no further! This pork and plum sauce was very delicious. It also takes very little to fix. You'd have dinner ready quicker than it would take the Chinese delivery guy to bring you your food!

This was my first time using panko crumbs. But I can tell you that after tonight, it will be a staple in my cabinet! The cookbook states that, "Panko (PAHN-ko) crumbs are coarse, Japanese-style bread crumbs that are made from crustless bread. These crumbs lend a light and crispy coating to the pork." Coating the pork in the panko crumbs added some good flavor to  the pork, something different from what we're used to. Very tasty! You can find panko crumbs in the Asian section of your grocery store.

Now, the plum sauce. I can't lie to you guys - I didn't actually make the plum sauce. I bought some jarred plum sauce. I know, I know... if you are completely disgusted with me and never want to read my blog again then I understand. BUT, I didn't skip out on making it from scratch for no good reason! I had every intention of making the plum sauce, but my grocery store (whom I have complained about in this blog several times before for not carrying items that I need for my cooking), did not have any plum preserves. There wasn't even a spot on the shelf for it. SO, I found some jarred plum sauce (also found in the Asian section) that had the exact same ingredients that the cookbook listed for the made-from-scratch plum sauce.

The plum sauce that I bought was really good! The tart flavor of the plum sauce very nicely balanced out the flavor of the panko-crusted pork. Everything was delicious! Give this recipe a try next time you are in the mood for some (very quick) Asian food!

Panko-Crusted Pork with Plum Sauce
Pampered Chef Cooking for Two & More
Published by The Pampered Chef, Ltd. in 2006.

Prep time: 20 minutes  Total time: About 30 minutes  Yield: 2 servings

Pork
2 boneless pork loin chops, cut 3/4-inch thick (5-6 ounces)
1/4 teaspoon salt
2 tablespoons all-purpose flour
1 egg, lightly beaten
1/2 cup panko crumbs
1/4 cup vegetable oil

Plum Sauce
1/4 cup plum preserves
1 tablespoon rice vinegar
1 tablespoon soy sauce
1 garlic clove, pressed
1/2 teaspoon finely grated fresh gingerroot
2 tablespoons thinly sliced green onions with tops

1. For pork, flatten pork to 1/4-inch thickness using toothed side of Meat Tenderizer; trim excess fat. Season both sides of pork with salt. Lightly dredge pork in flour, shaking off excess; dip into beaten egg and then into panko crumbs, coating generously.
2. Heat oil in (10-in.) Skillet over medium heat until hot. Add pork; cook 4-6 minutes or until crust is deep golden brown and pork is no longer pink in center, turning once. Remove pork from Skillet; drain on paper towels.
3. Meanwhile, for plum sauce, combine preserves, vinegar, soy sauce, garlic and ginerroot in (1.5-qt.) Saucepan. Whisk over medium heat until heated through. Slice pork lengthwise into 4-5 strips; serve with sauce and garnish with green onions.

Labels:

Sunday, December 18, 2011

Crunch Top Apple Pie


Mmmmm I love apple pie...

I made this for Thanksgiving and it was a huge hit! The title of this recipe is Crunch Top Apple Pie, but I suppose that is false advertising because I didn't actually to the "crunch top." I just made the apple pie and ooooooh was it good!

This is a Paula Deen recipe. A lot of people joke about how much butter Paula Deen uses when she cooks, but this recipe surprisingly did not ask for a ridiculous amount of butter! Whenever I can, I like to look at online reviews of recipes I'm about to attempt... it is times like this when I am glad that I do that! There were MANY reviews of this recipe that suggested a slight change in the ingredients. The recipe calls for 3 1/2 cups peeled, chopped apples and one 16-ounce jar applesauce. However, after reading the overwhelming agreement among reviewers, I decided to follow their advice and only use 8 ounces of applesauce. So, my ingredients included 6 apples (3 red and 3 green), and only 8 ounces of applesauce.

Also, I have a bit of an obsession with cinnamon, so I MAY have added slightly more cinnamon than the recipe said to use. There were several reviews that suggested adding some nutmeg as well. It has been almost 4 weeks since I made this recipe, so I honestly can't remember if I added the nutmeg or not. If I did, then it was delicious! If I didn't, then I'm sure that addition would be delicious! :-)

Again, as you see from the pictures, I did not do the crunch topping or the lattice design mentioned in the recipe. And guess what? It was still amazing!

I used a Pampered Chef tool with this recipe that saved a GREAT deal of time and effort. I used the Apple Peeler/Corer/Slicer to cut up the apples, and not only did it peel the apples, but it made PERFECT slices for the pie!

The recipe was very easy to follow and I hope you try it out sometime! I was very happy with how it turned out, and everyone in my family loved it! It would be a great addition to your dessert table for Christmas this weekend!

Crunch Top Apple Pie

Prep time: 15 minutes  Cook time: 55 minutes  Yield: 6 to 8 servings

Dough and Filling
Dough for a double crust 9-inch pie (homemade, frozen, or refrigerated)
3/4 cup sugar
1 tbsp all-purpose flour
1 tsp ground cinnamon
Dash salt
3 1/2 cups peeled, chopped cooking apples
1 (16 ounce) jar applesauce
1 tbsp lemon juice
2 tbsp butter, chopped into small pieces

Crunch Topping
3 tbsp all-purpose flour
1 tbsp sugar
Dash salt
1 tbsp butter, at room temperature

1. Preheat oven to 425°F.
2. Line a 9-inch pie pan with half of dough. Combine sugar, flour, cinnamon, and salt in a bowl. Stir in apples, applesauce, and lemon juice. Spoon apple mixture into pie pan and dot with butter. Cut remaining crust into strips; arrange in a lattice design over top of pie. For crunch topping, combine flour, sugar and salt in a bowl. sing a fork, cut in butter until mixture is crumbly. Sprinkle over top of crust. Bake for 10 minutes, then reduce heat to 350°F and continue to bake for about 45 minutes, or until crust and topping are golden brown.

Labels:

Tuesday, December 13, 2011

Spanish-Style Stuffed Peppers


I loooove this recipe! It is so good! I have made it several times before, and in the past have added sausage to the stuffing mixture. I left the sausage out today so that this could be used as our vegetarian dinner for the week. You can actually find this recipe in two different Pampered Chef cookbooks - Quick Vegetarian Main Dishes and 29 Minutes to Dinner (both excellent cookbooks).

Adding sausage makes it a bit of a more hearty meal and also adds some great flavor. But it was also very delicious tonight without the sausage! If you do decide to add the sausage, cook the sausage before you begin preparing dinner and chop it up, then add it to the rice when you're mixing the vegetables in with the rice and stir it all together.

Yellow saffron rice is so yummy to me. I probably could have just sat there and just ate the whole pot of rice, but I restrained myself. The cookbook says that, "We used packaged yellow saffron rice, available in most grocery store, to save time in preparing this recipe. Yellow rice is flavored with onion and garlic as well as saffron, the most expensive spice in the world. Saffron adds a unique flavor and a beautiful color to the rice." Lucky for us, even though saffron is the most expensive spice in the world, packaged yellow saffron rice is NOT expensive.

This sparked my curiosity, so I did a little research. The spice is actually derived from a flower and has been traded and used for over four millennia! Isn't it pretty?
saffron crocus
picture from wikipedia 

Ok, back to the recipe... the packaged yellow saffron rice seemed to have cooked a lot faster than the regular brown rice that we normally make, so just make sure it doesn't start to stick to the bottom of the pan or anything. The recipe is pretty easy to follow and really doesn't take too long to put together. It says to microwave the red peppers for 3-4 minutes, but mine are always good to go after just 3 minutes. After you stir the vegetables (and sausage, if desired) into the rice and you place the red bell pepper halves in the skillet, you need to move a little fast with spooning the stuffing mixture into the peppers and getting the water into the bottom of the skillet so that the bottoms of the peppers don't burn. The recipe yields 4 servings, but each serving (half of a stuffed pepper) only has 250 calories in it, so if you're just cooking for two and really hungry, then you might want a whole pepper each (which is what this recipe produces). Of course, if you add the sausage, then just a regular serving of one half should be enough for dinner!

I really hope you try this recipe! It is so delicious and you will be very happy that you gave it a shot!

Spanish-Style Stuff Peppers
Published by The Pampered Chef, Ltd. in 2010.

Total time: 29 minutes  Yield: 4 servings

1 pkg (5 oz or 175 g) yellow saffron rice (plus ingredients to make rice)
2 medium red bell peppers
2 medium tomatoes
1 poblano pepper or small green bell pepper
1 green onion with top
1/4 cup chopped fresh cilantro, divided
1 tsp olive oil
2 garlic cloves, pressed
3/4 cup shredded Mexican cheese blend, divided
2 tbsp water

1. Prepare rice according to package directions in (1.5-qt.) Saucepan. As rice cooks, prepare bell peppers. Slice bell peppers in half lengthwise; remove and discard stems and seeds. Microwave, covered, in Large Micro-Cooker on high 3-4 minutes or until crisp-tender. Carefully remove bell peppers and pat dry with paper towels.
2. Meanwhile, core and seed tomatoes with Core & More. Using Santoku Knife, dice tomatoes and poblano pepper. Slice green onion, Chop cilantro.
3. Add oil to (10-in.) Skillet; heat over medium heat 1-3 minutes or until shimmering. Add tomatoes, poblano pepper, onion, half of the cilantro and garlic pressed with Garlic Press; cook 2-3 minutes or until onion is tender.
4. Stir vegetable mixture and 1/2 cup of the cheese into rice in Saucepan. Place bell peppers cut side up into Skillet; spoon rice mixture evenly into each pepper and sprinkle with remaining cheese. Add water to Skillet. Cover Skillet and heat over medium-low heat 3-5 minutes or until cheese is melted. Sprinkle with remaining cilantro.

Labels:

Sunday, December 11, 2011

Chicken & Broccoli Ring


My husband said that his mom used to make this all the time, but this was my first attempt at it. I thought it turned out pretty good! It took me some time to put it together (probably because it was my first time making it), but it was definitely worth the effort!

I like having the whole dinner all bundled up in this one dish. It was really good! I thought the dill added a lot of flavor and paired really well with the chicken. The only thing I had trouble with was tucking the points under the dough at the center of the ring. I tried a couple different ways to get the points tucked, but I had some trouble! Everything turned out fine, but I have yet to figure out the best way to do that part. That was the only tricky part to the recipe though - everything else was really easy to put together. The recipe says to bake for 25-30 minutes, but I ended up only baking mine for 20 minutes. The dough was fully cooked and golden brown after only 20 minutes and I didn't want to burn it, so just keep an eye on it while it bakes!

A few notes from the cookbook - 1) Dill weed is an herb with a fresh, distinctive flavor and has been used in cooking for thousands of years. Use it in salad dressings, breads, sauces and vegetables, 2) Dried dill weed can be substituted for the All-Purpose Dill Mix, if desired, and 3) The Small Round Stone is the perfect size to prepare personal pizzas and smaller quantities of food for smaller families.

Chicken & Broccoli Ring
Pampered Chef Stoneware Inspirations
Published by The Pampered Chef, Ltd. in 2005.

Prep time: 20 minutes  Bake time: 25-30 minutes  Yield: 4 servings

1 package (8 oz) refrigerated crescent rolls
1 cup coarsely chopped cooked chicken
3/4 cup coarsely chopped broccoli
1/2 cup (2 oz) shredded cheddar cheese
1/4 cup diced red bell pepper
2 tbsp mayonnaise
1 tsp Pantry All-Purpose Dill Mix
1 small garlic clove, pressed
1/8 tsp salt
1 egg white, lightly beaten
2 tbsp slivered almonds

1. Preheat oven to 375°F. Unroll crescent rolls; separate into eight triangles. Arrange triangles, slightly overlapping, in a circle on Small Round Stone with wide ends 3 inches from edge of baking stone (points will extend off the edge of the baking stone). Roll wide ends of dough toward center to create a 3-inch opening.
2. In Classic Batter Bowl, combine chicken, broccoli, cheese, bell pepper, mayonnaise, seasoning mix, garlic pressed with Garlic Press and salt; mix well.
3. Using Large Scoop, scoop filling evenly over dough in a continuous circle. Bring points of triangles up over filling and tuck under dough at center to form a ring. (Filling will show.) Lightly brush dough with egg white using Pastry Brush; sprinkle with almonds. Bake 25-30 minutes or until deep golden brown.

Labels:

Saturday, December 10, 2011

Brew Pub Pork Chops

A quick post tonight! This recipe was really good. The mixture that was brushed on the pork chops was very tasty, and that combined with the marinade made for some very tasty pork chops! I was really pleased with how they came out - very juicy and full of flavor! I highly recommend this one! Happy Saturday!

Brew Pub Pork Chops
Kraft Foods

Prep time: 10 minutes  Total time: 1 hour 22 minutes  Yield: 4 servings

1 cup beer
1 cup water
2 tbsp sugar
1 tbsp salt
4 bone-in pork chops (1-1/2 lb.)
1/4 cup Kraft Real Mayo Mayonnaise
1 tbsp Grey Poupon Dijon Mustard
1 clove garlic, minced
1/2 tsp chopped fresh rosemary

1. Mix first 4 ingredients until sugar is dissolved; pour over chops in shallow dish. Turn chops over to evenly coat both sides of each chop. Refrigerate 1 hour to marinate.
2. Meanwhile, mix remaining ingredients.
3. Heat grill to medium-high heat. Remove chops from marinade; discard marinade. Grill chops 5-6 minutes on each side or until done (160°F), brushing occasionally with mayo mixture.

Labels:

Thursday, December 8, 2011

Barbecue Salmon with Radish Slaw


This wasn't one of my favorite recipes that I've tried... I actually didn't even really follow the recipe a whole lot, but I still wanted to share it with you in case one of you may be interested in giving it a try! I baked the salmon in the oven rather than using a Grill Pan, but still used the Smoky Barbecue Rub and brushed the salmon with the vinegar and honey mixture. I only brushed half of the salmon with the vinegar/honey mixture, and I'm very glad that I did. It wasn't that good! It was very sweet and overpowering. You couldn't even taste the salmon. But, the half of the salmon that only had the Smoky Barbecue Rub on it was pretty good.

I didn't make the radish slaw. I forgot to get the ingredients and then it was a long day and I didn't feel like going back out to the store blah, blah, blah... but I'm kind of glad that I didn't make it now because it would have been mixed with the remaining vinegar/honey mixture, which we didn't really like. So, it all worked out!

A few notes from the cookbook: 1) The Ultimate Mandoline quickly and evenly slices radishes. To easily cut slices into julienne strips, arrange slices in a long row before cutting crosswise, 2) To check for bones in salmon fillet, bend raw fillet back and run fingers over surface of fillet. You can easily pull out any pin bones with your fingers, and 3) Reducing the vinegar evaporates the water and intensifies the flavor.

Maybe some of you will enjoy this - let me know!

Barbecue Salmon with Radish Slaw
Pampered Chef 29 Minutes to Dinner
Published by The Pampered Chef, Ltd. in 2007.

Total time: 23 minutes  Yield: 4 servings

1/2 cup cider vinegar
1/3 cup honey
1 lb radishes (about 3 cups)
1 medium carrot
2 tbsp snipped fresh parsley
4 skinless salmon fillets (4 oz each)
2 tbsp Smoky Barbecue Rub
1/2 tsp salt
1/2 tsp coarsely ground black pepper
1 tbsp olive oil

1. Pour vinegar into Small Batter Bowl. Microwave on high 4 minutes or until reduced by half. Whisk in honey; microwave an additional 3-4 minutes or until beginning to thicken. Using Oven Mitts, carefully remove batter bowl from microwave; set aside to cool. (Honey mixture will be very hot.)
2. Meanwhile, slice radishes using Ultimate Mandoline fitted with v-shaped blade. Cut slices into thin julienne strips with Santoku Knife. Peel carrot; cut into julienne strips using Julienne Peeler. Snip parsley using Kitchen Shears. Combine radishes, carrot and parsley in Classic Batter Bowl.
3. Heat Grill Pan over medium-high heat 5 minutes. As pan heats, coat salmon on all sides with barbecue rub. Cook 2-3 minutes or until grill marks appear. Turn salmon over; cook 2-3 minutes or until salmon flakes easily with a fork. Remove from heat. Pour 3 tbsp of the honey mixture into Prep Bowl and brush over salmon.
4. To serve, whisk salt and black pepper into remaining honey mixture. Slowly add oil while whisking constantly until blended. Pour vinaigrette over radish mixture; toss to coat. Serve slaw immediately with salmon.

Labels:

Tuesday, December 6, 2011

Autumn Wild Rice Salad with Chicken


This post will probably be short because I'm tired! haha :-) I did a recipe similar to this a few months ago. You can view it by clicking here. I liked this one better! I thought this meal had a lot more flavor to it. I think the dressing had a lot to do with it. Mixing that dressing, grapes and pears in with the rice was delicious! The pears were also a very nice touch. They paired exceptionally well with the chicken! I never thought to put chicken and pear together, but I will surely have to do that again! Overall, this meal was very easy to put together and VERY delicious and full of flavor!

A few notes from the cookbook: 1) Packaged wild rice blend consists of a variety of wild rice and whole grain brown rice and can be found with other rice varieties in most grocery stores, and 2) To toast hazelnuts, place whole hazelnuts in Small Micro-Cooker; microwave, covered, on high 2-4 minutes or until toasted, stirring every 30 seconds.

Autumn Wild Rice Salad with Chicken
Pampered Chef Make it Fresh, Make it Healthy
Published by The Pampered Chef, Ltd. in 2011.

Prep time: 15 minutes  Total time: 1 hour  Yield: 6 servings

Dressing
1/2 cup white balsamic vinegar
3 tbsp packed brown sugar
2 tsp Dijon mustard
1 tsp olive oil
1/4 tsp salt
1/4 tsp coarsely ground black pepper

Salad & Chicken
1 1/4 cups uncooked wild rice blend
1 medium pear
2 green onions with tops
1 cup seedless red grapes
1/3 cup coarsely chopped hazelnuts, toasted
18 oz boneless, skinless chicken breasts
1/4 tsp each salt and coarsely ground black pepper
12 green leaf lettuce leaves
2 oz blue cheese, crumbled

1. For dressing, whisk together ingredients in [1-cup] Easy Read Measuring Cup; set aside.
2. For salad, prepare rice blend according to package directions, omitting salt and oil. Place cooked rice in Stainless [4-qt.] Mixing Bowl; set aside to cool. Meanwhile, thinly slice pear and onions. Cut pear slices and grapes in half. Add pear, onions, grapes and hazelnuts to mixing bowl. Pour dressing over rice mixture; mix gently with Mix 'N Scraper until well coated.
3. Spray [12-in.] Skillet with canola oil using Kitchen Spritzer; heat over medium-high heat 1-3 minutes or until shimmering. Flatten chicken to an even thickness using Meat Tenderizer; season with salt and black pepper. Cook chicken 3-4 minutes on each side or until centers are no longer pink. Remove chicken from Skillet to Cutting Board; set aside to cool. Thinly slice chicken.
4. To serve, divide lettuce leaves among serving plates; top with rice mixture, chicken and cheese.

Labels:

Monday, December 5, 2011

Portobello & Blue Cheese Burgers


YUM!! This is a very tasty alternative to the traditional beef burger.

There is so much flavor packed into this burger! I loved marinating the portobello mushrooms in the balsamic vinaigrette. I don't have a Grill Pan/Grill Press, so I used our George Foreman grill, which worked out just fine! I also just used a saute pan for the onion. The onion and blue cheese were both also really good and added a nice touch to everything. The only problem I ran into was that I had some trouble eating it! I had difficulty biting into the portobello mushroom. I'm not sure if I cooked it too long, not long enough, or if that is just how portobello mushrooms are. My husband made it through the meal alright, but I ended up getting a fork and knife to eat most of it. That didn't bother me though - it was still delicious!

A few notes from the cookbook: 1) When removing brown gills from undersides of mushrooms, leave a small amount of the gills around the outer edge. This will help keep the mushroom caps intact when grilling, 2) To clean mushrooms, wipe them with a damp paper towel. To prevent mushrooms from becoming soggy, do not clean them until ready to use, and 3) Blot tomato slices with paper towels to remove excess moisture.

Give this healthy, yummy version a try next time you're in the mood for a burger! You won't be disappointed!

Portobello & Blue Cheese Burgers
Pampered Chef The Vegetarian Table
Published by The Pampered Chef, Ltd. in 2011.

Prep time: 10 minutes  Total time: 30 minutes Yield: 4 servings

4 large portobello mushroom caps (about 4-5 in. in diameter)
1/4 cup prepared balsamic vinaigrette
1 medium onion
2 tsp sugar
1 large tomato, sliced
3 oz blue cheese, crumbled
1/4 tsp coarsely ground black pepper
4 large onion rolls
1 cup mixed greens salad blend

1. Using Avocado Peeler, remove and discard brown gills from undersides of mushroom caps. Combine mushrooms and vinaigrette in large resealable plastic bag; seal bag and turn carefully to coat. Let stand 20 minutes.
2. Preheat oven to 400°F. Heat Grill Pan over medium-high heat 3 minutes. Slice onion using Simple Slice on #2 setting. Spray pan with canola oil using Kitchen Spritzer. Add onion and sugar to pan; cook 6-8 minutes or until golden brown, stirring frequently. Remove pan from heat. Remove onion from pan to Cutting Board; tent with foil and set aside.
3. Return pan to heat. Remove mushrooms from bag; carefully pour vinaigrette into [1-cup] Prep Bowl. Place mushrooms rounded side down in pan. Brush mushrooms with half of the vinaigrette using Chef's Silicone Basting Brush; top with Grill Press. Cook mushrooms 3-4 minutes or until grill marks appear. Turn mushrooms over; brush with remaining vinaigrette. Top with Grill Press and cook 3-4 minutes or until grill marks appear. Remove pan from heat.
4. Remove Grill Press. Top mushrooms with tomato slices and cheese; bake 5-6 minutes or until cheese is softened. Carefully remove pan from oven to Stackable Cooling Rack using Oven Mitts. Sprinkle with black pepper. To assemble, place onions on roll bottoms; top with mushrooms, mixed greens and roll tops.

Labels: