Tuesday, February 28, 2012

Spaghetti Aglio e Olio

Spaghetti Aglio e Olio is Italian for "spaghetti with garlic and oil." (If you go to Google Translate, you can type that in and listen to the correct pronunciation. All I will say is that I was no where NEAR pronouncing it correctly, haha!) The cookbook suggests that if you want more than just the spaghetti, to add some roasted shrimp and broccoli to the pasta, which is what I decided to do.

 Mmm yummy shrimp and broccoli roasting on the stove.

 I wanted to get a picture of just the spaghetti since that is just what the original recipe is for.
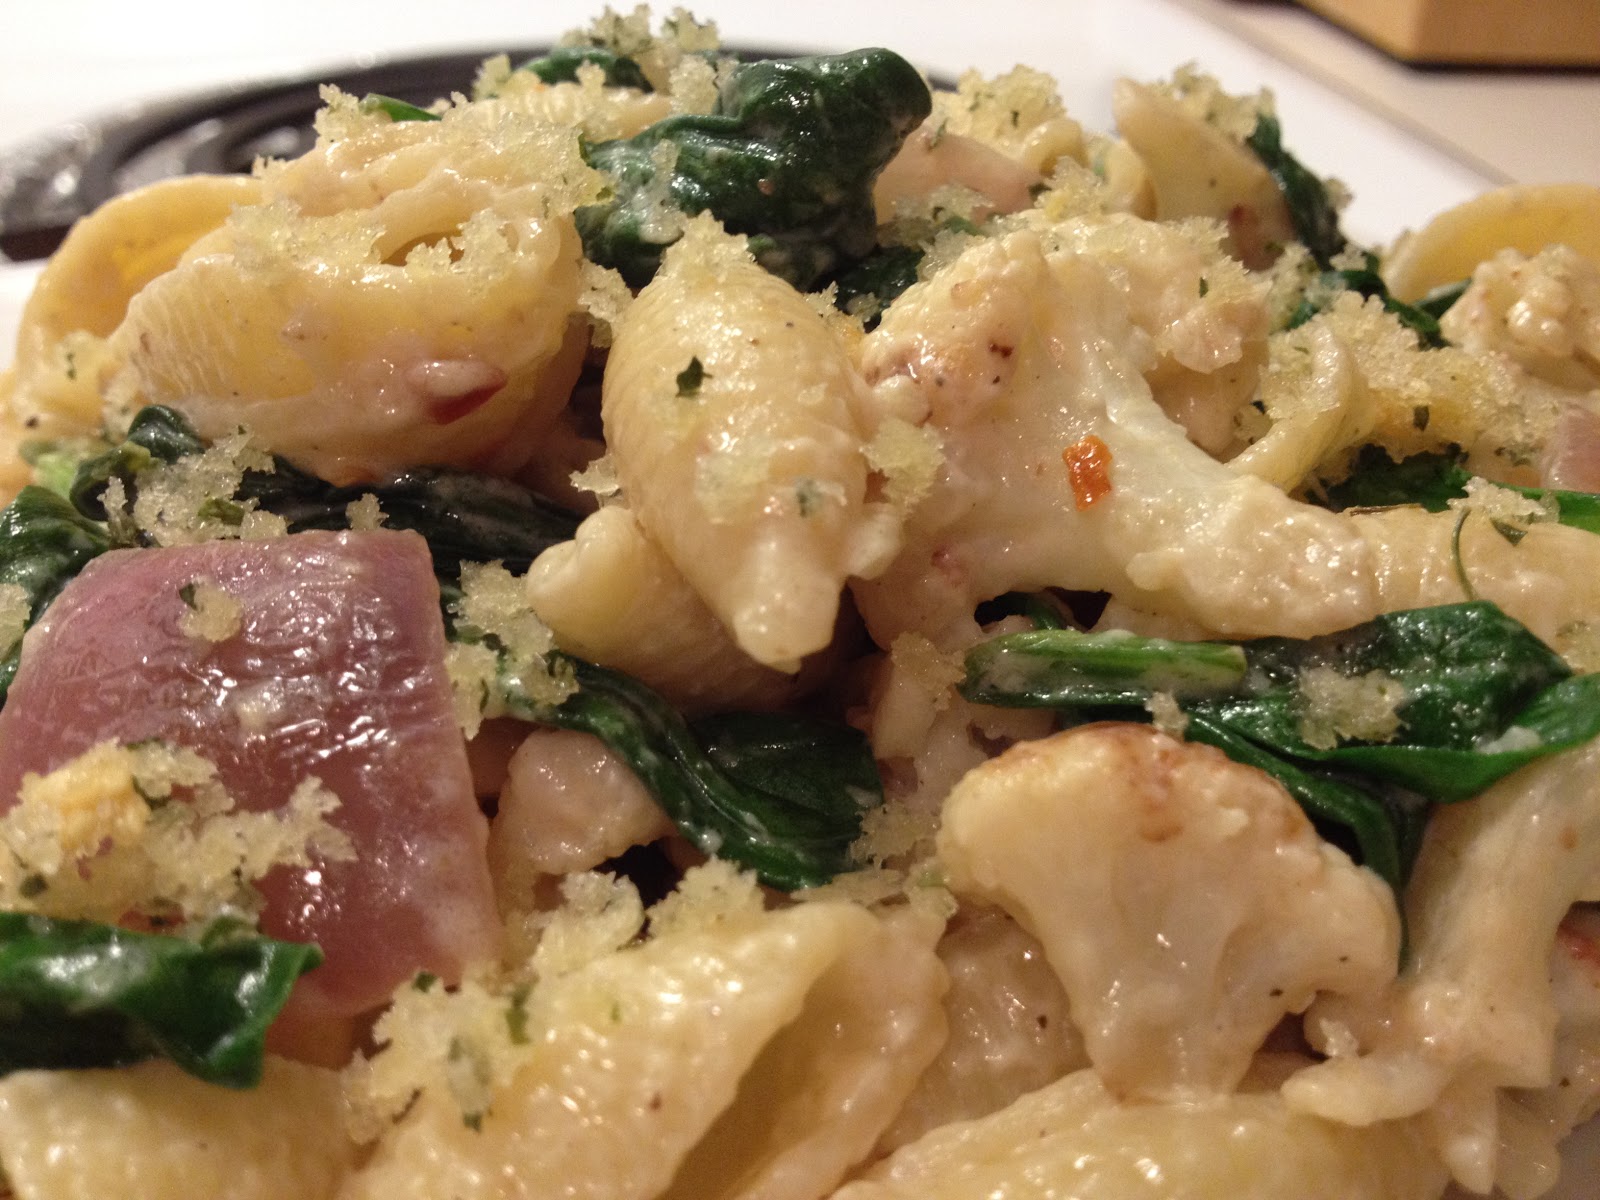
The final product!

What a wonderfully simple and delicious meal! I am a huge fan of both garlic and olive oil, so I completely fell in love with this spaghetti. The red pepper flakes added a fantastic dynamic to everything. It doesn't take much red pepper flakes to get some heat going! 

I am really happy that I decided to add the shrimp and broccoli. While the spaghetti was delicious on its own, it was good to have a little more than just the noodles. The recipe doesn't include the preparation of the shrimp and broccoli, so what I did was just toss the shrimp in some olive oil and then once they finished cooking, add the broccoli florets and let them roast until they were cooked. I then added the shrimp and broccoli to the pasta at the very end after I had finished mixing everything together for the spaghetti. The shrimp and broccoli paired perfectly with the flavors the spaghetti already had going on.

Enjoy!

Spaghetti Aglio e Olio
Published by Clarkson Potter/Publishers in 2010.

Yield: 4 servings

Kosher salt
1 pound dried spaghetti
1/3 cup good olive oil
8 large garlic cloves, cut into thin slivers
1/2 teaspoon crushed red pepper flakes
1/2 cup minced fresh parsley
1 cup freshly grated Parmesan cheese, plus extra for serving
shrimp and broccoli florets, if desired

1. Bring a large pot of water to a boil. Add 2 tablespoons of salt and the pasta and cook according to the directions on the package. Set aside 1 1/2 cups of the pasta cooking water before you drain the pasta.
2. Meanwhile, heat the olive oil over medium heat in a pot large enough to hold the pasta, such as a 12-inch saute pan or a large, shallow pot. Add the garlic and cook for 2 minutes, stirring frequently, until it just begins to turn golden on the edges - don't overcook it! Add the red pepper flakes and cook for 30 seconds more. Carefully add the reserved pasta-cooking water to the garlic and oil and bring to a boil. Lower the heat, add 1 teaspoon of salt, and simmer for about 5 minutes, until the liquid is reduced by about a third.
2a. During this step is when I roasted my shrimp and broccoli. 
3. Add the drained pasta to the garlic sauce and toss. Off the heat, add the parsley and Parmesan and toss well. Allow the pasta to rest off the heat for 5 minutes for the sauce to be absorbed. (Add the cooked shrimp and broccoli: toss.)Taste for seasoning and serve warm with extra Parmesan on the side.


Monday, February 27, 2012

Black-Eyed Pea Burgers with Summer Squash Slaw


If you've been following my blog, then you know that I try to cook at least one vegetarian meal per week. Lately, it seems like most of my vegetarian meals I've been making are some type of pasta. We tried tofu once, and although I see many tofu recipes that look pretty yummy, I don't think my husband and I are quite ready for tofu. That said, my goal for this week was to find a non-pasta, non-tofu, delicious vegetarian dinner. I was successful!

These burgers were delicious! I got excited about the idea of the burger when I first came across it, but then I started to become a little skeptical as I was mixing everything together. But once I took that first bite, I was hooked! Of course it's not quite like eating a traditional beef burger, but these had a great flavor and we both really enjoyed them! You definitely taste the black-eyed peas up front, but then the subtle flavors of the roasted red peppers, adobo sauce and other spices come through as well. I tried some bites without the slaw and also with the slaw. With the slaw on the burger, you definitely taste a lot more of the adobo sauce, which adds a great kick to everything and tastes really good with the flavor of the burger. Overall, a delicious success!

The recipe does have you use a food processor, which I unfortunately do not have. (My birthday is coming up! hint hint, wink wink...) We had to do all of the chopping and mashing and mixing by hand, which took a little longer, but well worth the effort. Assembly was a breeze and the burgers cooked perfectly in the skillet! I highly recommend you give this recipe a try next time you want a tasty alternative to the traditional beef burger!

Black-Eyed Pea Burgers with Summer Squash Slaw
Pampered Chef The Vegetarian Table
Published by The Pampered Chef, Ltd. in 2011.

Prep time: 20 minutes  Total time: 35 minutes  Yield: 4 servings

Burgers
1 can (15.5 oz) black-eyed peas, drained and rinsed
1 cup quick-cooking rolled oats
2/3 cup loosely packed fresh parsley
1/2 cup jarred roasted red peppers, drained
2 large shallots
1 egg
1 tsp adobo sauce (from can of chipotle peppers in adobo sauce)
1/2 tsp coarsely ground black pepper
2 tbsp canola oil
4 leaves green leaf lettuce
4 cornmeal-dusted hamburger buns

Slaw
4 tbsp light mayonnaise
2 tsp adobo sauce
1 each small zucchini and yellow squash
3 green onions with tops

1. For burgers, place black-eyed peas in Manual Food Processor; cover and pump handle until coarsely chopped. Combine black-eyed peas and oats in Classic Batter Bowl. Place parsley, roasted peppers, shallots, egg, adobo sauce and black pepper in processor bowl; cover and pump handle until finely chopped. Add vegetable mixture to batter bowl; mix well. Let stand 10 minutes.
2. Meanwhile, for slaw, combine mayonnaise and adobo sauce in Stainless (2-qt.) Mixing Bowl; mix well. Cut zucchini and yellow squash into julienne strips using Julienne Peeler, avoiding seeds. Thinly slice green onions using Utility Knife. Add zucchini, yellow squash and green onions to mixing bowl; mix well.
3. Form black-eyed pea mixture into four 1/2-inch-thick patties. Heat oil in (12-in.) Skillet over medium heat 1-3 minutes or until shimmering. Cook patties 3-5 minutes on each side or until deep golden brown.
4. To assemble, place lettuce onto bun bottom; top with burger, slaw and bun top.

Sunday, February 26, 2012

Dark Chocolate Guinness Cake with Bailey's Buttercream

Oh my goodness... the next time you have an excuse to make a cake, make this one!!


My husband's birthday was the other week, so of course I wanted to make a birthday cake! I had come across this recipe many months ago and thought it looked incredible, but hadn't had an excuse to make it. My husband has always loved Guinness, so I decided that his birthday would be the perfect opportunity to make it!

This cake was so amazing! The cake was rich and moist and the frosting was so incredible! The wonderful Bailey's flavor was really showcased in this frosting and paired deliciously magnificent with the cake. The recipe says to keep the cake in the fridge at all times, but doing so made the cake lose a lot of its moisture (at least that is what happened to me). However, I learned that if you put your piece of cake in the microwave for 15 seconds after it has been in the fridge for a day or so then it is quite tasty!

I originally found this recipe on Pinterest, and then fell in love with the blog that it came from! I'm not going to actually type out the recipe here because I want you to read through the recipe on the original blog it came from because it is a really neat post! Make sure to check it out! And definitely make sure to make this cake at some point!

http://globaltableadventure.com/2011/08/04/recipe-dark-chocolate-guinness-cake-with-baileys-buttercream/

Wednesday, February 22, 2012

Orecchiette with Roasted Cauliflower


I enjoyed my last cauliflower recipe that I posted so much that I thought I'd make another one this week. This one was pretty good. It's not my favorite recipe ever or anything, but it was pretty good. It felt like a lot went into putting it together. I was kind of hoping it would be more tasty than it was after all that went into the preparation. Although, I am pretty tired tonight. I had a pretty long day at work and then pushed myself through an hour long workout, so I may have just been a bit tired tonight, making it feel like it took more work to put dinner together than it really did. Reading through the recipe, it doesn't seem like it takes much to put together. So still make sure to give it a try!

I substituted a few of the ingredients. I couldn't find any orecchiette pasta in the store, but it looks pretty similar to shells, so I got some medium shells. Not exactly the same, but pretty close. I also was unable to find mascarpone cheese. While in the grocery store, I looked up on my phone a substitution for mascarpone cheese, and found a website that showed how to combine ricotta cheese and heavy cream to use as a mascarpone substitute. I mixed that together tonight, but ended up not using it. I'm not sure if I messed something up along the way, but it just did not look very appetizing at all!! It didn't look like something I wanted to mix in with the rest of the food. Luckily I had some cream cheese in the fridge, which I read tonight can also be used as a substitution for mascarpone cheese. So that is what I used and it worked out great!

The wine did add a nice flavor to the dish, and the red pepper flakes added a great little kick. The cauliflower turned out really good! And the panko bread crumb mixture added a pretty tasty slight crunch. Maybe I did like this dinner more than I realized...

Orecchiette with Roasted Cauliflower
Pampered Chef The Vegetarian Table
Published by The Pampered Chef, Ltd. in 2011.

Prep time: 40 minutes  Total time: 40 minutes  Yield: 6 servings

12 oz uncooked orecchiette pasta (3 cups)
1/2 cup panko bread crumbs
2 tbsp olive oil, divided
6 garlic cloves, pressed, divided
1/4 cup chopped fresh parsley
1/2 large head cauliflower (3 cups small florets)
1 medium red onion
1 1/4 tsp salt, divided
1 1/2 cups dry white wine such as Sauvignon Blanc
1/4 tsp crushed red pepper flakes
1/3 cup mascarpone cheese
2 oz Parmesan cheese, grated
1/2 tsp coarsely ground black pepper
5 cups fresh baby spinach leaves

1. Cook pasta according to package directions, omitting salt and oil. Carefully remove 1/2 cup of the cooking water for later use. Drain pasta and set aside. Meanwhile, combine bread crumbs, 1 tbsp of the oil and one of the pressed garlic cloves in Large Micro-Cooker; mix well. Microwave, uncovered, on high 1-2 minutes or until light golden brown, stirring every 30 seconds. Stir in parsley; set aside.
2. Cut cauliflower into small florets and onion into 1/2-in. wedges. Spray [12-in.] Skillet with olive oil using Kitchen Spritzer. Heat over medium-high heat 1-3 minutes or until shimmering. Add cauliflower and onion. Season with 1/4 tsp of the salt. Cook 3-4 minutes or until cauliflower is golden brown on all sides, stirring occasionally.
3. Stir in remaining 1 tbsp oil, remaining pressed garlic cloves, wine and pepper flakes; bring to a boil. Cook 2-3 minutes or until wine is reduced by half. Add pasta, reserved cooking water, cheeses, black pepper and remaining 1 tsp salt; mix well. Remove Skillet from heat. Add half of the spinach; stir until spinach begins to wilt. Add remaining spinach; stir 1-2 minutes or until spinach begins to wilt. Cover and let stand 10 minutes or until spinach is wilted and sauce is thickened, stirring once halfway through. Top each serving with bread crumb mixture.

Tuesday, February 21, 2012

Stir-Fried Scallops and Asparagus


My 100th post! Woohoo! And a very yummy post at that!

My husband and I both loved the fact that this recipe used ramen noodles. They're pretty much the best noodle ever. Or maybe we're just caught up in the nostalgia aspect of eating ramen noodles, bringing back memories of our college days. Either way, they were very tasty in this dish!

I knew I had some scallops in the freezer leftover from another recipe that called for them, but I didn't realize until it was time to cook that I only had a couple. Luckily, I also had some shrimp in the freezer, so I just turned this into a Stir-Fried Scallops and Shrimp and Asparagus meal! I knew that the shrimp would take little time to cook in the skillet, just like the scallops, so it all worked out just fine. Just throw the shrimp in the skillet at the same time as the scallops and you'll be fine. I thought it tasted great with the addition of the shrimp! I will definitely keep that change next time I make this!

The sauce that got mixed in with everything at the end was very tasty. The ingredients listed a teaspoon of hot pepper sauce. I wasn't 100% sure if hot pepper sauce is the same thing as say, Texas Pete hot sauce, but that is what we had and the first ingredient in Texas Pete is peppers, so I decided that would work and that is what I used. The hot sauce mixed really well with the soy sauce and lime juice and added a great flavor to the dish! The hot sauce, in my opinion, added more flavor rather than heat. There was a subtle level of heat to the food, but nothing overpowering by any means.

Everything mixed together was really good! And I hope you don't get tired of me saying this, but it was very simple to put together! A perfect quick, healthy, yummy dinner! Enjoy!

Stir-Fried Scallops and Asparagus
Taste of Home: Everyday Light Meals
Published by Reiman Media Group, Inc. in 2010.

Prep/Total time: 25 minutes  Yield: 4 servings

1 package (3 ounces) chicken ramen noodles
1 pound fresh asparagus, trimmed and cut into 1-inch pieces
1 garlic clove, minced
1 tablespoon olive oil
1 medium sweet red pepper, julienned
3 green onions, thinly sliced
1 pound sea scallops, halved horizontally
1 tablespoon lime juice
2 tablespoons reduced-sodium soy sauce
1 teaspoon sesame oil
1 teaspoon hot pepper sauce

1. Discard seasoning packet from ramen noodles or save for another use. Cook ramen noodles according to package directions; keep warm.
2. Meanwhile, in a nonstick skillet or wok, cook and stir asparagus and garlic in oil for 2 minutes. Add red pepper; cook and stir 1 minute longer. Add green onions; cook and stir 2 minutes longer. Stir in scallops. Cook for 3 minutes or until scallops are firm and opaque.
3. Combine the lime juice, soy sauce, sesame oil and hot pepper sauce; stir into skillet. Serve over ramen noodles.

Monday, February 20, 2012

Edamame Chicken Salad

This just might be one of my new favorite recipes! This was simply delicious! I absolutely LOVED how it used julienne strips of vegetables as a substitution for noodles. I love julienne-cut vegetables - so pretty!


And here is the final product:


Mmm mmm mmm!! There was so much flavor in this dish! My husband and I both love edamame. We had it for the first time a few months ago and instantly fell in love! I'm super excited to realize now that you can buy it frozen in the grocery store. In case you are unsure what edamame is, the cookbook says, "Edamame (eh-dah-MAH-meh) is the Japanese name for fresh soybeans. Edamame are bright to dark green in color and are served in many Japanese restaurants, steamed and salted, as a snack. They are available frozen in larger supermarkets and can be found fresh in Asian markets. Three cups of edamame in the pods will yield about 1 cup shelled." Next time you go to a Japanese restaurant, make sure to order some edamame! You will love it!

This was very simple to put together. Because the meal is to be chilled for some time, you could definitely put this together in the morning before work or even the night before and then dinner will be ready when you get home! The peanut butter mixture was terrific. The whole thing was terrific! All of the flavors combined was really quite delicious. I highly recommend this one!!

Edamame Chicken Salad
Pampered Chef: Cooking for Two & More
Published by The Pampered Chef, Ltd. in 2006.

Prep time: 20 minutes  Total time: about 50 minutes  Yield: 2 servings

1 1/4 cups frozen shelled edamame beans (green soybeans)
1 cup water
3 tablespoons reduced-fat creamy peanut butter
1 tablespoon sesame oil
1 tablespoon reduced-sodium soy sauce
1/4 cup rice vinegar
1 garlic clove
1 medium carrot, peeled
1 small zucchini
1 small yellow squash
1 cup diced cooked chicken
Thinly sliced green onion and chopped peanuts (optional)

1. Place edamame beans and water in Large Micro-Cooker; microwave on high 3-4 minutes or until beans are hot. Drain and cool completely. Meanwhile, in Classic Batter Bowl, combine peanut butter, oil, soy sauce, vinegar and garlic pressed with Garlic Press; mix well.
2. Cut carrot, zucchini and yellow squash into julienne strips using Julienne Peeler; add chicken and beans. Chill 30 minutes or until ready to serve. Add peanut butter mixture; toss to coat. Sprinkle with green onions and peanuts, if desired. Serve immediately.

Monday, February 13, 2012

Creamy One-Pot Pasta


I loooooove sun-dried tomatoes! Eating one is just like a punch of flavor to your taste buds. They're so good! The sun-dried tomatoes add a wonderful flavor to this pasta.

The recipe calls for penne pasta, but as you see, there are three different types of pasta in my dinner tonight. I had a little bit left over of penne pasta, bow-tie pasta and macaroni noodles, so I just decided to combine them all together so that I could clean my cabinet out of all of these boxes. For the broccoli, you could make it easier on yourself and just buy one of those pre-packaged bags of broccoli florets, but I've been on this "buy fresh as often as possible" kick for a while now, so I got a head of broccoli and cut it up into small florets myself. That left me with a decent amount of broccoli left over, but that just means I have some healthy snacks for the rest of the week now!

This is a great quick, healthy weeknight dinner for when you don't have much time to throw something together but you don't want to sacrifice good eating habits by going through a fast food drive-thru. I literally had dinner on the table within 20 minutes from the time I got started in the kitchen. Plus there was little to clean up since everything goes into the same one pot! And on top of all of that, it was delicious!!!

A few notes from the cookbook: 1) For an interesting flavor twist, omit black pepper, salt, Parmesan cheese and basil. Add 1 tbsp Moroccan Rub or Greek Rub, 2) Don't throw away remaining oil from the jar of sun-dried tomatoes. Reserve it to make salad dressing or pesto, and 3) If desired, 2 cups halved cherry tomatoes can be substituted for the sun-dried tomatoes.

Enjoy!

Creamy One-Pot Pasta
Pampered Chef Quick Vegetarian Main Dishes
Published by The Pampered Chef, Ltd. in 2010.

Total time: 20 minutes  Yield: 6 servings

4 garlic cloves, peeled
1 jar (7 oz) sun-dried tomatoes in oil, undrained
3 cans (14.5 oz each) vegetable broth
1 lb uncooked penne pasta
1 head broccoli (2 cups small florets)
2 medium carrots, peeled
4 oz reduced-fat cream cheese
1/2 tsp coarsely ground black pepper
1/4 tsp salt
Grated fresh Parmesan cheese and snipped fresh basil leaves (optional)

1. Slice garlic using Garlic Slicer. Place garlic and 1 tbsp oil from sun-dried tomatoes into (8-qt.) Stockpot; cook over medium heat 2-3 minutes or until garlic is golden brown, stirring occasionally. Remove from heat; add broth. Return Stockpot to burner; increase heat to high. Cover and bring to a boil. Add pasta; cover and simmer vigorously 8-10 minutes or until pasta is almost cooked but still firm, stirring occasionally using Mega Scraper.
2. Meanwhile, cut broccoli into small florets; place into Classic Batter Bowl. Cut carrots in half lengthwise; thinly slice crosswise on a bias. Drain tomatoes; pat dry and slice into thin strips.
3. Cut cream cheese into cubes. Add vegetables, cream cheese, black pepper and salt to pasta; stir until cream cheese is melted and fully incorporated. Reduce heat to medium; cover and cook an additional 2-4 minutes or until vegetables are tender. If desired, top with Parmesan cheese and basil.

Thursday, February 9, 2012

Grilled Chicken with Spinach and Melted Mozzarella


I got a new phone yesterday and the camera on my new phone takes better pictures (see above) than my regular camera did! Geez! Haha

This was kind of a last minute recipe idea. I normally plan out recipes for the entire week, but I didn't have anything planned for tonight. However, I REALLY didn't want to fight the 5pm mid-week grocery store crowd. I was trying to think of what I could fix based on what I had around the house, but I don't keep much extra food in the house besides what I know I'm going to use in my recipes each week. I knew I had some chicken in the freezer, and could have just fixed some plain chicken, but I really wanted to have a blog post for tonight since I haven't posted as much as I normally do this week.

I had come across this recipe and thought it looked really good, but I didn't think I had any spinach. Long story short, I was discussing my dilemma with my friend when she asked what vegetables I had. I knew I didn't have any fresh vegetables, but decided to double check the freezer to see if I had any frozen veggies. Lo and behold, there was some frozen spinach hidden in my freezer! Hooray! Fortunately, that was the only ingredient I was missing for this recipe (I had half a jar of roasted red peppers leftover from a previous recipe and some sliced mozzarella from sandwiches.)

This recipe was quite tasty! It was a great last minute dinner to throw together. It was very light, but satisfying. The roasted red peppers really added a lot of flavor to the dish! We kept it a low-carb meal and just had a garden salad on the side. Make sure to give this one a try!

Grilled Chicken with Spinach and Melted Mozzarella
http://www.skinnytaste.com/2011/03/grilled-chicken-with-spinach-and-melted.html

Yield: 6 servings

24 oz (3 large) chicken breasts sliced in half lengthwise to make 6 cutlets
salt and pepper to taste
1 tsp olive oil
3 cloves garlic, crushed
10 oz frozen spinach, drained
3 oz shredded park skim mozzarella
1 roasted red pepper, sliced in strips
olive oil spray

1. Preheat oven to 400°. Season chicken with salt and pepper. Lightly spray a grill with oil (I used my George Forman) or grill outside on a gas grill. Cook chicken on the grill until no longer pink, careful not to overcook or you'll have dry chicken.
2. Meanwhile, heat a saute pan on medium heat. Add oil and garlic, saute a few seconds, add spinach, salt and pepper. Cook a few minutes until heated through.
3. When chicken is done, lay on a baking sheet lined with foil or parchment for easy clean-up. Divide spinach evenly between the 6 pieces and place on top. Top each with half oz mozzarella, then slices of roasted pepper and bake until melted, about 6-8 minutes.

Tuesday, February 7, 2012

Cauliflower Penne Puttanesca


If you're like me, then the first question you have when you see the title of this recipe is, what is puttanesca? According to the Merriam-Webster Dictionary, puttanesca is defined as: served with or being a pungent tomato sauce typically containing olives, garlic, capers, hot pepper, and sometimes anchovies. Minus the anchovies, that nails this recipe on the head!

When I first came across this recipe, I thought the picture looked really good, but I was a little unsure about how flavorful it would be seeing as one of the main ingredients in cauliflower. I was pleasantly surprised! There was a very heavy tomato flavor that was really good. That combined with all of the other ingredients made for a very delicious meal!

This dish was very simple to put together. A yummy, quick healthy dinner! After having this, I'm going to have to find more recipes that use cauliflower - I was impressed!

Enjoy!

Cauliflower Penne Puttanesca
Real Simple

Total time: 25 minutes Yield: 4 servings

3/4 pound penne or some other short pasta
3 tablespoons olive oil
1 small head cauliflower (about 1 1/2 pounds), cored and cut into small florets
Kosher salt and black pepper
2 cloves garlic, chopped
1 28-ounce can whole peeled tomatoes
1/2 cup pitted kalamata olives, chopped
2 tablespoons capers, rinsed
1/4 teaspoon crushed red pepper
2 tablespoons chopped fresh flat-leaf parsley
Grated Parmesan, for serving

1. Cook the pasta according to the package directions. Drain and return it to the pot.
2. Meanwhile, heat the oil in a large skillet over medium-high heat. Add the cauliflower, 1/2 teaspoon salt, and 1/4 teaspoon black pepper. Cook, tossing occasionally, until golden, 4 to 6 minutes. Add the garlic and cook, stirring, until fragrant, about 1 minute. Add the tomatoes and their juices, olives, capers, and crushed red pepper. Cook, stirring occasionally and breaking up the tomatoes with a spoon, until the cauliflower is tender, 8 to 10 minutes more.
3. Toss the pasta with the sauce. Serve topped with the parsley and Parmesan.


Sunday, February 5, 2012

Omelette Flipping Skills

My husband and I went to visit one of his brothers (who I always call my homeboy) this weekend and had some good times with him and some other very cool people. We always have a good time when we get to hang out with our homeboy! This weekend was no exception!

We had a big group at his house this weekend, and so he and I went grocery shopping on Saturday to get stuff for breakfast on Sunday morning. We decided to make omelettes, so we decided to get tomatoes, green pepper, mushrooms, onion, spinach and cheese for the omelettes. In college, I majored in Hospitality Management, so one of the classes I had to take in my very first semester was a cooking class. I'll never forget the omelette test we had to take. We had to flip an omelette, as I do in the video below, for a test. If I remember correctly, I passed, but I ruined a lot of eggs during the learning process. I learned that you just gotta do it! You can't hold back when flipping an omelette. Just do it! It's pretty fun when it actually works out :-) Anyways, here is a video for your amusement. (And I thought the omelettes turned out pretty tasty too!) 


Thursday, February 2, 2012

Honey-Herb Pork


Yup, this was good!

Maybe one of these days I'll actually buy a whole pork tenderloin, but in the mean time, I'm happy with just getting a small package of pork chops whenever a recipe calls for a whole pork tenderloin. It's still good to me! The marinade was delicious! The recipe said that you only needed to marinate the pork for at least an hour, but I put it together earlier in the day and let the pork soak up the juices for most of the day. Very yummy! The combination of ingredients provided a great flavor!

Because the sauce had a mustardy flavor to it, I decided to make the mustard mash potatoes that I fell in love with last month. You can view that recipe here. They paired really well with the marinated pork chops! Everything was delicious! If you don't want to get the grill out, I'm sure you could bake the tenderloin in the oven.

Hope everyone has a great weekend! :-)

Honey-Herb Pork
Taste of Home: Everyday Light Meals
Published by Reiman Media Group, Inc. in 2010.

Prep: 10 min + marinating  Grill: 25 min + standing  Yield: 6 servings

1 cup beer or ginger ale
1/2 cup prepared mustard
1/2 cup honey
2 tablespoons canola oil
2 tablespoons onion powder
1 1/2 teaspoons dried rosemary, crushed
1 teaspoon salt
1 teaspoon garlic powder
1/4 teaspoon pepper
2 pork tenderloins (1 pound each)

1. In a small bowl, combine the first nine ingredients. Pour 1 cup marinade into a large resealable plastic bag; add the pork. Seal bag and turn to coat; refrigerate for at least 1 hour. Cover and refrigerate the remaining marinade for basting.
2. Coat grill rack with nonstick cooking spray before preparing the grill for indirect heat. Drain and discard marinade from pork. Grill, covered, over indirect medium heat for 25-30 minutes or until a meat thermometer reads 160°, basting occasionally with reserved marinade. Let stand for 10 minutes before slicing. Serve with any remaining marinade if desired.