Wednesday, November 30, 2011

Rigatoni with Tuna and Sun-Dried Tomatoes


What a simple and yummy meal! This is a great dinner to do if you are pressed for time. Hardly took any time at all to put together!

The sun-dried tomatoes added so much flavor! They were so delicious! Also tossing the pasta in the skillet with everything else added some nice flavor to the pasta (I already had bow-tie pasta in the cabinet, so I just used that instead of buying some rigatoni). I almost didn't add the crushed red pepper flakes because I have had a bad experience in the past with cooking red pepper flakes, but it didn't call for much so I went ahead and went through with it. I'm glad I did, because it gave the dish a nice, slight kick to it. Not too overpowering, just right. Using the lemon wedge at the end topped the whole dish off and really brought everything together!

A few notes from the cookbook: 1) Sun-dried tomatoes are vine-ripened tomatoes that have been picked and dried. These tomatoes deliver an intense flavor year round. Sun-dried tomatoes can be purchased dried or oil-packed, 2) This recipe is great with traditional Italian tuna, or tonno, which has a rich, mellow flavor. Look for olive oil-packed tuna in the gourmet or Italian section of larger supermarkets, 3) Canned tuna can be substituted for the vacuum-packed tuna, and 4) To round out the meal, serve with a fresh arugula salad tossed with red wine vinaigrette.

Rigatoni with Tuna and Sun-Dried Tomatoes
Pampered Chef 29 Minutes to Dinner
Published by The Pampered Chef, Ltd. in 2007.

Total time: 25 minutes  Yield: 4 servings

8 oz uncooked rigatoni pasta
2 oz Parmesan cheese, divided
1/2 cup sun-dried tomatoes packed in oil, drained
1/2 cup chopped fresh parsley, divided
1 lemon
3 tbsp olive oil
2 garlic cloves, pressed
1/2 tsp crushed red pepper flakes
1 pouch chunk light tuna

1. Bring salted water to a boil in (4-qt.) Casserole (Did they mean Saucepan?) Cook pasta according to package directions; drain.
2. Meanwhile, grate cheese using Deluxe Cheese Grater. Pat tomatoes dry using paper towels. Slice tomatoes and chop parsley using Santoku Knife. Cut lemon into wedges; set aside.
3. Heat oil, pressed garlic and pepper flakes in Stir-Fry Skillet over medium-high heat 1-2 minutes or until garlic turns golden (do not allow to burn). Immediately stir in tuna and tomatoes; cook 2-3 minutes or until tomatoes are tender. Add pasta, half of the parsley and half of the cheese to Skillet; toss gently.
4. To serve, divide pasta among serving plates. Sprinkle with remaining parsley and cheese. Serve with lemon wedges.

Labels:

Tuesday, November 29, 2011

Tarte Chocolat Caramel (Chocolate Caramel Tart)

Did you miss me? I know I have been MIA for the past week and a half. Lots of cooking still took place, but things were just super busy surrounding Thanksgiving! But, I'm back!

My family came over one night last week for dinner, which was very exciting for me! I started out with a Roasted Red Pepper Dip as an appetizer, which was quite tasty. For dinner, I served Florentine Stuffed Chicken Breasts, which I had been anxious to make again ever since I first made it back in early October, paired with a side salad and Asparagus with Mustard Sauce. I was very happy with how everything turned out! My brother helped me with the chicken, so that was fun having him in the kitchen with me!

But now, the focus point of this blog post.... the tart. Ohhhhh my goodness was this quite a tart. I really don't even know where to start. It was SO delicious! The made-from-scratch tart crust came out just perfect, not to mention the homemade caramel filling. Oh it just makes my mouth water thinking about it. The chocolate was the perfect consistency, although quite rich! It really wasn't hard to make. Anyone could make this, and you will surely impress anyone that eats some of it!

The recipe came from a collection of tart recipes that my brother gave me for Christmas a few years ago. There are many amazing recipes in there, but I think this one might be my favorite! I will post pictures as I go through the recipe below.

The Tarte Chocolat Caramel recipe starts out with the preparation of the Pâte Sablée:

1/3 cup sugar
1 cup plus 2 tablespoons all-purpose flour
1/4 teaspoon fine sea salt
7 tablespoons(3 1/2 ounces) chilled unsalted butter, diced, plus a pat to grease the pan
1 to 2 tablespoons cold milk

Makes enough to line a 10-inch tart pan, or six 4-inch tartlet molds.

1. Grease a 10-inch tart or quiche pan with butter.

2. If working with a food processor, combine the sugar, flour, and salt in the processor. Add the butter and process in short pulses, until the mixture resembles coarse meal. Add a tablespoon of milk and process again, in short purses, until the milk is absorbed. The dough should still be crumbly, but it should clump if you gently squeeze a handful in your hand. If it doesn't, add a little more milk, teaspoon by teaspoon, and give the dough a few more pulses, until it reaches the desired consistency. Proceed to step 3.

If working by hand, in a medium mixing bowl, combine the sugar, flour, and salt. Add the butter and rub it into the dry ingredients with the tips of your fingers or a wire pastry blender, until the mixture resembles coarse meal. Add a tablespoon of milk and blend it in, handling the dough as lightly as you can. The dough should still be crumbly, but it should clump if you gently squeeze a handful in your hand. If it doesn't, add a little more milk, teaspoon by teaspoon, and blend again, still working lightly, until it reaches the desired consistency. Proceed to step 3.

3. Pour the mixture into the prepared tart pan and use the back of a tablespoon to spread it evenly over the bottom. using the heels of your hands and your fingers, press down on the dough to form a thin layer, covering the surface of the pan and creating a rim all around. Don't worry if the dough feels a little dry - this is normal. Cover with plastic wrap and refrigerate for 30 minutes, or up to a day.

Now that we have our Pâte Sablée as our base, we move on to the Chocolate Caramel Tart recipe:

for the caramel filling
1/2 cup (packed) light brown sugar
1 tablespoon good-quality honey
1/2 teaspoon fleur de sel or kosher salt
1/3 cup crème fraîche or heavy cream
2 tablespoons unsalted butter, diced, plus a pat for greasing the pan

for the ganache filling
10 ounces good-quality bittersweet (or semi-sweet) chocolate, very finely chopped
1 cup crème fraîche or heavy cream

1. Grease a 10-inch tart pan with butter. Prepare the Pâte Sablée and line the pan as instructed. Wrap tightly with plastic and refrigerate for 30 minutes, or up to a day.
2. Preheat the oven to 350°F. Bake for 20-25 minutes, until golden, keeping an eye on it. Transfer to a rack to cool.
3. Prepare the caramel filling: make sure you have all the ingredients measured out before you start. Combine the brown sugar and 1 tablespoon water in a small heavy-bottomed saucepan and melt the sugar slowly over medium-low heat. Swish the pan around from time to time to ensure even melting, but don't stir. As soon as bubbles form on the surface (avoid overcooking the caramel, which would result in a bitter taste afterward), add the honey and stir to combine. Add the salt and cream and stir until blended. Remove from heat, add the butter, and stir to combine. Pour the caramel into the tart shell and tilt the pan slowly in a circular motion to coat the bottom of the shell evenly. Let set in the fridge for 40 minutes.

4. Prepare the ganache filling: put the chocolate in a medium mixing bowl, preferably stainless steel. Bring the cream to a simmer in a heavy-bottomed saucepan over medium-low heat. Pour half of the cream on the chocolate (cover the saucepan to keep the remaining cream warm), let stand for 20 seconds, and stir gently in the center with a whisk, gradually blending the cream with the chocolate until smooth. Add half of the remaining cream, and stir again until combined. Repeat with the remaining cream. Remove the tart pan from the fridge, pour the chocolate filling into the shell, and level the surface with a spatula. Return to the fridge to set for an hour.
 I got semi-sweet chocolate chips and just chopped them up the best I could and put them in the bowl. The heavy cream just melted them right away perfectly!
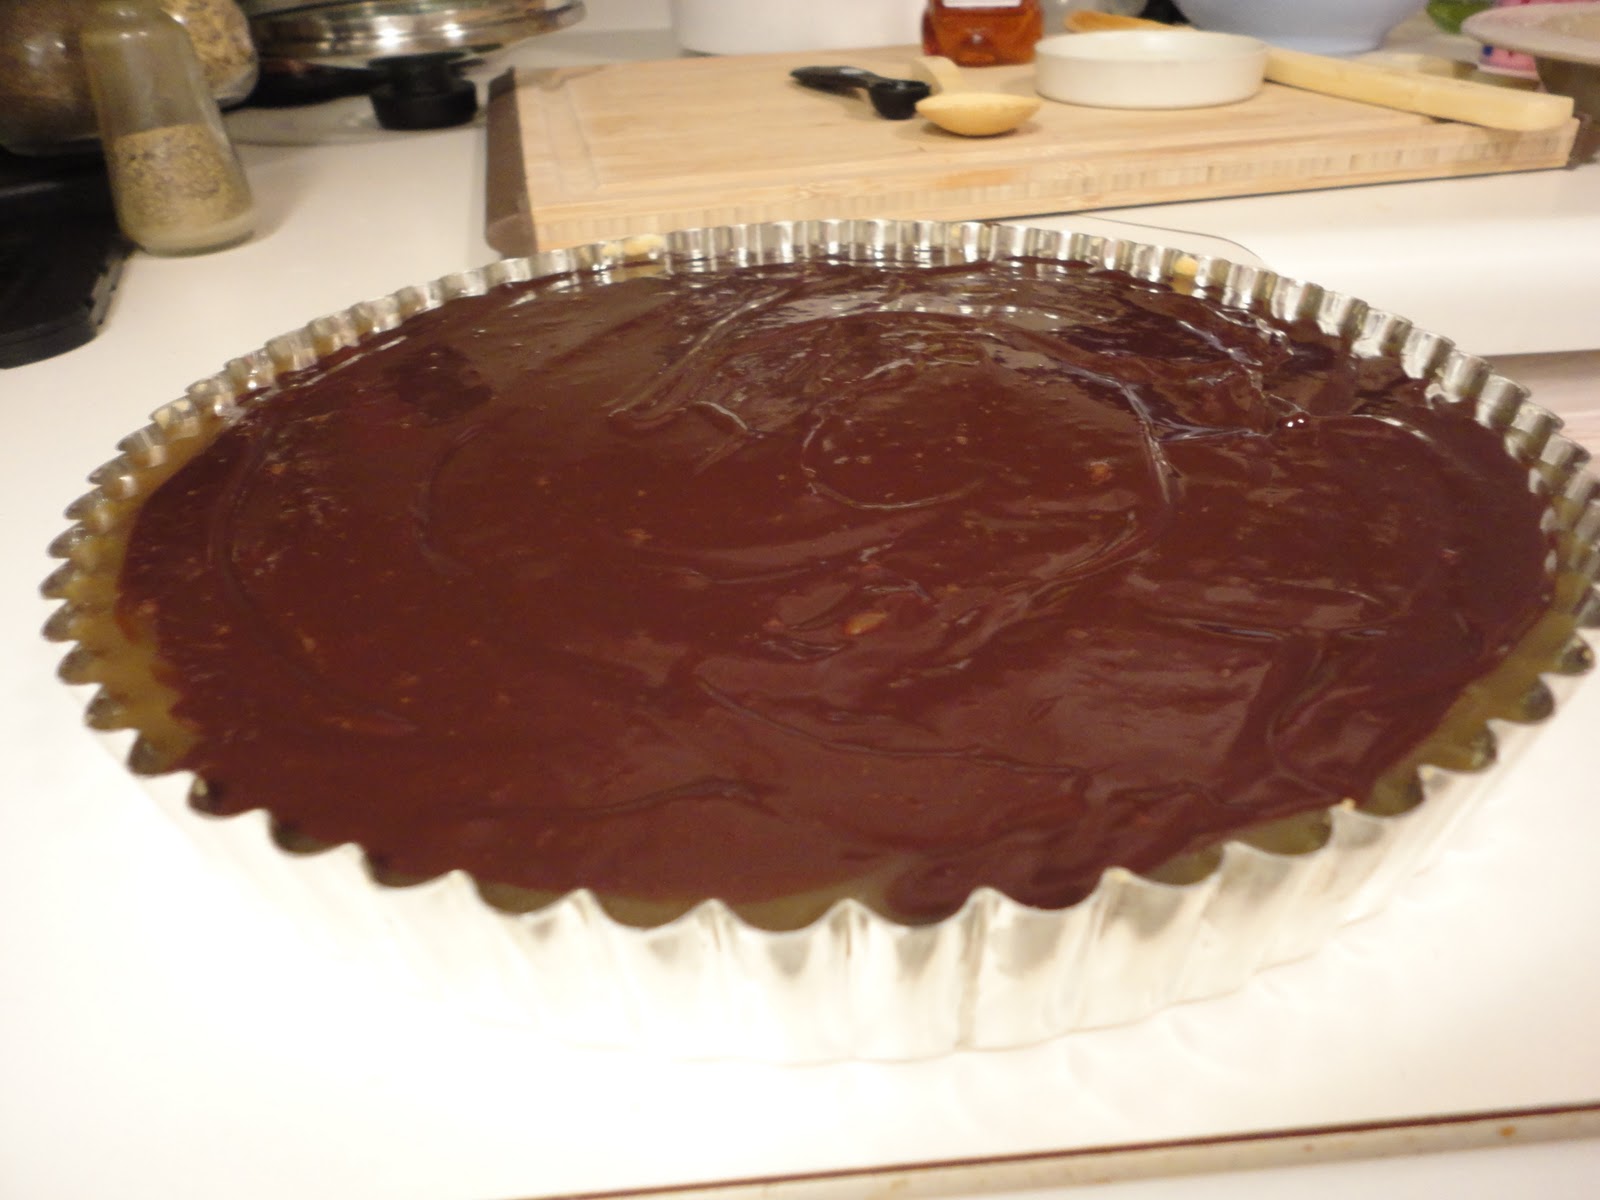
The final product before I put it in the fridge to set. When I poured the chocolate, it pushed some of the caramel out to the edges, but it still worked out just fine!

5. Remove the tart from the fridge 15 minutes before serving. Cut in small slices - it is quite rich - and serve on its own, or with fresh berries. The leftovers will keep for 2 days, tightly wrapped and refrigerated. 

 Just look at that caramel spilling over the edges! Yum!

I was SO happy with how amazingly delicious this dessert turned out! You'll be sorry if you don't give it a try!

Bon appétit!

Labels:

Thursday, November 17, 2011

Provençal Chicken with Brown Rice


This meal had a lot more flavor to it than I was expecting!

The rice was really good after being cooked in chicken broth. Really added a lot of flavor to it, especially since we're used to cooking rice with water. However, I am terrible at cooking rice. Terrible! I can never get it right! Maybe once in my cooking career have I made good rice. My husband rocks at it though. Even if I screw it up, he can come in and fix it! He says that the reason my rice never comes out right is because I always lift the lid off the pot and stir the rice, which makes all the steam get out... I'm sure he is right, but I just can't help but stir the rice! I'm always worried it will stick to the bottom of the pot! Maybe one of these days...

The sauce was delicious! The olives add a very unique taste to everything. The cookbook says that "caramelizing the tomato paste gives this sauce a slow-cooked flavor." Also, completely cleaning out the inside of the tomato makes sure the sauce won't become watered down. Everything was really easy to put together and didn't take too much time. And as I said, the sauce was very delicious!  Enjoy!


Provençal Chicken with Brown Rice
Pampered Chef 29 Minutes to Dinner
Published by The Pampered Chef, Ltd. in 2007.

Total time: 25 minutes  Yield: 2 servings

Rice
1 tsp olive oil
1 cup uncooked instant brown rice
1 cup chicken broth

Chicken
1 tbsp olive oil
2 boneless, skinless chicken breasts (4-6 oz. each)
1/4 tsp salt
1/8 coarsely ground black pepper

Sauce
2 tbsp tomato paste
3/4 cup water
1 garlic clove, pressed
1/4 cup pitted green olives
2 plum tomatoes

1. For rice, add oil to (1.5 qt.) Saucepan; heat over medium heat 1-3 minutes or until shimmering. Add rice; stir until well coated with oil. Add broth; bring to a boil. Cover; reduce heat to low and simmer 5 minutes. Remove from heat.
2. Meanwhile, for chicken, add oil to (10-in.) Saute Pan; heat over medium-high heat 1-3 minutes or until shimmering. Season chicken with salt and black pepper. Cook chicken 3-5 minutes or until golden brown. Turn chicken over; cook 3-5 minutes or until center of chicken is no longer pink. Remove chicken from pan to a plate; tent with aluminum foil.
3. For sauce, reduce heat to medium; add tomato paste to same Saute Pan and cook over medium heat 2 minutes or until tomato paste is caramelized, whisking constantly with Silicone Flat Whisk. Add water and pressed garlic; simmer 2-3 minutes or until sauce begins to thicken, whisking to loosen browned bits from bottom of pan.
4. As sauce simmer, cut olives lengthwise into quarters. Peel tomatoes using Serrated Peeler. Remove cores and seeds using Core & More. Slice tomatoes lengthwise into thin strips. Add chicken, olives and tomatoes to sauce; simmer until heated through.
5. To serve, divide rice between serving plates; top with chicken.

Labels:

Monday, November 14, 2011

Sweet Potato Enchiladas


Mmmmm... this was pretty yummy :-) I was a little unsure going into the recipe. When I hear "enchiladas," I think Mexican food, and never before have I thought of sweet potatoes when I've thought about Mexican food. But the sweet potatoes added a terrific flavor to the dish! The whole combination of the sweet potatoes, vegetables and enchilada sauce and everything was delicious! This is definitely a dish that I will be cooking again.

A few notes from the cookbook: 1) Chihuahua cheese is best known as a Mexican melting cheese commonly used in quesadillas. For best results, do not use pre-shredded cheese in this recipe, and 2) When pouring remaining sauce over the enchiladas, begin along the edges of the pan and work toward the center. This will help keep the edges of the enchiladas moist. Now, having passed that information along, I will let you know that I just bought shredded Mexican cheese from the grocery store and I thought it worked out just fine!


Sweet Potato Enchiladas
Pampered Chef The Vegetarian Table
Published by The Pampered Chef, Ltd. in 2011.

Prep time: 40 minutes  Total time: 1 hour  Yield: 6 servings

1 large sweet potato, peeled
1 medium red bell pepper
1 medium onion
1 cup frozen corn, thawed
4 garlic cloves, pressed
1 tbsp canola oil
2 tsp ground cumin
8 oz Chihuahua cheese, divided
1/2 cup chopped fresh cilantro
2 cups red enchilada sauce, divided
12 [6-in.] corn tortillas
Sour cream and additional chopped cilantro [optional]

1. Preheat oven to 400°F. Dice sweet potato and bell pepper into 1/2-in. pieces. Finely chop onion using Food Chopper. Spray [10-in.] Skillet with canola oil using Kitchen Spritzer. Heat over medium-high heat 1-3 minutes or until shimmering. Add corn; cook, covered, 1-2 minutes or until golden brown.
2. Reduce heat to medium-low. Stir in sweet potato, bell pepper, onion, pressed garlic, oil and cumin. Cook, covered, 4-6 minutes or until sweet potato is tender, stirring occasionally. Remove Skillet from heat; cool sweet potato mixture 10 minutes.
3. Grate cheese using Microplane Adjustable Coarse Grater. Combine sweet potato mixture, cilantro, 1/2 cup of the enchilada sauce and half of the cheese in Classic Batter Bowl; mix well.
4. Place tortillas into Large Micro-Cooker. Microwave, covered, on high 1-2 minutes or until warmed. Spread 1/2 cup of the enchilada sauce over bottom of Rectangle Baking Pan. Arrange six of the tortillas over flat side of Large Grooved Cutting Board. Fill each tortilla with about 1/4 cup of the sweet potato filling. Roll up tortillas and place seam side down into pan. Repeat with remaining tortillas and filling. Pour remaining 1 cup sauce of enchiladas; sprinkle with remaining cheese.
5. Cover pan with aluminum foil. Bake 18-20 minutes or until cheese is melted. Serve with sour cream and additional chopped cilantro, if desired.

Labels:

Sunday, November 13, 2011

Glazed Ham with Dijon-Pineapple Sauce, Mashed Sweet Potatoes, & Balsamic-Glazed Green Beans

I absolutely love this time of the year. Crisp, refreshing mornings warmed up by a hot cup of coffee, leaves are changing colors, extra blankets are going on the bed, hints of a fireplace burning waft through the air... there is just something comforting and calming about this time of the year for me.

Thanksgiving is one of my favorite holidays. It is so nice to have family and friends gather together, and I think it goes without saying that I'm a big fan of all of the delicious food that I get to consume. I'm also big on traditions, and I have some from growing up that I really enjoy, like making cinnamon buns on Thanksgiving morning, watching the Macy's Thanksgiving Day Parade and playing games after the big meal. With Thanksgiving right around the corner and the changing of the seasons taking place, I felt like making a dinner tonight filled with foods that I associate with this time of the year.

A baked ham is a comfort food for me that I think of during this time of the year. Since it is only the two of us, I didn't want to get a gigantic ham, so I got one of the little Smithfield 2-pound hams that are already sliced and cooked and you just have to heat it up in the oven. I looked around online for some sort of a glaze recipe to bake the ham with and found this very delicious glaze and sauce on the Kraft website! The brown sugar, maple syrup and Dijon mustard mixture really baked into the ham and gave it a delicious taste. Adding the crushed pineapples to the glaze mixture for the sauce really balanced out the flavors and paired quite deliciously with the ham!

Here is a picture of the ham when it came out of the oven and you can see the glaze shimmering. Mmmmm:


I decided to make some mashed sweet potatoes and green beans to go with the ham. For the mashed sweet potatoes, I used the Pampered Chef recipe that I have posted on here before. I will post the recipe again below. While I was on the Kraft website getting the recipe for the ham glaze, I found a very yummy balsamic-glazed green bean recipe! It incorporated sweet onion and dried cranberries, which I thought added fantastic flavor to the green beans! Here is a picture of them:


Everything turned out so delicious! Here are some pictures of the finished product with the pineapple sauce on the sliced ham:


Since I was making (what I thought to be) a really nice dinner, I wanted the whole dining experience to be nice also! The nice place mats came out, warm candle light lit our table, the musical talents of Frank Sinatra, Ray Charles, Ella Fitzgerald and Duke Ellington (among others) filled our apartment, and some goooooood food filled our plates! A very smooth Pinot Noir with hints of fruit and oak was an excellent final touch that paired exceptionally well with the whole meal. A nice way to end the weekend!


Glazed Ham with Dijon-Pineapple Glaze

Yield: 24 servings

1 cup packed dark brown sugar
1/2 cup maple-flavored or pancake syrup
1/4 cup Grey Poupon Dijon Mustard
1 whole fully cooked boneless ham (5 lb.)
Whole cloves
12 maraschino cherries, halved
1 tbsp. cornstarch
1 can (20 oz) crushed pineapple in juice, undrained

1. Heat oven to 350°F.
2. Mix sugar, syrup and mustard until well blended. Use paring knife to make a shallow even diagonal cuts across top of ham in one direction. Repeat, making slits in opposite directions to form diamond shapes.
3. Insert cloves where cuts meet. Place ham on rack in shallow pan. Place cherries, cut-sides down, on surface of ham.
4. Bake 2 hours or until ham is heated through, brushing occasionally with 1/2 cup syrup mixture of 1-1/2 hours. About 10 min. before ham is done, mix remaining syrup mixture with cornstarch and pineapple in saucepan; bring to boil on medium-high heat, stirring constantly. Cook and stir on medium-low heat 5 min. or until thickened.

(I didn't use the cloves and cherries, and because I bought the precooked ham, I just followed the baking instructions that came with it rather than following the baking instructions in this recipe.)

Mashed Sweet Potatoes

Yield: 4 servings

2 medium sweet potatoes
1/2 cups milk
2 tbsp butter
1/2 tsp salt

1. Pierce potatoes in several places with a fork; place onto microwave-safe plate. Microwave on high 14-16 minutes or until potatoes are very tender. Transfer potatoes to Cutting Board and cool slightly. In Easy Read Measuring Cup, combing milk, butter and salt. Microwave on high 1-2 minutes or until hot. Cut potatoes in half lengthwise; scoop out flesh into Small Batter Bowl. Add milk mixture; mash using Mix 'N Masher until smooth. Cover; set aside and keep warm.

Balsamic-Glazed Green Beans

Yield: 6 servings

1 lb. fresh green beans, trimmed
1/3 cup dried cranberries
2 tsp. butter
1/2 cup finely chopped sweet onions
1 tbsp. brown sugar
2 tbsp. Kraft Balsamic Vinaigrette Dressing
1/4 cup slivered almonds

1. Cook beans and cranberries in simmering water in skillet 4-5 min. or until beans are crisp-tender. Drain; rinse with cold water to stop the cooking.
2. Melt butter in large nonstick skillet on medium heat. Add onions and sugar; cook and stir 5 min. Add bean mixture; cook and stir 3 min. or until heated through.
3. Stir in dressing; cook and stir 1 min. Top with nuts.

Labels:

Thursday, November 10, 2011

Lemon-Chicken Scallopine with Gremolata Orzo


It felt like a lot that went into this dish, but it was all worth it! If you like lemon, you will love this recipe!

The lemon flavor really came through, but it wasn't too overbearing. I didn't have any orzo, so I used brown rice instead. The gremolata (lemon/orange zest, parsley, and garlic) added a very nice touch to the rice. It was very refreshing! The chicken also turned out really good. The recipe calls for you dredge the chicken in a mixture of flour and paprika. I have fixed many recipes that had the chicken be dredged in flour, but I have never thought to mix a spice in with the flour before! What a great idea! It definitely set the chicken apart adding the paprika. Never again will I dredge my chicken in just plain ol' flour! (Dredge is such a fun word to say.)

I definitely recommend getting everything together before you start cooking. I recommend that for any recipe, but definitely make sure you do that with this one. I had everything done and was down to making the sauce when I realized I still hadn't sliced the shallots! Luckily my husband came to the rescue. It does take some time to fix from beginning to end, so make sure you aren't pressed for time or anything when you decide to make this! And make sure to give this one a try! It was full of flavor and worth the effort!

Lemon-Chicken Scallopine with Gremolata Orzo
Pampered Chef Make it Fresh, Make it Healthy
Published by The Pampered Chef, Ltd. in 2011.

Prep time: 30 minutes  Total time: 40 minutes  Yield: 4 servings

Orzo & Gremolata
1 cup uncooked orzo pasta
1 orange
1 lemon, divided
1/4 cup chopped fresh parsley
1 tsp olive oil
2 garlic cloves, pressed
1/8 tsp salt

Chicken & Sauce
4 boneless, skinless chicken breasts [3 oz each]
1/2 tsp each salt and coarsely ground black pepper, divided
2 tsp olive oil, divided
2 tbsp all-purpose flour, divided
1 tsp paprika
1/4 cup water
3 medium shallots, thinly sliced
3 garlic cloves, pressed
1/2 cup unsalted chicken stock
1/3 cup dry white wine such as Sauvignon Blanc
2 tbsp fresh lemon juice [from lemon used in gremolata]
2 tbsp unsalted butter

1. Cook pasta according to package directions, omitting salt and oil; drain and place in Small Batter Bowl. Meanwhile, for gremolata, zest orange and lemon to measure 1 tsp zest each. Juice lemon to measure 2 tbsp; set aside for later use in sauce. Combine zests, parsley, oil, pressed garlic and salt in [2-cup] Prep Bowl; stir until combined. Add gremolata to orzo; toss to coat and set aside.
2. Meanwhile, for chicken, flatten chicken to an even thickness with Meat Tenderizer; season with 1/4 tsp each of the salt and black pepper. Heat 1 1/2 tsp of the oil in Executive [12-in.] Skillet (do not use stainless cookware) over medium-high heat 1-3 minutes or until shimmering. Combine 1 1/2 tbsp of the flour and paprika in Coating Tray. Dredge chicken in flour mixture, coating evenly. Cook 3-4 minutes on each side or until centers are no longer pink. Remove chicken from Skillet; set aside and keep warm.
3. For sauce, whisk together remaining 1/2 tbsp flour and water until well blended in [1-cup] Easy Read Measuring Cup. Add remaining 1/2 tsp oil, shallots and pressed garlic to Skillet. Cook 30-60 seconds or until fragrant, stirring occasionally. Add stock and wine; bring to a simmer. Add reserved 2 tbsp lemon juice and flour mixture, stirring constantly. Remove Skillet from heat; stir in butter and remaining 1/4 tsp each salt and black pepper. Serve chicken with orzo; drizzle with sauce.

Labels:

Monday, November 7, 2011

Shark Steaks


In an effort to promote healthy eating habits in our house, I make sure we eat fish at least once a week. Many times, during my Sunday morning tradition of planning out our menu for the week, I pick a recipe and then Food Lion doesn't have the particular fish available that I had been planning to cook. So, this week, I decided to plan out the rest of the week except for one day and see what fish Food Lion had for sale that day and decide on a recipe from there. It seems that the Food Lion I go to usually has some tilapia, shrimp, catfish, and salmon. Of course, usually the weeks that I decide to fix salmon they don't have any. Anyways, every once in a while they will have something random available. One time I saw frog legs. WELL, this past Sunday, they had shark steaks. Nice!

I just couldn't pass up shark steak. How often does this opportunity present itself? I wish the package specified what type of shark it was. All it said was that it was "Fresh Shark Steak, Wild Caught from Ecuador." So, now time to search for a recipe. I could have just grilled them plain, but I really wanted to find some type of marinade or rub or something. I was searching for a recipe when my friend Sara pointed this Seven Spiced Shark Steak recipe that I decided to go with. It was really good! It definitely had quite a kick to it, and I thought it went really well with the fish! The shark itself was really good as well! My husband and I both had a preconceived notion that shark meat was stringy. When you cut into it, it actually kind of looks stringy, but when you eat it the texture isn't stringy! It was really good! We cooked it on the grill and it turned out very juicy. And again, this spiced recipe paired really well with the shark and was very tasty! You could definitely use this on other types of fish as well!

The recipe that I used (which you can view by clicking on the link) cooks the steak in the oven. You can go that route if you'd like, but I thought the grill added a nice touch to it! I only copied the spice mixture that I used here, but again, you can view the rest of the recipe by clicking on the link. Enjoy!


Seven Spiced Shark Steaks

1/4 cup soy sauce
1/4 Worcestershire sauce
2 tbsp onion powder
2 tbsp garlic salt
2 tbsp chopped fresh thyme
2 tbsp ground black pepper
2 tbsp chili powder

Combine ingredients. Spread a thin layer of the mixture on both sides of each shark steak. Place on a plate and cover. Allow to marinate in the refrigerator at least 30 minutes. Grill!

Labels:

Sunday, November 6, 2011

Crab-Stuffed Portobello Mushrooms


Ohhhhhh boy... these were good! They are listed as an appetizer, so I made them tonight before our dinner. The recipe is actually called "Shrimp-Stuffed Portobello Mushrooms," but the cookbook says that crabmeat can be substituted for the shrimp, if desired. I have some shrimp in the freezer, but I didn't feel like going through the whole thawing out and cooking process. Also, I love crabmeat. :-)

I forgot to get the chive and onion cream cheese at the store. I had it on my list and looked right past it! I had some plain cream cheese at home, so I just mixed some chives and onion powder in with that. Worked out great! The filling was very delicious. Very creamy and full of flavor. I have done crab-stuffed mushrooms before, but one thing I liked about this recipe was that it used some lemon zest. You could taste that hint of lemon in the filling and I thought that really made this recipe stand our from other stuffed mushrooms that I've had before. Very yummy!

A few notes from the cookbook: 1) To remove dirt from mushrooms, wipe mushrooms with a damp paper towel or soft brush, or quickly rinse them under cold running water and immediately pat dry. Do not clean mushrooms until you're ready to use them, 2) If desired, six large button mushrooms can be substituted for the portobello mushrooms. Remove stems; discard or reserve for another use. Proceed as recipe directs, 3) Imitation crabmeat can be substituted for the shrimp, if desired.


Shrimp-Stuffed Portobello Mushrooms
Pampered Chef Stoneware Inspirations
Published by The Pampered Chef, Ltd. in 2005.

Prep time: 15 minutes  Bake time: 18-20 minutes  Yield: 2 servings

Mushrooms and Shrimp Filling
2 medium portobello mushroom caps (3-4 inches in diameter)
3 ounces shelled, deveined, cooked shrimp, chopped
2 tablespoons (1/2 ounce) grated fresh Parmesan cheese
1 lemon
1 teaspoon snipped fresh parsley
3 tablespoons chive and onion cream cheese spread
1/4 teaspoon Dijon mustard
1/2 small garlic clove, pressed

Crumb Topping
2 teaspoons butter or margarine
1/2 small garlic clove, pressed
1 1/2 tablespoons unseasoned dry bread crumbs

1. Preheat oven to 400°F. For mushrooms, place mushrooms, gill sides up, on Small Bar Pan.
2. For shrimp filling, chop shrimp using Food Chopper. Grate Parmesan cheese using Deluxe Cheese Grater. Zest lemon using Microplane Adjustable Grater to measure 2 teaspoons zest. Snip parsley using Kitchen Shears. In Classic Batter Bowl, combine shrimp, Parmesan cheese, lemon zest, parsley, cream cheese spread, mustard and garlic pressed with Garlic Press; mix well. Divide shrimp mixture into two equal portions; spoon into mushroom caps and flatten slightly.
3. For crumb topping, place butter and garlic pressed with Garlic Press in Prep Bowl; microwave on high 20-30 seconds or until butter is melted. Stir in bread crumbs. Sprinkle crumb topping evenly over shrimp filling. Bake 18-20 minutes or until crumb topping is golden brown and filling is hot. Serve warm.

Labels:

Thursday, November 3, 2011

Adobo-Glazed Barbecue Chicken


Yeah right, I wish my food looked that good! This is the picture of this dish out of the cookbook. I'm not gonna lie to y'all, I haven't actually made this dish yet. I was going to make it tonight, but after a really bad day, I just didn't feel like cooking. We ended up doing steaks on the grill that were so incredibly delicious and full of flavor (my husband is quite the grill master). I am going to do this chicken recipe tomorrow (Friday) night, but I knew that I wouldn't get around to updating the blog on a Friday night and didn't want to get behind again like I did this week, so I'm going to go ahead and give you the recipe!

It looks very simple and very yummy. The cookbook states that "Adobo sauce is a thick, spicy sauce that is often used to pack chipotle peppers and adds kick to this recipe's sweet and smoky glaze." The cookbook also suggests making charred corn as a side. Here is how it says to prepare that: "Make charred, glazed corn to accompany this recipe. Remove husks and silk from 4 ears of corn; discard outer husks and silk, reserving light colored inner husks. Trim ears of corn. Line bottom of Deep Covered Baker with half of the reserved husks. Add corn; top with remaining husks and 1/4 cup water. Cover and microwave on high 8-10 minutes or until corn is cooked through. Remove corn from baker; grill corn 4-5 minutes or until grill marks appear, brushing with some of the reserved adobo glaze.

Enjoy!

Adobo-Glazed Barbecue Chicken
Published by The Pampered Chef, Ltd. in 2008.

Prep time: 15 minutes  Total time: 25 minutes  Yield: 4 servings

Chicken
2 tbsp Smoky Barbecue Rub
2 tsp vegetable oil
2 garlic cloves, pressed
8 boneless, skinless chicken thighs (about 3 oz each)

Adobo Glaze and Garnish
1-2 tbs seeded and finely chopped canned chipotle peppers(about 3-4 peppers)
1 tbsp adobo sauce from chipotle peppers
1/2 cup honey
1 tbsp Smoky Barbecue Rub
1 tbsp cider vinegar
1 medium green onion with top (about 1/4 cup sliced)

1. Prepare grill for direct cooking over medium-high heat. For chicken, combine rub, oil and garlic pressed with Garlic Press in Stainless (4-qt.) Mixing Bowl. Add chicken and toss to coat; cover and refrigerate until ready to grill.
2. For glaze, remove and discard seeds from chipotle peppers with Quikut Paring Knife; finely chop peppers with Food Chopper. Whisk chipotle peppers. adobo sauce, honey, rub and vinegar in Small Batter Bowl. Reserve half of the glaze for serving.
3. Grill chicken, covered, 4 minutes or until grill marks appear. Turn with BBQ Tongs and grill 4-6 minutes or until Pocket Thermometer inserted into thickest part of thighs registers 180°F and juices run clear. Brush both sides of chicken with glaze using BBQ Basting Brush during last 2 minutes of cooking. 
4. To serve, spoon reserved glaze over chicken; top with sliced green onion.

Labels:

Artichoke & Red Bell Pepper Risotto


I have quite a story to go along with this dish. You probably don't care to hear all of it, but I'm going to share it anyway. And if you're reading this blog, then you must be interested in my stories! :-) Anyways, I normally do all of my grocery shopping on Sunday. Back in the day, I used to go day to day figuring out what to do for dinner and go to the store after work each day and I hated it. So now, I plan out the week on Sunday morning and make one trip. Well, this past Sunday I wasn't feeling well (scratchy throat, congestion), so I never made it to the grocery store. That meant that I had to go grocery shopping on Monday at 5pm... uggggh. 

I don't think I need to explain how much it sucks to go grocery shopping at 5pm on a Monday. Well, I normally do most of my shopping at Food Lion, so that is where I headed. It was not a good trip. Besides the traffic and massive amounts of grumpy people filling the aisles of the store, Food Lion was out of several items I needed, including the salmon I needed for dinner that night (see my last post), and the Arborio rice I needed for this dish (which I made on Tuesday). I probably spent 10-15 minutes on the rice aisle looking for Aroborio rice. I even called my husband and asked him to google it and try to describe to me what the package looked like. No Arborio rice. So, I was already irritated that I was even grocery shopping on a Monday after work, and now Food Lion was out of several items that I needed and didn't even carry any brand of Arborio rice.

I try to make the best out of the situation. A brand new Harris Teeter just opened in town and I had only been in there briefly one time so far, but could tell from that one brief visit that it was a pretty amazing grocery store. So, I thought to myself, here is an excuse to visit the new, very nice, Harris Teeter. Everything will be okay. 

I am on my way from Food Lion to Harris Teeter, cruising along in the right hand lane approaching a green light, then this JERK in the left hand lane cuts RIGHT in front of me! It is a miracle that I did not slam into him. I slammed my breaks on and heard tires screeching, so I looked in my rear view mirror (worried that another car was about to slam into me from behind) only to realize that I was the one making the horrible tire screeching noise and had smoke behind my car from slamming my breaks so hard. I seriously came within an inch of ramming this dude. Again, I'm amazed I didn't slam into him. And I didn't even get a courteous, apologetic hand wave or anything from this guy! Some people!

So, needless to say, that really shook me up and freaked me out and I had to pull over into a parking lot to regain my composure, call my husband, talk to him until I calmed down some and felt able to drive again. I finally make it to the new Harris Teeter and get all of my items that Food Lion failed to provide me, INCLUDING the Arborio rice for this recipe. Not only did they have Arborio rice, but they had about 5 different brands of it! I love this new Harris Teeter! Not only do they have a wide selection of every day items, but they have a HUGE meat display case, a wide selection of sushi, and a "Cheeses of the World" section (you can read about my love of cheese here in Cajun Shrimp with Smoked Gouda Grits).

Oh, wait, you were reading this blog to hear about the recipe? My bad. Anyways, this recipe was pretty good. I really liked the rice (especially after everything I went through to get the specific rice for it). The dish as a whole was kind of rich though. I'm not really sure what made it so rich. Some cheese was added to it, but I didn't feel like it was that much cheese. And plus, I love cheese. So, I don't know that that was it... maybe it was the artichokes? Or just the creamy nature of the risotto from adding the broth to the rice? I'm not sure, but it was very rich and we could only eat so much of it. But what we DID eat, we enjoyed! Don't get me wrong, it had a great flavor to it!

Well, I think I have rambled on enough for one post, don't you think? It was a good dish and definitely worth trying at least once! I hope you enjoy it, and hope you don't have to go through such an ordeal to get all of your ingredients! :-)

Artichoke & Red Bell Pepper Risotto
Published by The Pampered Chef, Ltd. in 2010.

Total time: 28 minutes  Yield: 6 servings

5-6 cups vegetable broth, divided
2 jars (7.5 oz) quartered marinated artichoke hearts, drained, divided
3 shallots
1 tbsp olive oil
1 1/2 cups uncooked Arborio rice
1 1/2 cups dry white wine such as Chardonnay
1 lemon
1 small red bell pepper
1/2 cup frozen peas
2 oz cream cheese, softened
2 oz Parmesan cheese, grated (about 1/2 cup)
Snipped fresh chives (optional)

1. Heat broth in (2-qt.) Saucepan over medium-high heat until simmering. Reduce heat to medium-low. Meanwhile, place artichokes into Executive (12-in.) Skillet (do not use stainless cookware); saute over medium-high heat 4-5 minutes or until light golden brown. Remove from Skillet; reserve 1/2 cup of the artichokes. Set aside remaining artichokes.
2. Meanwhile, finely chop shallots using Santoku Knife. Add oil, shallots and rice to Skillet; cook and stir 1-2 minutes or until shallots are tender and and rice is shiny and translucent. Add wine; cook 1-2 minutes or until wine is completely evaporated, stirring with Small Bamboo Spatula. Carefully add 1 cup of the broth to Skillet; cover an cook 2-3 minutes or until liquid is absorbed, stirring occasionally. Repeat with remaining broth in 1-cup increments, cooking 2-3 minutes after each addition or until liquid is absorbed (13-15 minutes total cook time). Remove Skillet from heat.
3. Meanwhile, zest lemon with Microplane Adjustable Grater to measure 1 tbsp. Cut bell pepper into 1-in. pieces. Stir remaining artichokes, zest, bell pepper, peas, cream cheese and Parmesan cheese into rice. Top with reserved artichokes and garnish with snipped fresh chives, if desired.

Labels:

Baked Pesto Salmon


First of all, I apologize for not posting all week! I actually made this dish on Monday, but it has been a busy/crazy week so I unfortunately haven't had a chance to post in my blog. Second of all, this dish was absolutely delicious! 

There was very little I had to do to prepare the dish. Basically just cut, toss/coat, and bake! The salmon came out so delicious! It was very juicy, and tasted like the lemon juice soaked right through the whole fish while it baked. Quite delicious. The flavor of the pesto paired really well with the flavor of the salmon. And the vegetables turned out terrific! I love just about anything tossed in olive oil, and that flavor really came out in the vegetables after they came out of the oven. So yummy! 

Enjoy!

Baked Pesto Salmon
Published by The Pampered Chef, Ltd. in 2005.

Prep time: 10 minutes  Total time: 12-14 minutes  Yield: 2 servings

2 salmon fillets (4-6 ounces each), about 1 inch thick
2 small yellow summer squash or zucchini, cut into 1-inch slices
1 small red onion, cut into 1-inch wedges
1 tablespoon olive oil
1 garlic clove, pressed
1/4 teaspoon salt
1/8 teaspoon ground black pepper
1 lemon
2 tablespoons prepared basil pesto

1. Preheat oven to 425°F. Place salmon fillets side by side but not touching on Medium Bar Pan.
2. Cut yellow squash crosswise into 1-inch slices using Crinkle Cutter, cut slices in half. Cut onions into 1-inch wedges using Utility Knife. In Small Batter Bowl, combine oil, garlic pressed with Garlic Press, salt and black pepper. Add vegetables; toss to coat. Arrange vegetables around salmon on pan.
3. Zest lemon using Lemon Zester/Scorer to measure 1/2 teaspoon zest. Juice lemon using Juicer to measure 2 teaspoons juice. In Prep Bowl, combine lemon zest, juice and pesto; mix well. Brush top and sides of salmon with pesto mixture using Pastry Brush. Bake 12-14 minutes or until salmon flakes easily with fork and vegetables are crisp-tender. Garnish with additional lemon zest, if desired.

Labels: