Tuesday, September 11, 2012

Beef and Rice Casserole


I have only done a few crock pot meals in the past, but have generally steered away from them because I haven't had much success with the ones that I've tried. I'm not sure what it was, but I just didn't really like the few crock pot recipes that I've tried before. This dish has changed my way of thinking! For only five ingredients and hardly any effort, this was delicious!

You can't go wrong with this recipe! Again, for only five ingredients, this dish was packed with flavor. I did end up adding a little more salt than the recipe called for, and I also added some black pepper as it was cooking. I put the slow cooker on low, as instructed, but the rice was already cooked through after 4 hours, so I just kept adding a little water and stirring everything up over the next 2 hours until we were ready to eat. That worked just fine! The hardest part about this recipe was the fact that the house smelled amazing all afternoon as it cooked in the crock pot and I had to keep myself from going into the kitchen over and over and stealing little bites.

Enjoy!

Six Ingredients or Less
Published by CJ Books in 2001.

Total time: 6-7 hours  Yield: 8 servings

1 1/2 pounds lean ground beef
1 1/2 cups chopped onion
1 1/2 cups uncooked long-grain rice
1 can (10 3/4 oz) condensed cream of celery soup
1 can (10 3/4 oz) condensed cream of mushroom soup
1 teaspoon salt

1. In a medium skillet, brown ground beef and onion; drain. Place in slow cooker. Add remaining ingredients along with 2 soup cans of water. Cover and cook on low 6 to 7 hours, or until liquid is absorbed and rice is tender, but not overcooked.

Monday, September 10, 2012

Beer Bean-Stuffed Poblano Peppers


I have done several different stuffed peppers recipes over the last year. I'm starting to think it might be one of my favorite things to make. Definitely in the top 3. I posted another stuffed peppers recipe (see here) last December, and I completely fell in love with that one and have made it many times since then. This Beer Bean-Stuffed Peppers recipe is a close competitor! This was really, very delicious!

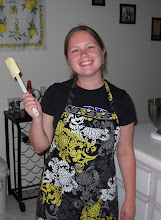
I altered the recipe slightly. First, as you can see, I have green bell peppers instead of poblano peppers. There were no poblano peppers to be found at the grocery store yesterday, but the green bell peppers worked just fine. The recipe calls for you to cut a slit in the poblano peppers and stuff everything inside of them, but because that would have been difficult with the green bell peppers, I decided to cut them in half and do this recipe in an open-face style.

Because I cut the peppers like this, I cooked them in the oven a little differently from how the recipe says to do it. With the stuffing and cheese exposed directly to the heat, I didn't want all of that to dry out or burn, so instead of stuffing it all and sticking it in the oven for 25 minutes, I first just put the peppers alone in the oven (still used the suggested heat of 425°F) for 10 minutes to let them roast a bit, then I filled the peppers with the stuffing, holding off on the cheese, and cooked them for another 10 minutes, and then in the last 5 minutes, I added the cheese.

A few alterations to the ingredients: I used canned beans instead of dried beans, and in an effort to try to save some money, I just used a chipotle rub seasoning that I had at the house instead of buying chipotle chiles in adobo, I did not get/use the feta cheese, and just used a shredded Mexican cheese blend that we already had at the house instead of the shredded jack cheese. I thought it all worked out just perfect!

I was really happy with how these turned out. There was a lot of flavor packed into those peppers! I especially liked the combination of the chipotle and cinnamon flavors. A combination I would not have thought of on my own, but having those contrasting flavors really added a lot to the dish! Plus it smelled fantastic as it was all cooking!

If do you make this dish, make sure to go to the actual website where I got the recipe from. She posted some notes at the end that you might want to check out, such as if you use canned beans, you don't have to add the 2 1/2 cups of water and let the beans simmer. Enjoy!

Beer Bean-Stuffed Poblano Peppers

Total time: about 1 hour  Yield: 4 servings

Beer beans
1/2 pound dried black beans, picked over and rinsed (or 1 can of cooked beans; you'll need about 2 cups, cooked)
1 tsp olive oil
1 yellow onion, chopped
2 cloves garlic, minced
12 ounces Mexican beer
1 canned chipotle chile in adobo, chopped (or 1/2 tsp chipotle chile powder)
scant 1/2 tsp ground cinnamon
sea salt
Peppers
6 poblano chiles
1 cup crumbled cotija or feta cheese
1 cup shredded Jack cheese
juice of 1/2 lime
1 cup cherry tomatoes, chopped
1 tbsp olive oil
1/2 cup chopped fresh cilantro

1. In a large bowl, soak the beans in plenty of water for at least 6 hours, or up to overnight.
2. Drain the beans and set them aside. In a large pot over medium heat, add the olive oil, onion, and garlic and saute for a few minutes, until the onion is just softened.
3. Add the soaked beans and 2 1/2 cups water, stir, and bring the beans to a simmer. Simmer until the beans are cooked through (but not totally tender), 45 minutes to 75 minutes. Add the beer, chipotle and cinnamon and simmer until much of the liquid is absorbed, around 20 minutes. If necessary, add some water to keep the beans from drying out. Add 1/2 to 3/4 tsp salt, to taste, and cook for another 10 minutes. Preheat the oven to 425° and set the beans aside.
4. Grease a large baking dish or cast iron skillet. Cut a slit down the length of each poblano. Use your fingers (you might want to wear gloves) and a paring knife to remove, and then discard, the membranes and seeds from each pepper.
5. In a bowl, mix together the shredded Jack and crumbled cotija/feta cheese with the lime juice. If there is still a good amount of liquid in your beans, drain off some of it. Mix the chopped tomatoes into the beans. Use a spoon to fill most of each pepper with beans, then stuff a handful of cheese inside. Brush the outside of each pepper with olive oil and bake for around 25 minutes, until the tops are roasted and golden and the pepper is tender all around. Serve peppers immediately, with the slit side up and garnished with cilantro.

Tuesday, September 4, 2012

Salmon Cakes


Mmm Mmm Mmm!!!

About 7 months ago, I made some crab cakes that turned out phenomenal. These salmon cakes are right up there! These were terrific! (That red sauce you see on the plate in the 2nd photo is Sriracha sauce - my husband puts that stuff on everything!)

Honestly, it was a week and a half since I made these, so I'm having a little trouble remembering how the cooking process was for these. The last few weeks seem to have run all together for me! I did do some of the prep beforehand so that there wouldn't be as much to do when it came time to fix dinner. That helped a lot. I'm not the fastest person in the world when it comes to prep work, such as chopping, dicing, etc, so getting some of that done beforehand cut my time in the kitchen at dinnertime down significantly.

One thing I did differently from the recipe posted below is that instead of using a fresh salmon filet and going through the whole baking process, I just bought canned salmon. That really simplified the recipe, and it was still delicious! I also just used some packaged bread crumbs instead of processing loaf bread and toasting it in the oven, which also cut down on the time.

There was so much flavor in these salmon cakes! They were absolutely delicious, and definitely something I'll be making again. You don't want to miss out on this recipe! Give it a try!

Salmon Cakes

Prep time: 30 minutes  Inactive: 1 hr  Cook time: 50 minutes

Yield: 5 servings

1/2 pound fresh salmon
good olive oil
kosher salt and freshly ground black pepper
4 tbsp unsalted butter
3/4 cup small-diced red onion (1 small onion)
1 1/2 cups small-diced celery (4 stalks)
1/2 cup small-diced red bell pepper (1 small pepper)
1/2 cup small-diced yellow bell pepper (1 small pepper)
1/4 cup minced fresh flat-leaf parsley
1 tbsp capers, drained
1/4 tsp hot sauce (recommended: Tabasco)
1/2 tsp Worcestershire sauce
1 1/2 tsp crab boil seasoning (recommended: Old Bay)
3 slices stale bread, crusts removed
1/2 cup good mayonnaise
2 tsp Dijon mustard
2 extra-large eggs, lightly beaten

1. Preheat the oven to 350°F.
2. Place the salmon on a sheet pan, skin side down. Brush with olive oil and sprinkle with salt and pepper. Roast for 15 to 20 minutes, until just cooked. Remove from the oven and cover tightly with aluminum foil. Allow to rest for 10 minutes and refrigerate until cold.
3. Meanwhile, place 2 tbsp of the butter, 2 tbsp olive oil, the onion, celery, red and yellow bell peppers, parsley, capers, hot sauce, Worcestershire sauce, crab boil seasoning, 1/2 tsp salt, and 1/2 tsp pepper in a large saute pan over medium-low heat and cook until the vegetables are soft, approximately 15 to 20 minutes. Cool to room temperature.
4. Break the bread slices in pieces and process the bread in a food processor fitted with a steel blade. You should have about 1 cup of bread crumbs. Place the bread crumbs on a sheet pan and toast in the oven for 5 minutes until lightly browned, tossing occasionally.
5. Flake the chilled salmon into a large bowl. Add the bread crumbs, mayonnaise, mustard, and eggs. Add the vegetable mixture and mix well. Cover and chill in the refrigerator for 30 minutes. Shape into 10 cakes.
6. Heat the remaining 2 tbsp butter and 2 tbsp olive oil in a large saute pan over medium heat. In batches, add the salmon cakes and fry for 3 to 4 minutes on each side, until browned. Drain on paper towels; keep them warm in a preheated 250°F oven and serve hot.